Title: Jigging Master PE5N - Updated to incl bearing sizes
Post by: Clem on June 18, 2011, 08:38:02 AM
Post by: Clem on June 18, 2011, 08:38:02 AM
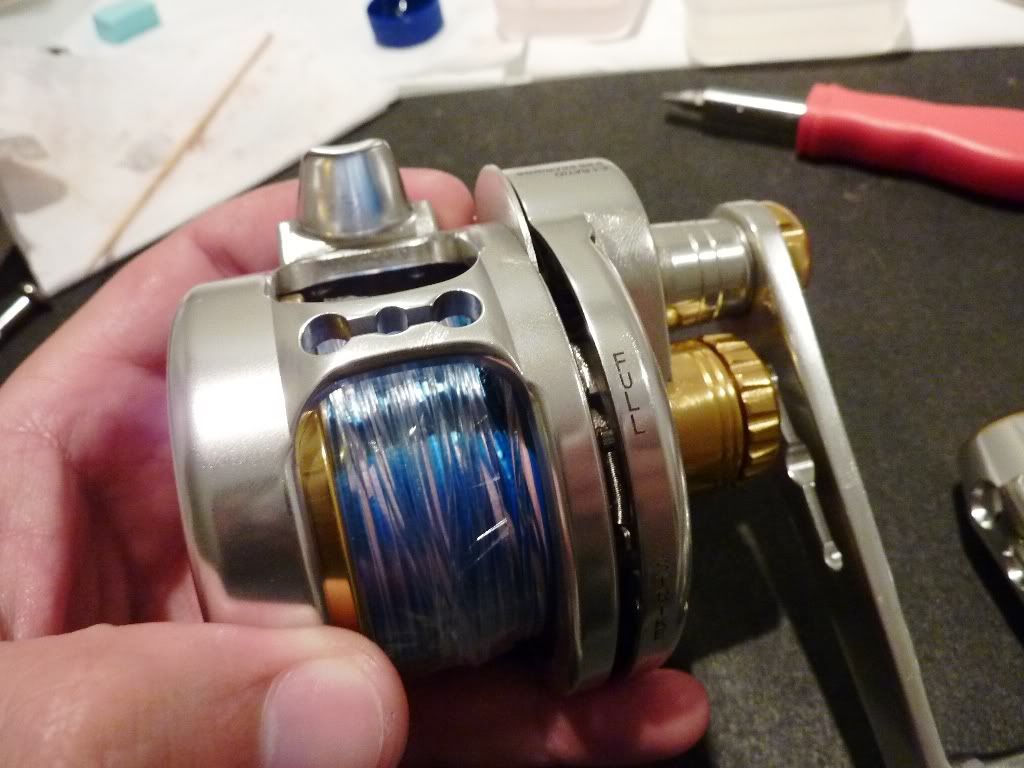
Ok, thought I'd give it a go...will hopefully be of help to someone,
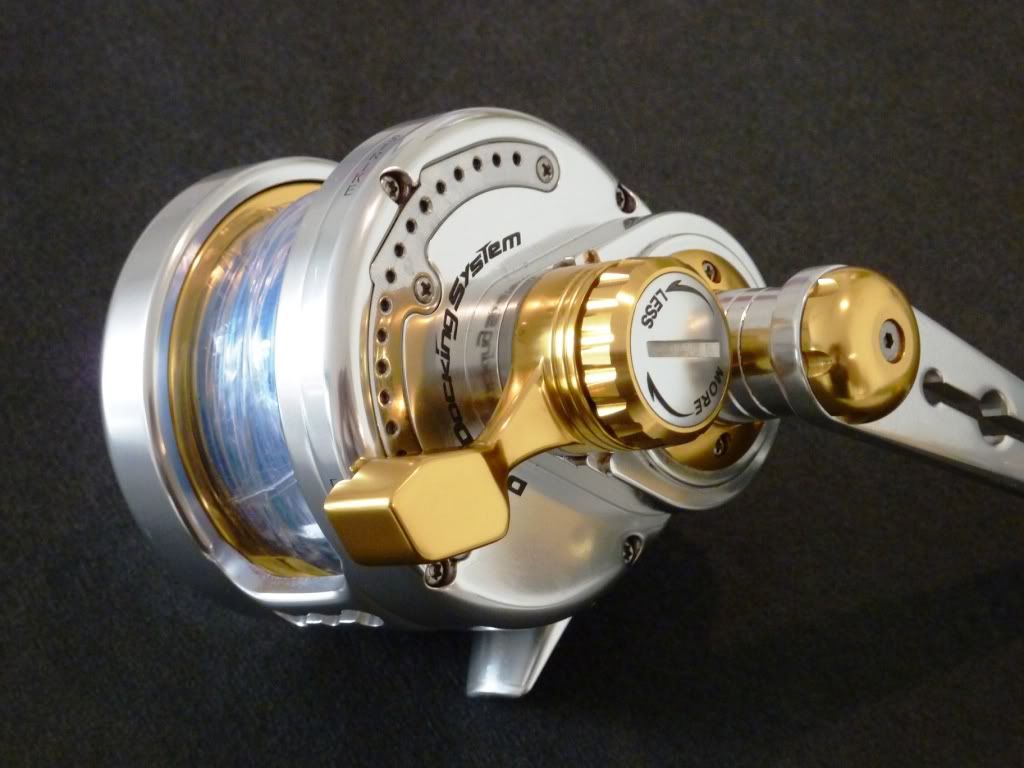
I have 2 JM reels, a PE3 and a PE5N..The PE3 is on a custom built 150 (CTS) and a the PE5 sits on a 350 (CTS) both built by Kieron at Reel Rods back in NZ - this is the PE5N
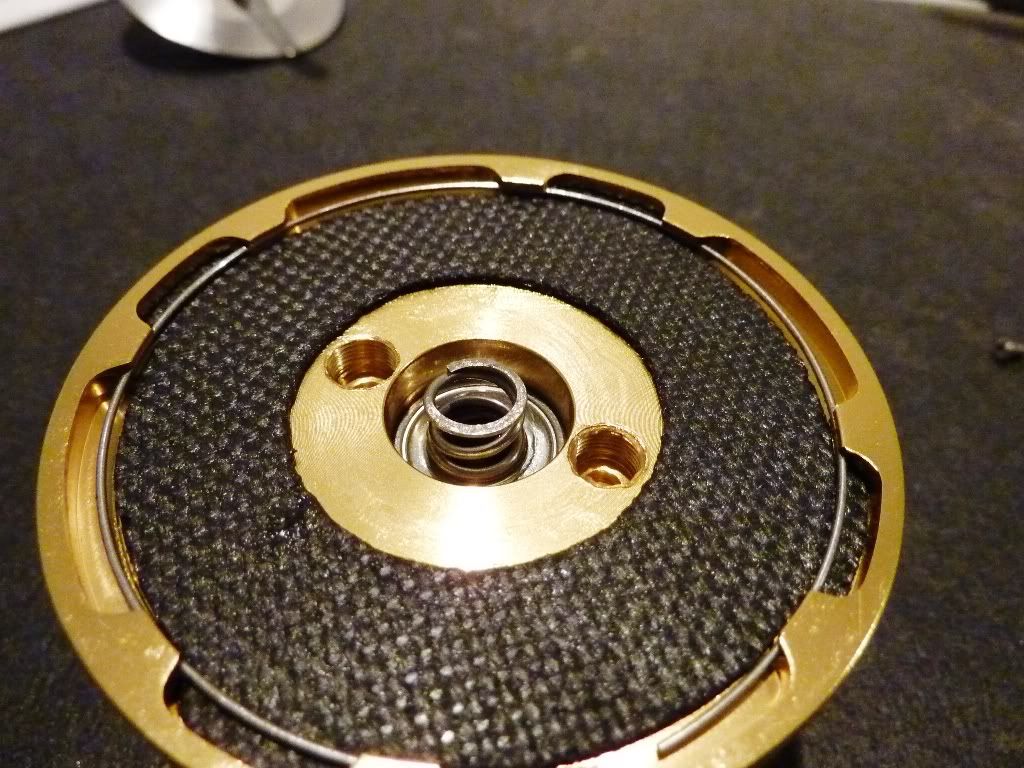
Remove the 4 main body screws to separate the drive from the housing
Separate the body, I work on the housing first
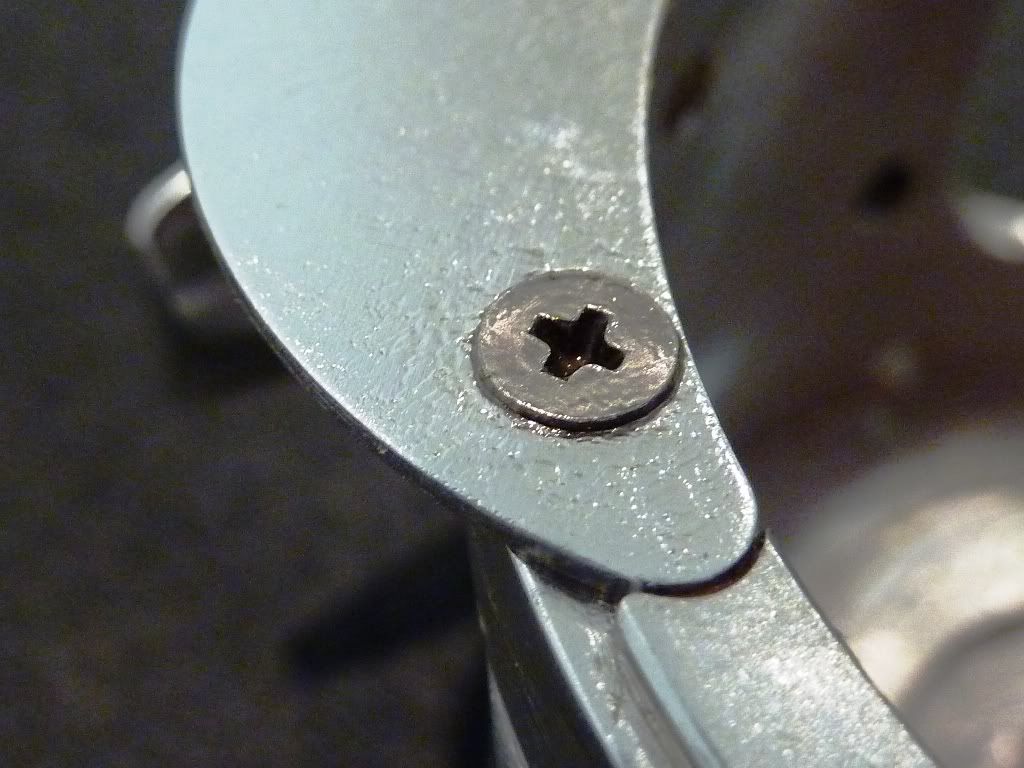
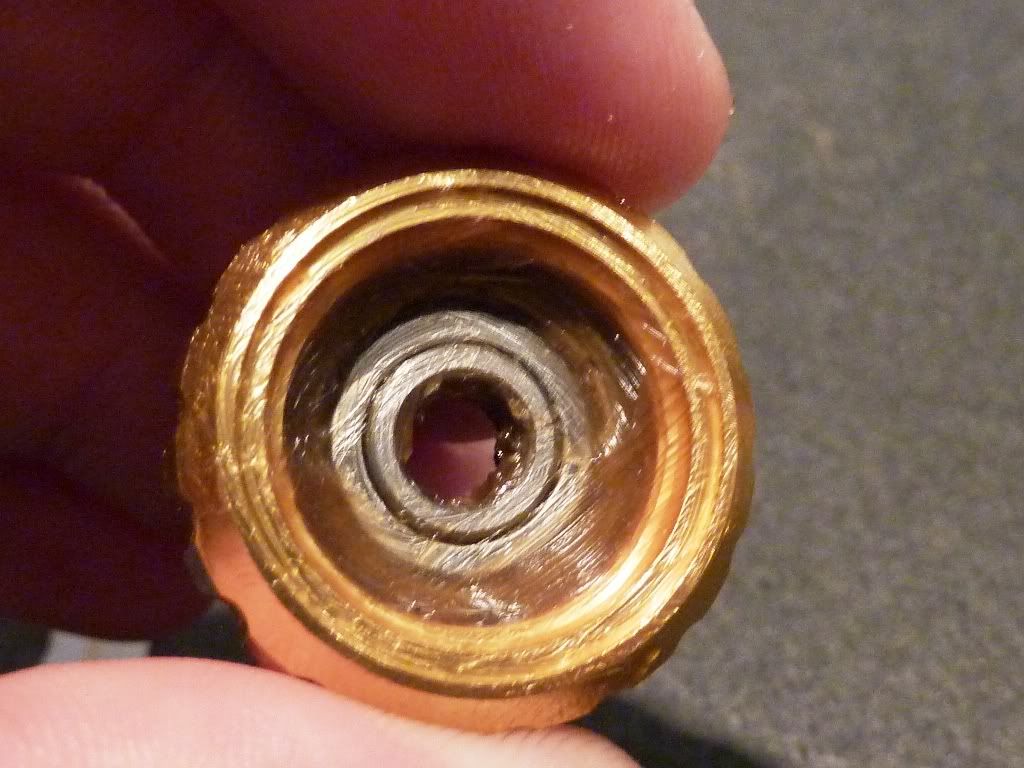
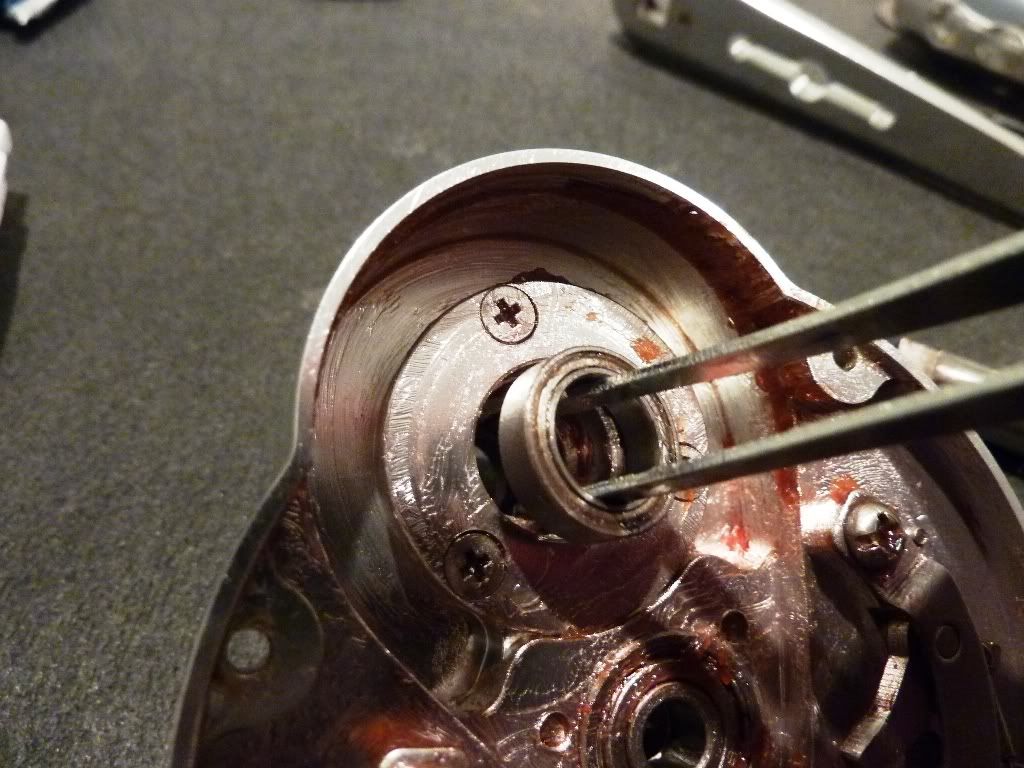
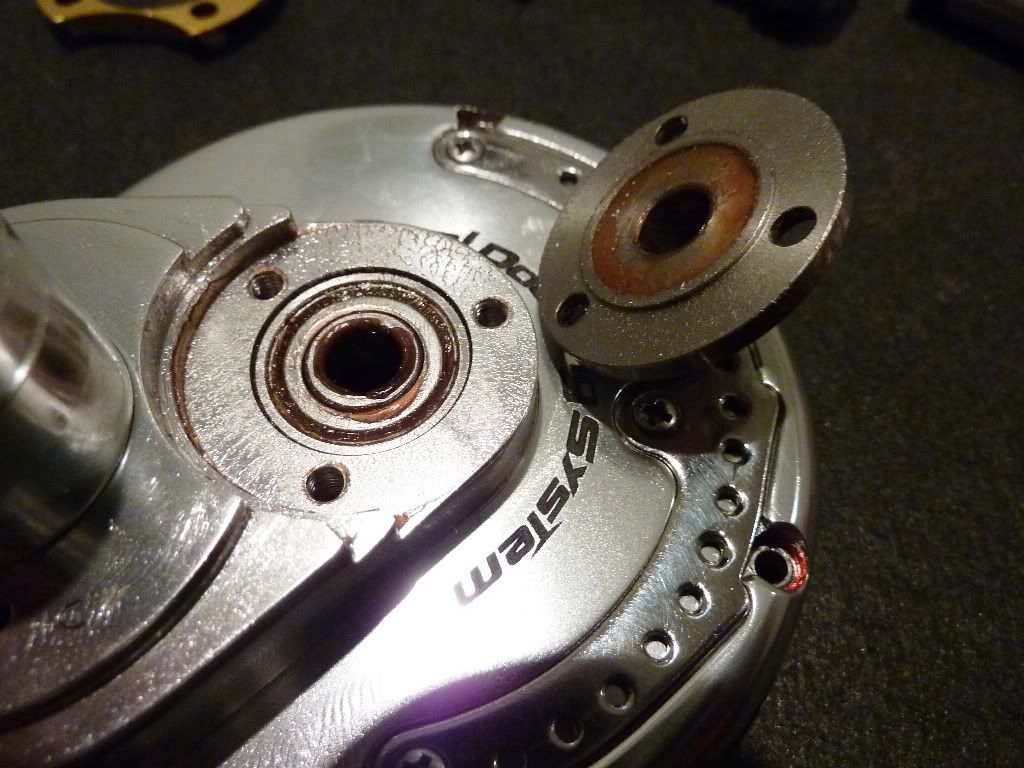
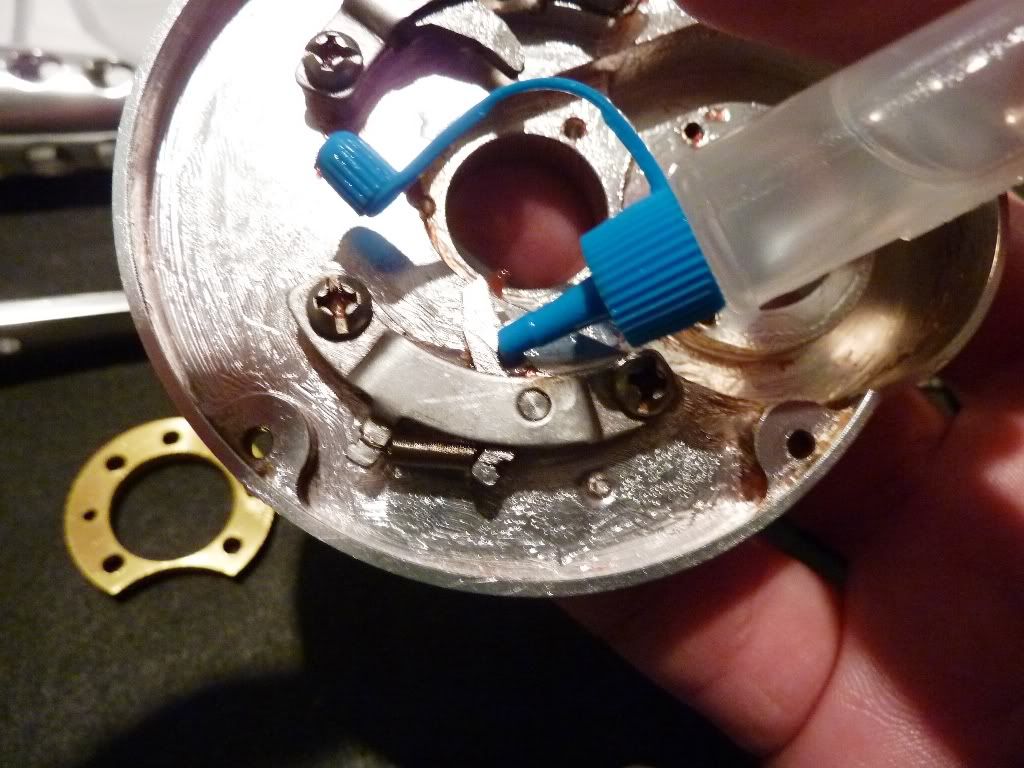
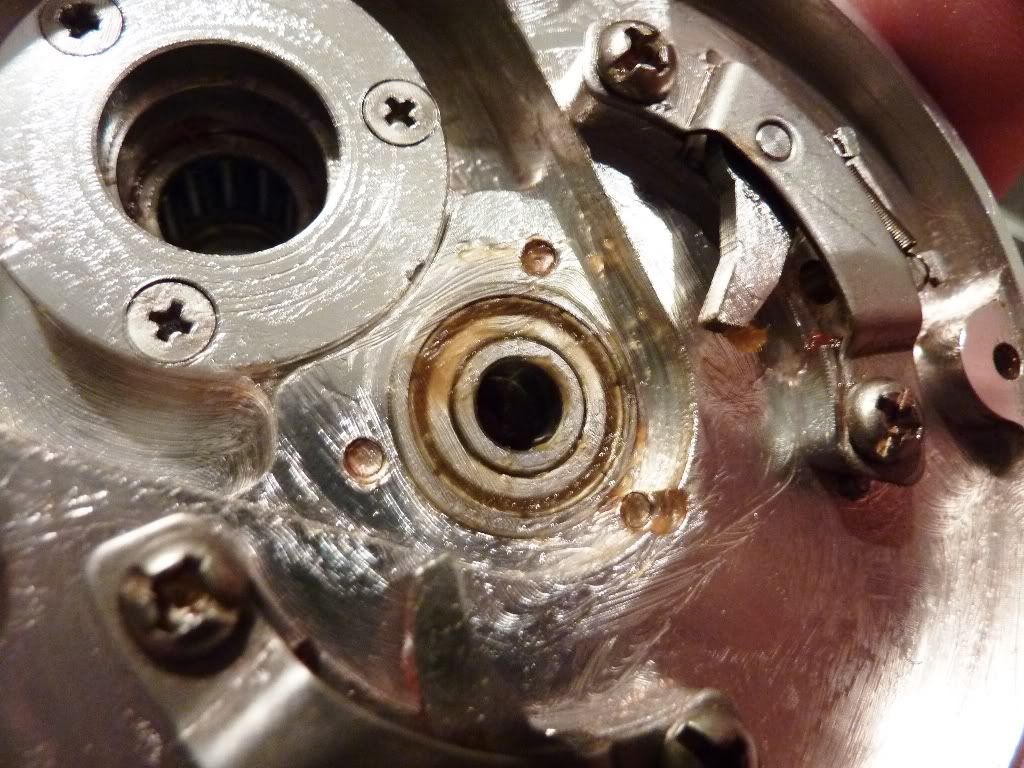
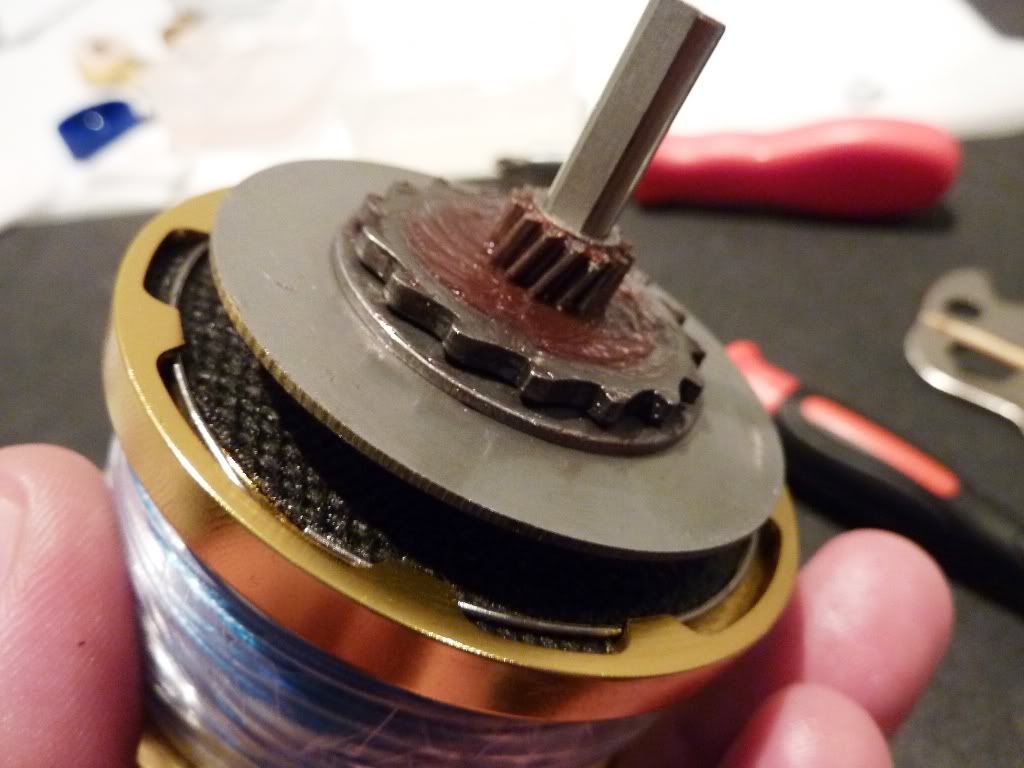
Inside the housing you will see the plastic tension ring for the clicker held in by 2 countersunk screws and the bearing
Take out the 2 screws and the tension ring will pop out
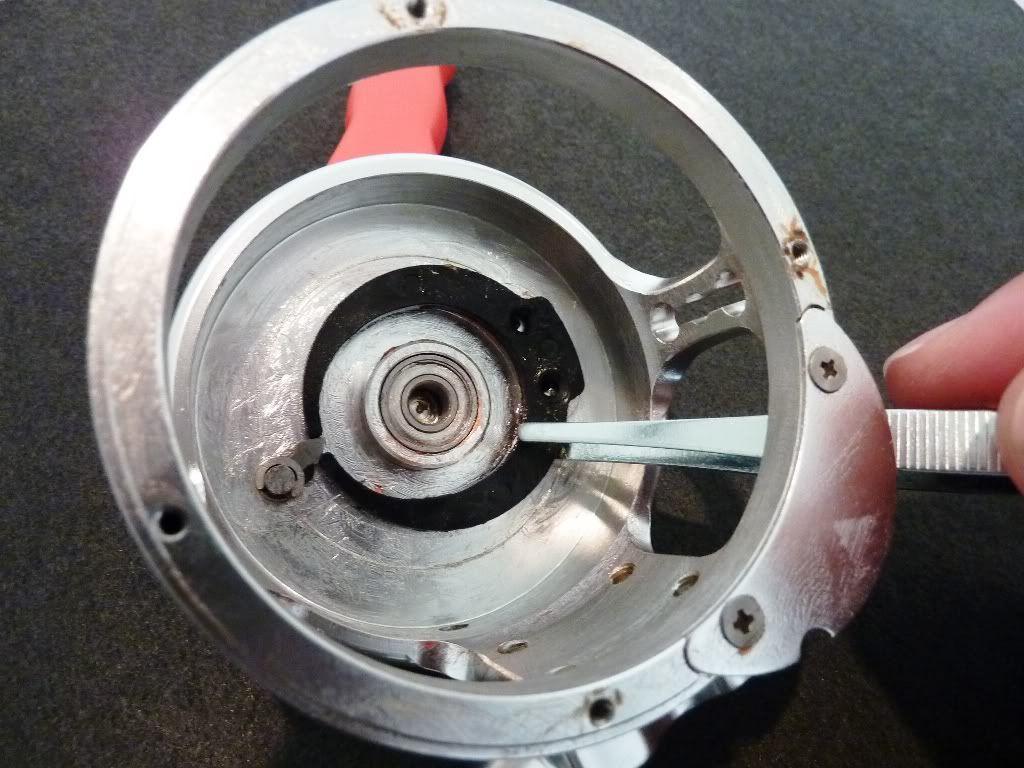
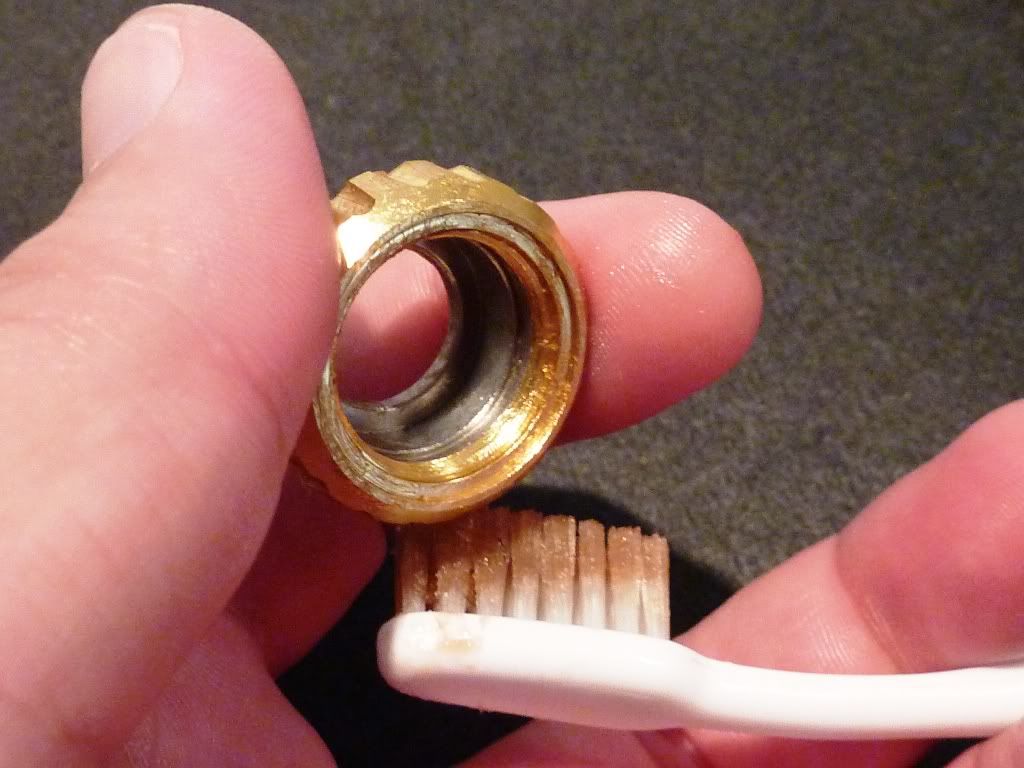
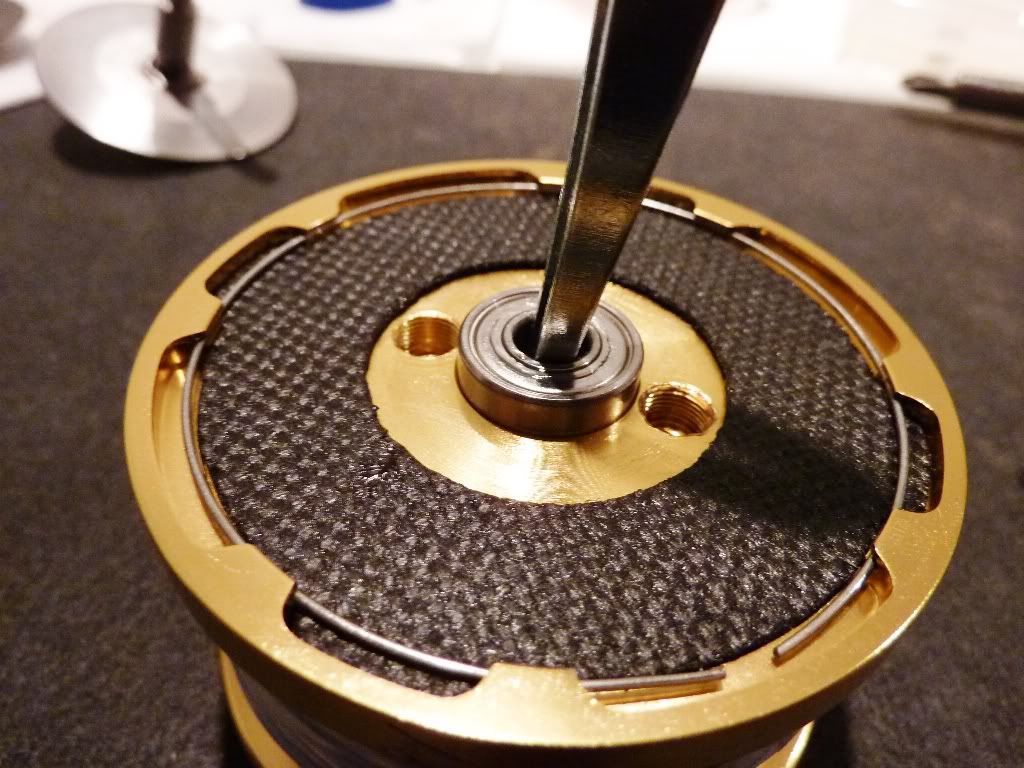
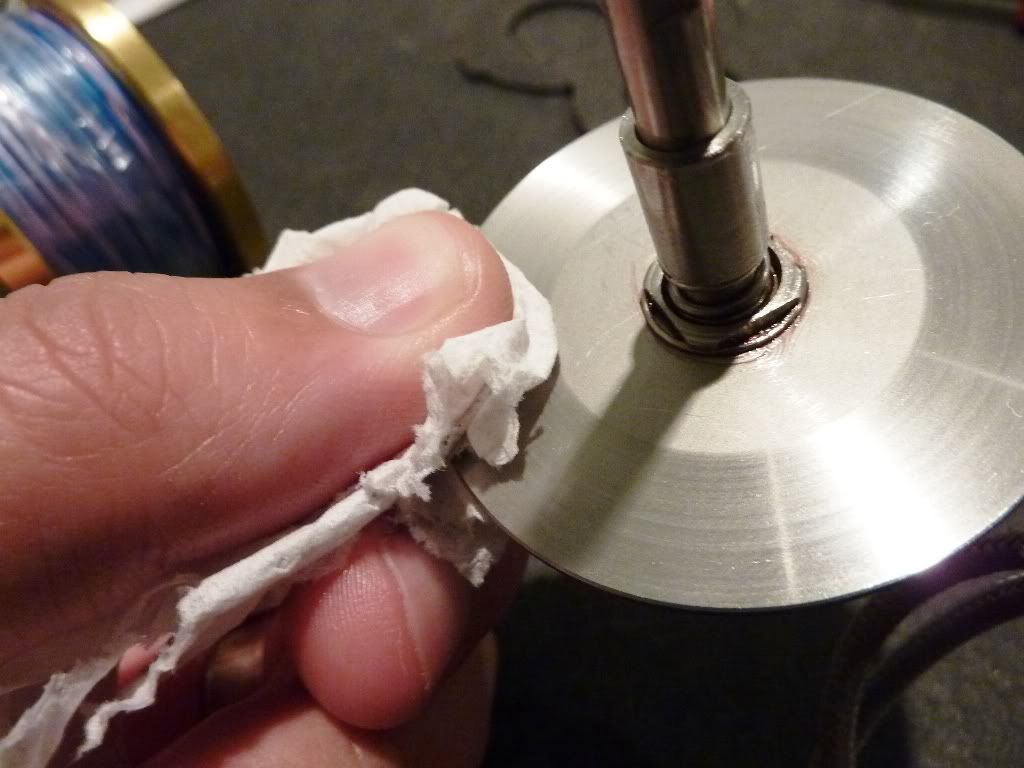
Remove the bearing (6mm x 15mm x 5mm). I clean this one and re-grease it, usually clean them in white spirit and then soak them in Inox before adding grease...seems to work fine particularly if you service your reels frequently. Once everything is out of the housing I run the brush around with a bit of grease

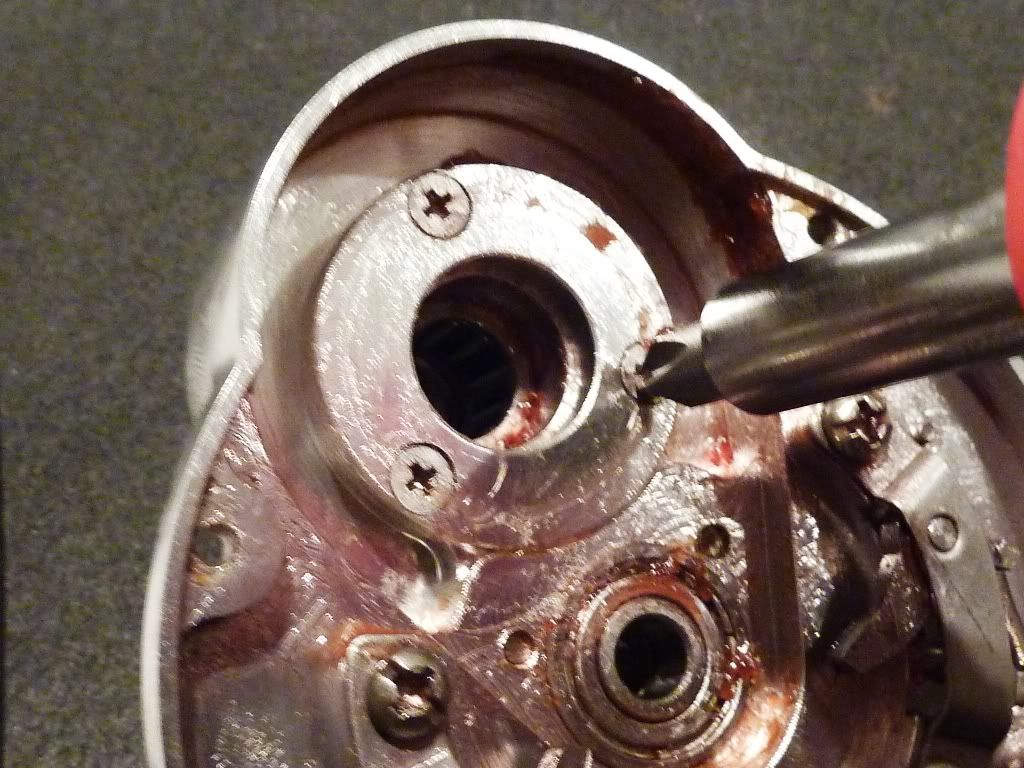
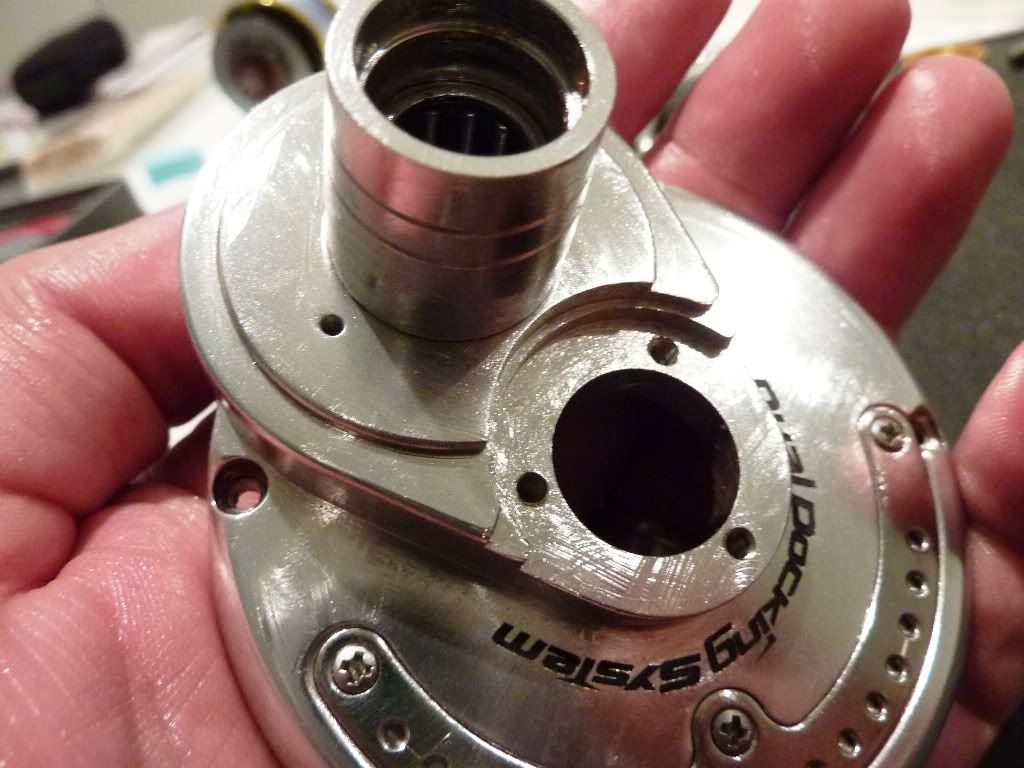
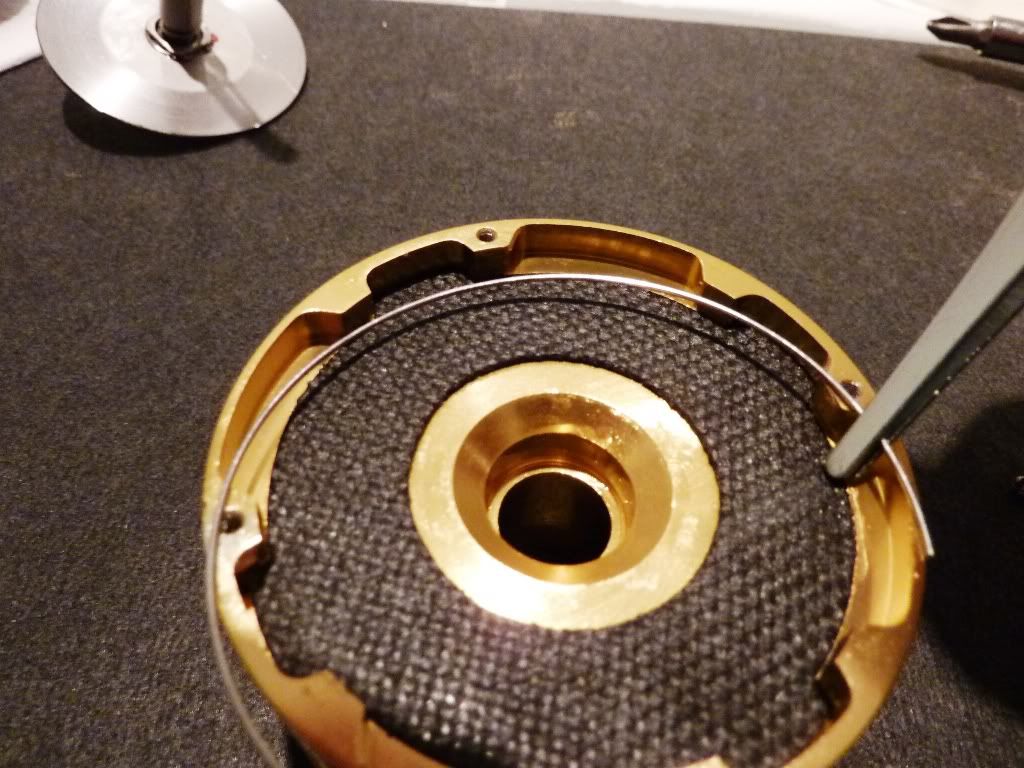
I remove the gear plate cover, I should say now that like many others I add grease or Inox to all the screws prior to putting them back in. Also, you will see in the picture that the plate is countersunk on on side only..so easy to see if its upside down

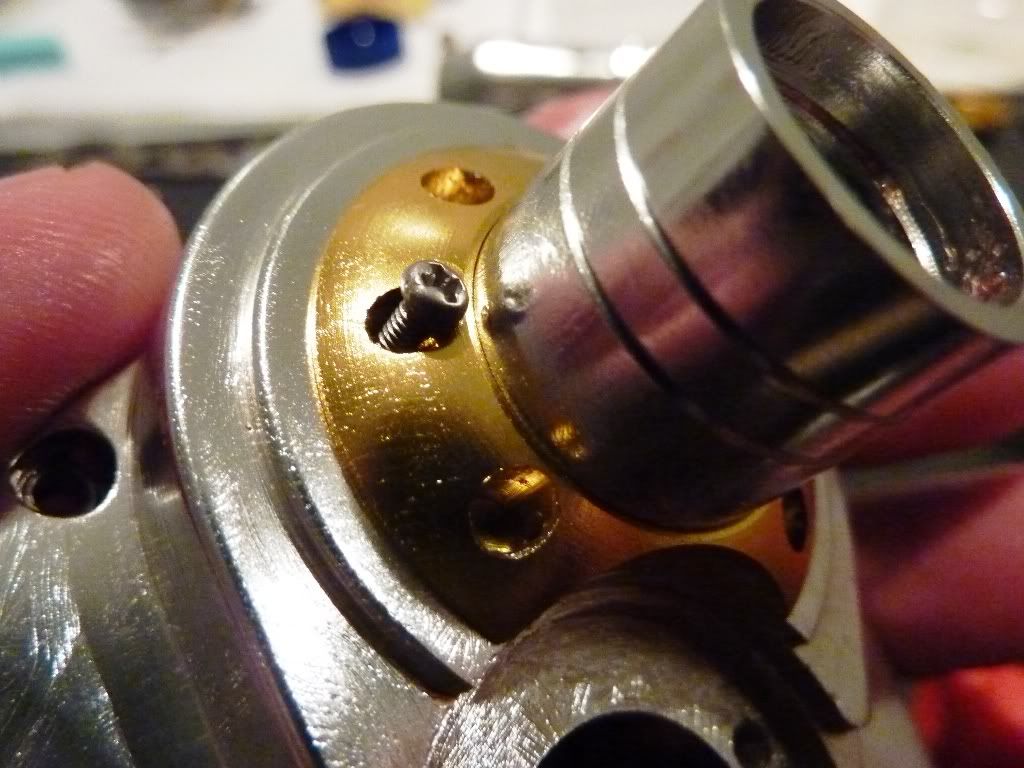
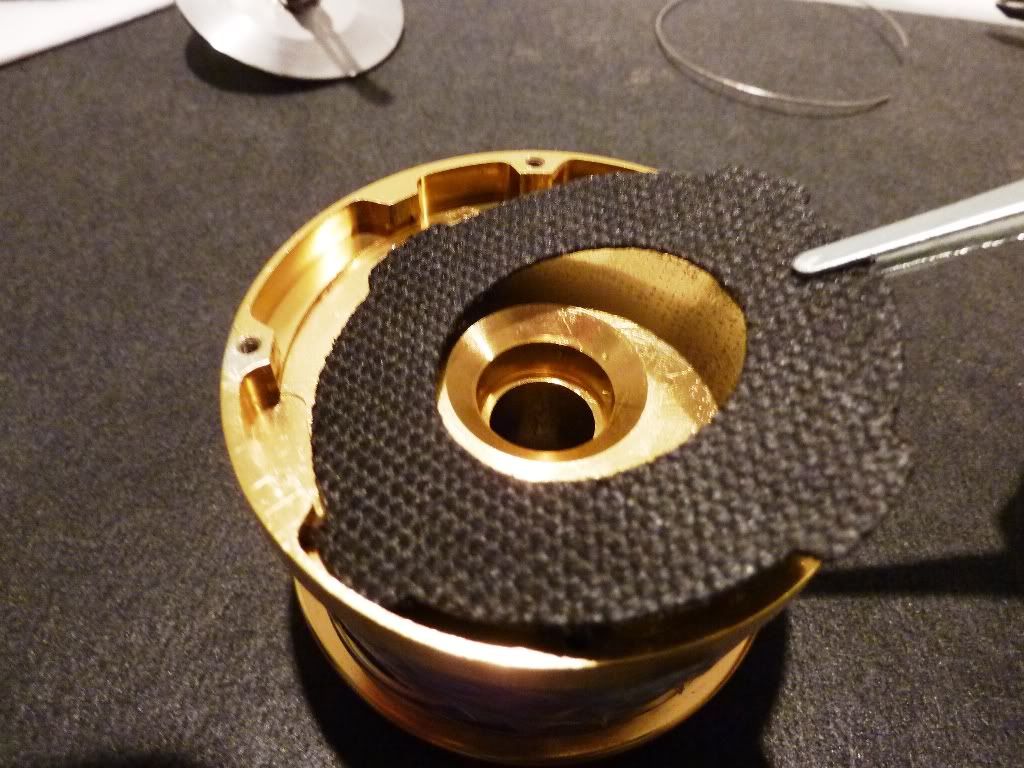
Next I will remove the reel foot
Once that is off I grease the surface between the body and seat, including the screws
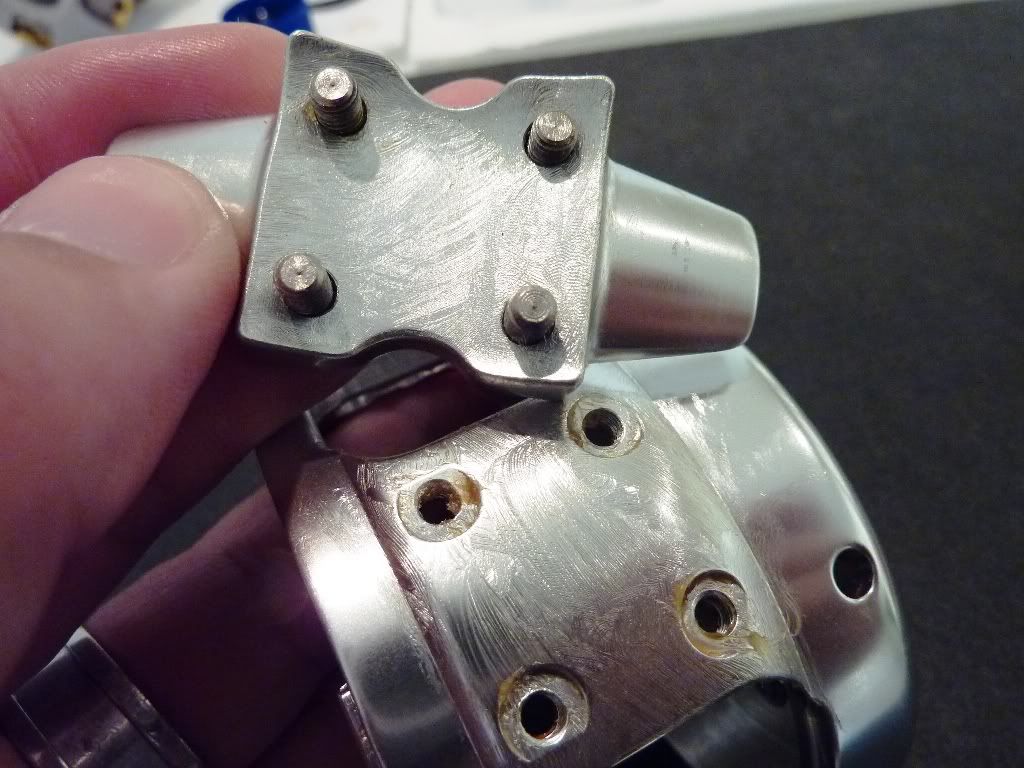
We will start putting the housing back together, you can see in the photo below that the seat is designed to sit on the body one way only..keeps it simple
Put the gear plate cover back on, screws should be flush with the plate
This is the bottom side of the tension ring, the other side is countersunk for the screws
Topside
Pop that back in, a bit fiddly lining up the clicker and replace the screws
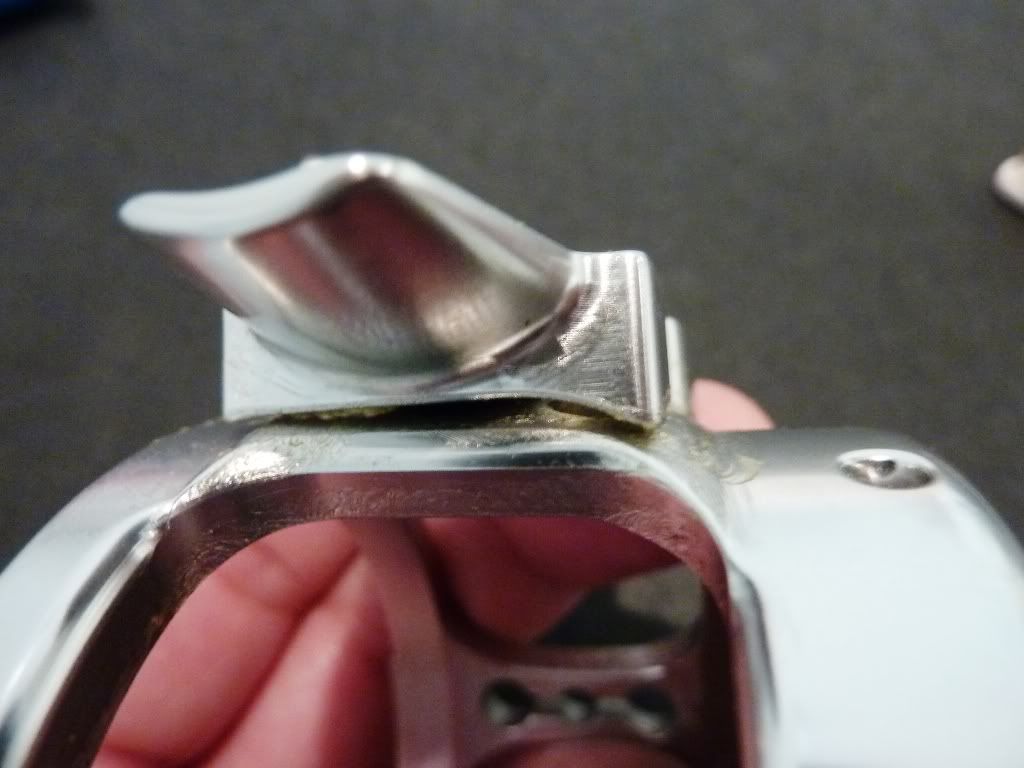
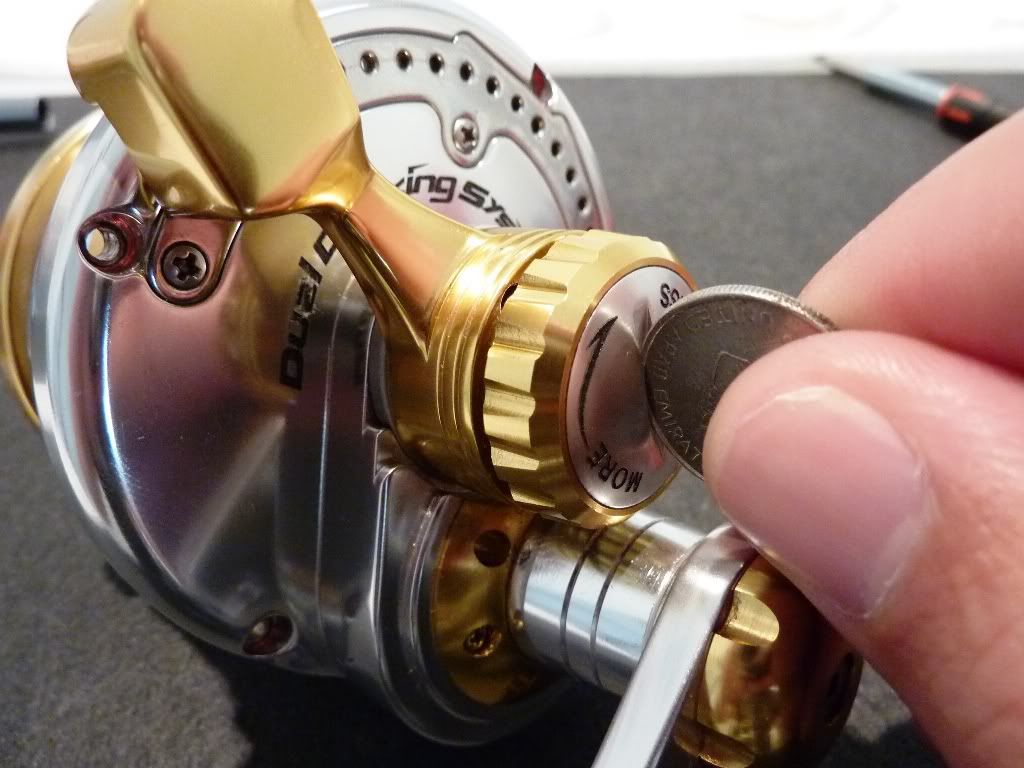
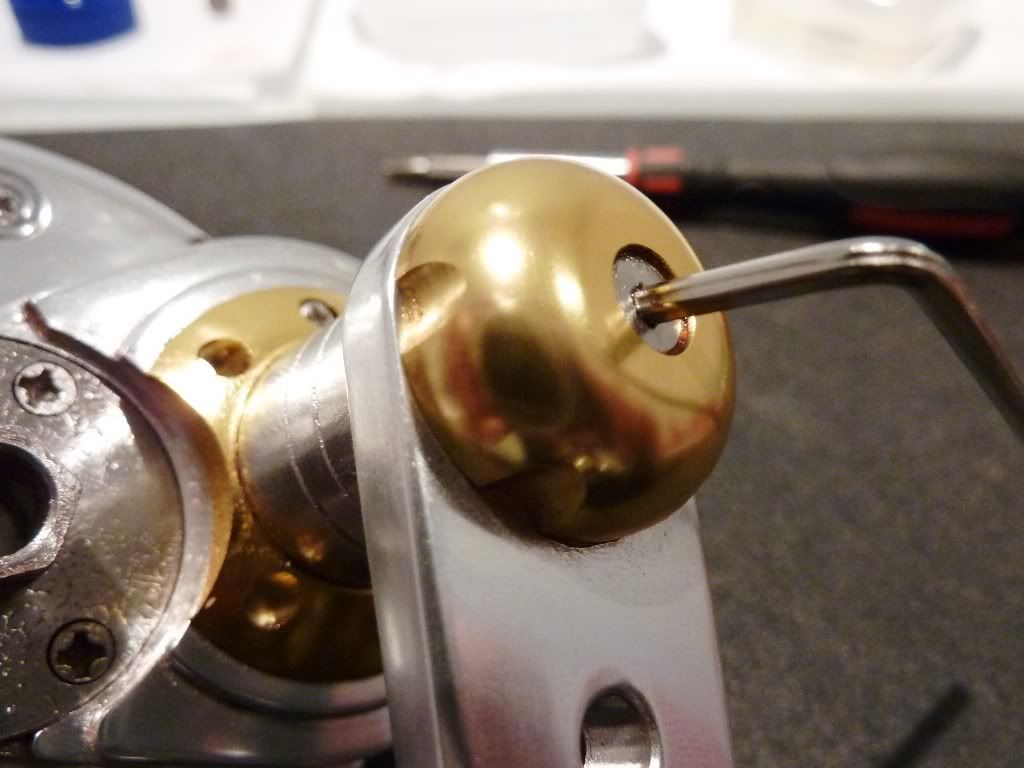
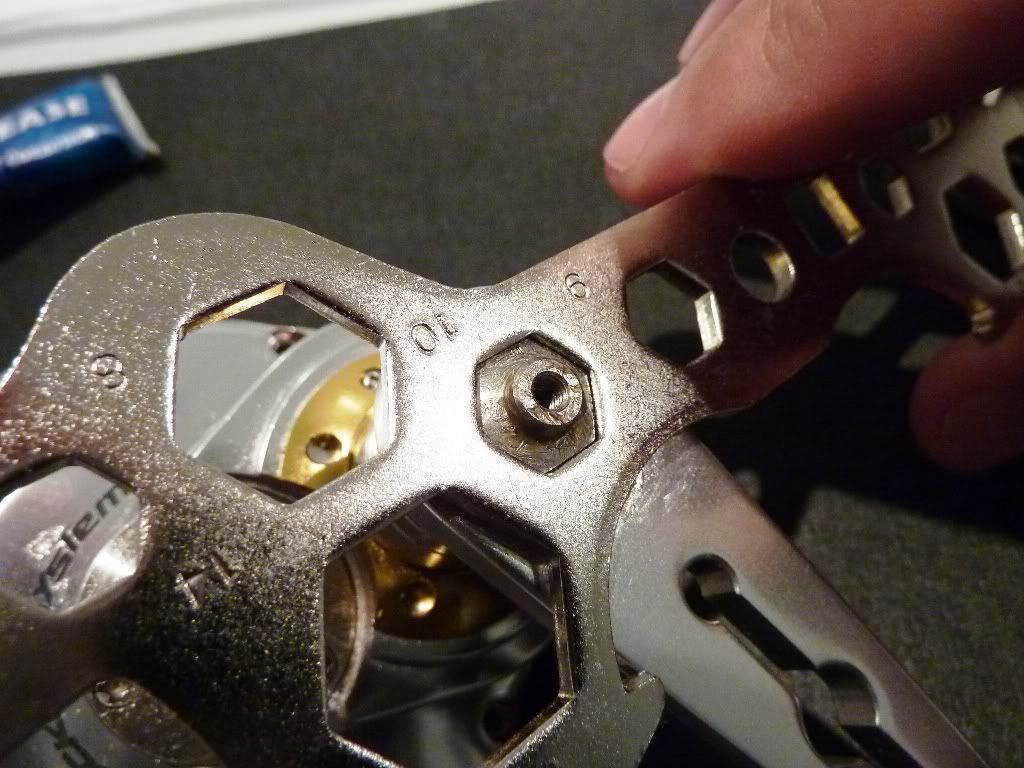
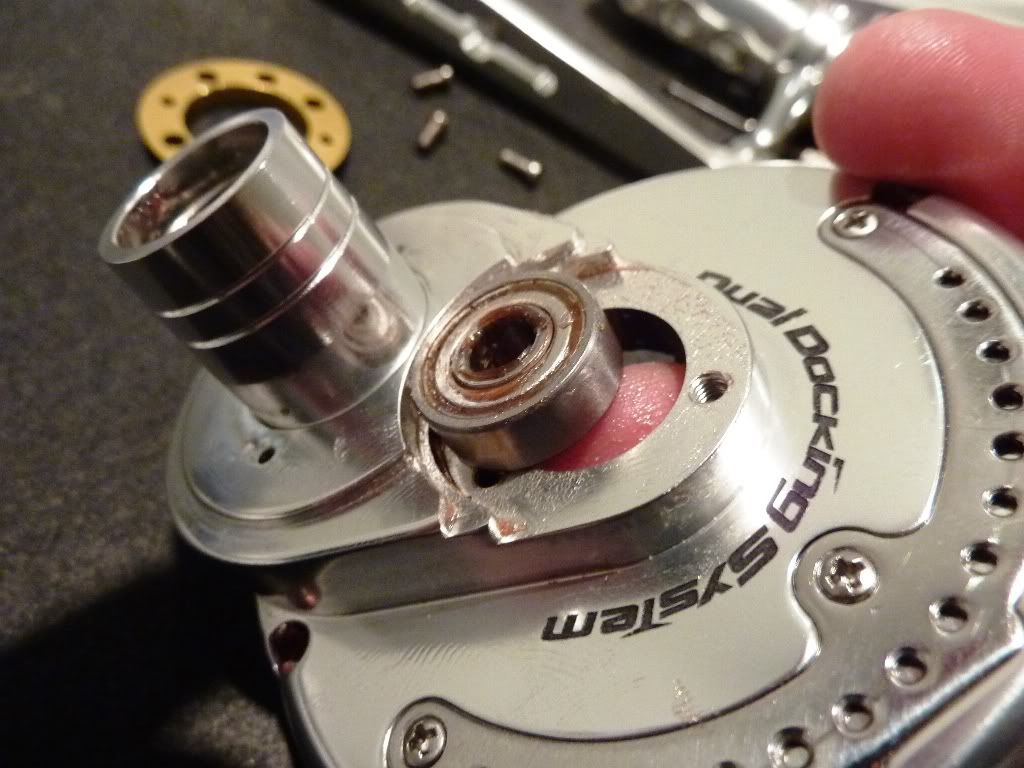
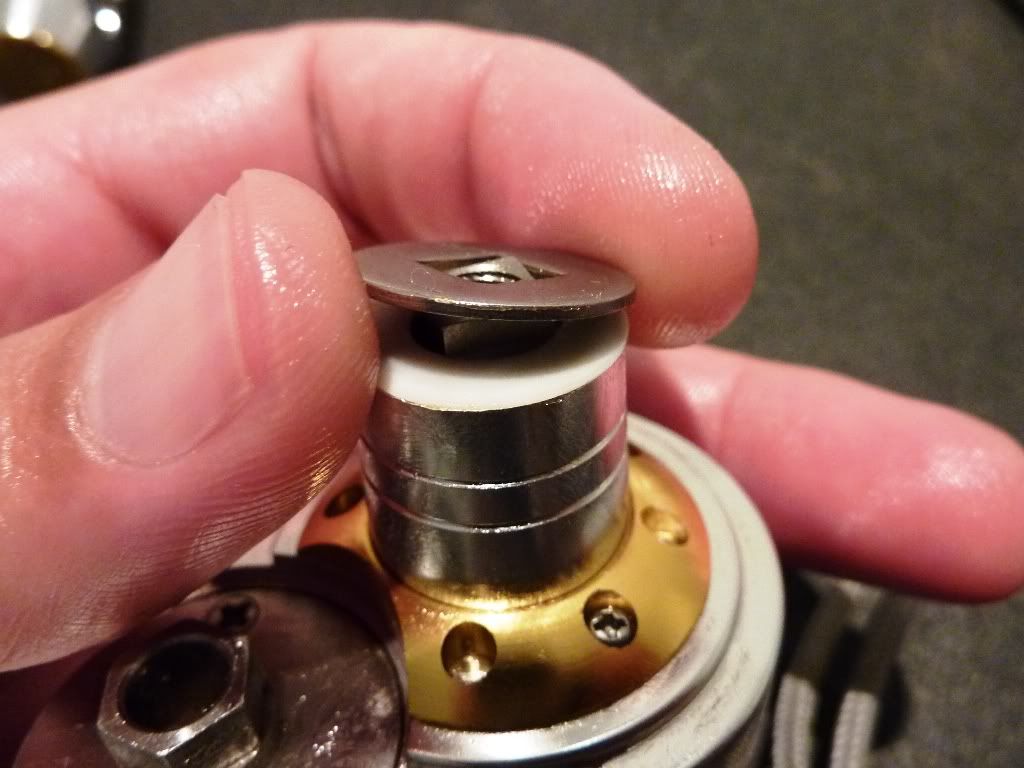
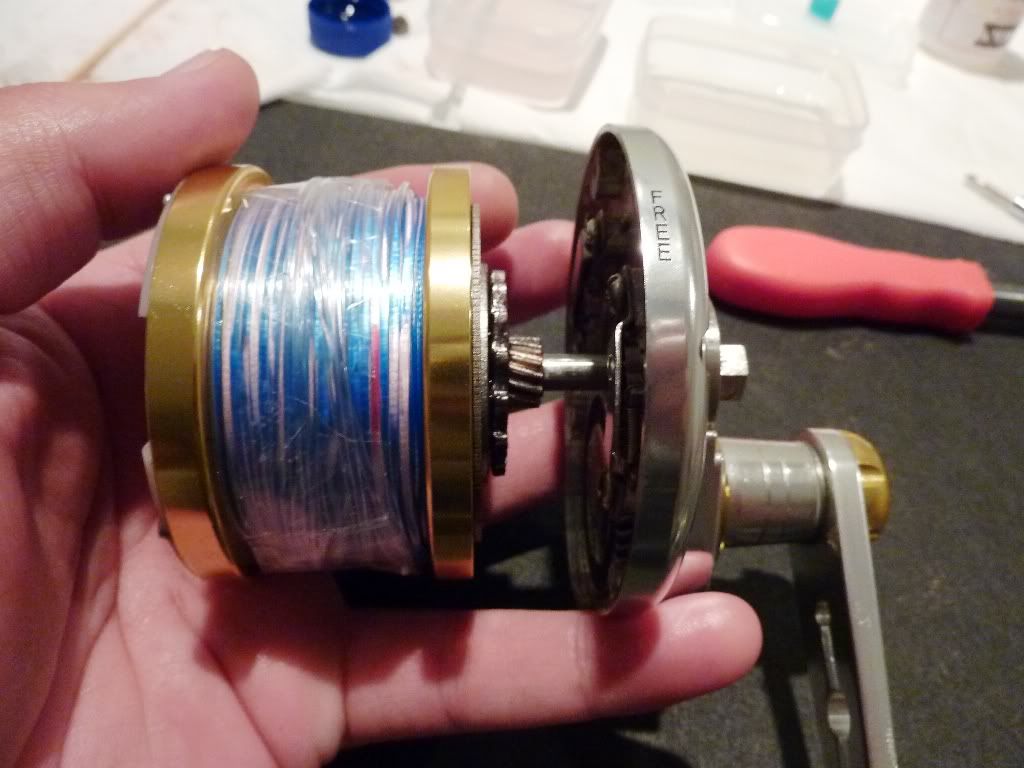
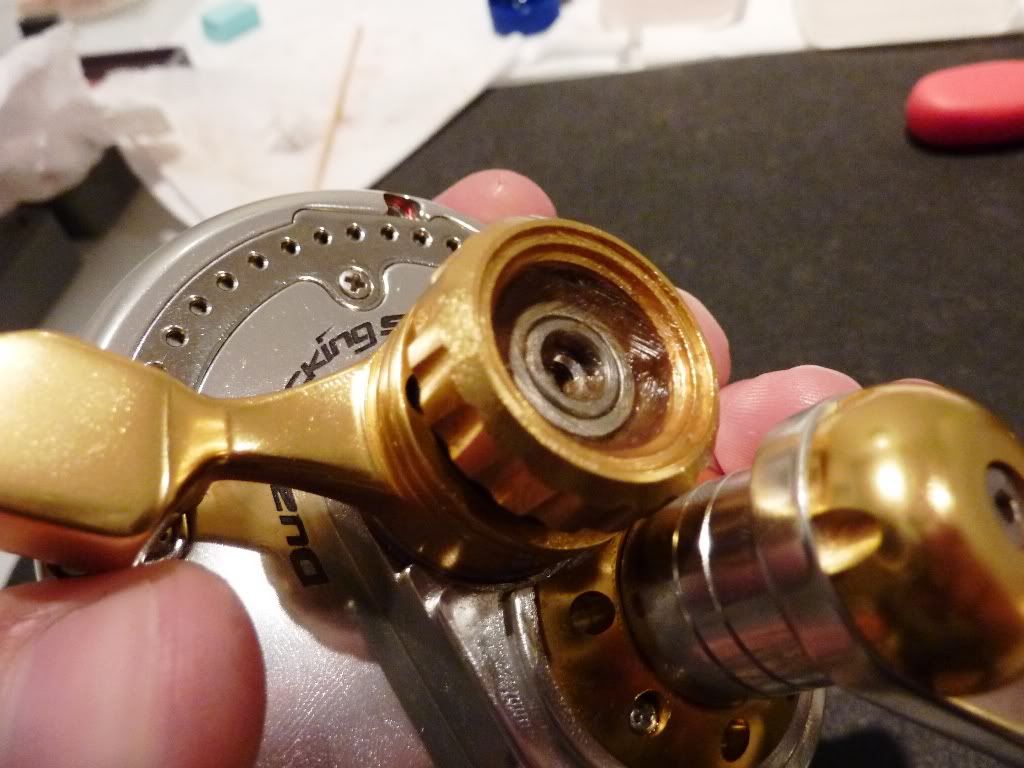
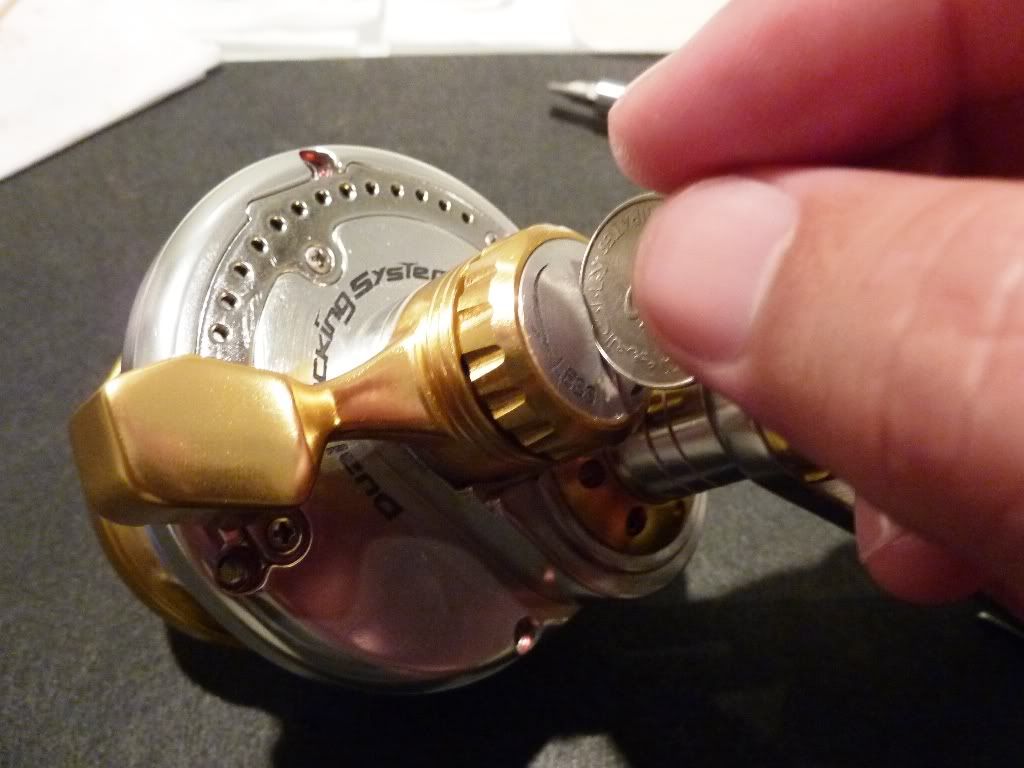
I'll put the housing to the side for now and work on the drive side, I use a coin to remove the drag adjustment cap
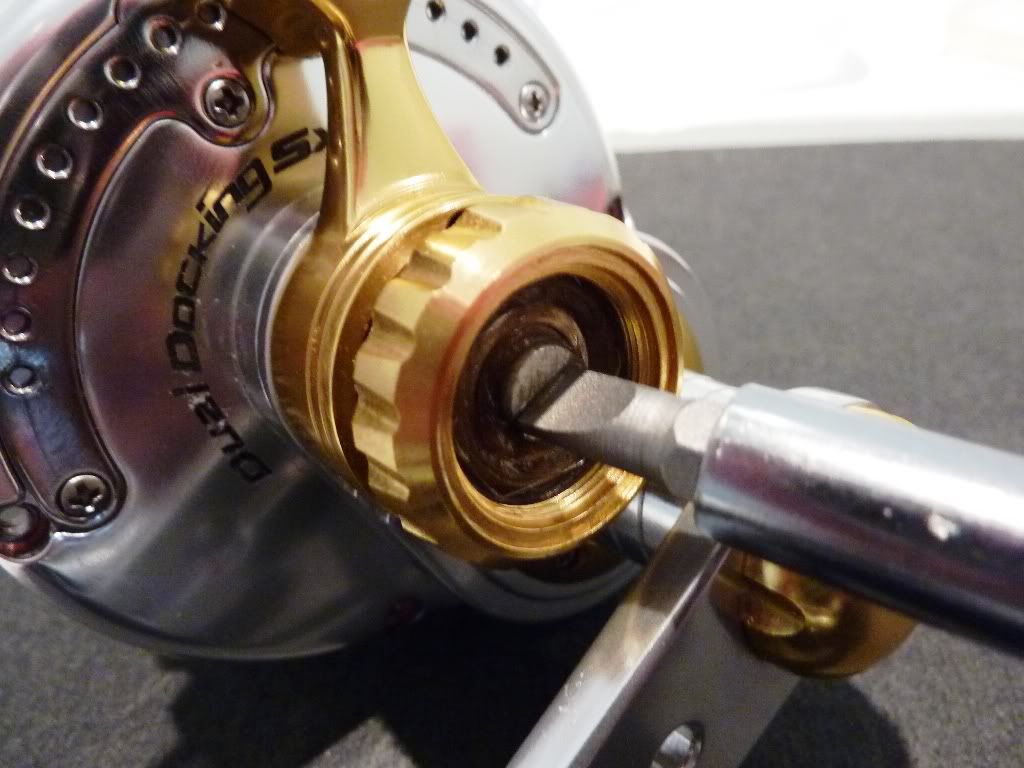
Once the cap is off I wind the tension up and push the drag lever to the strike position and remove the shaft screw
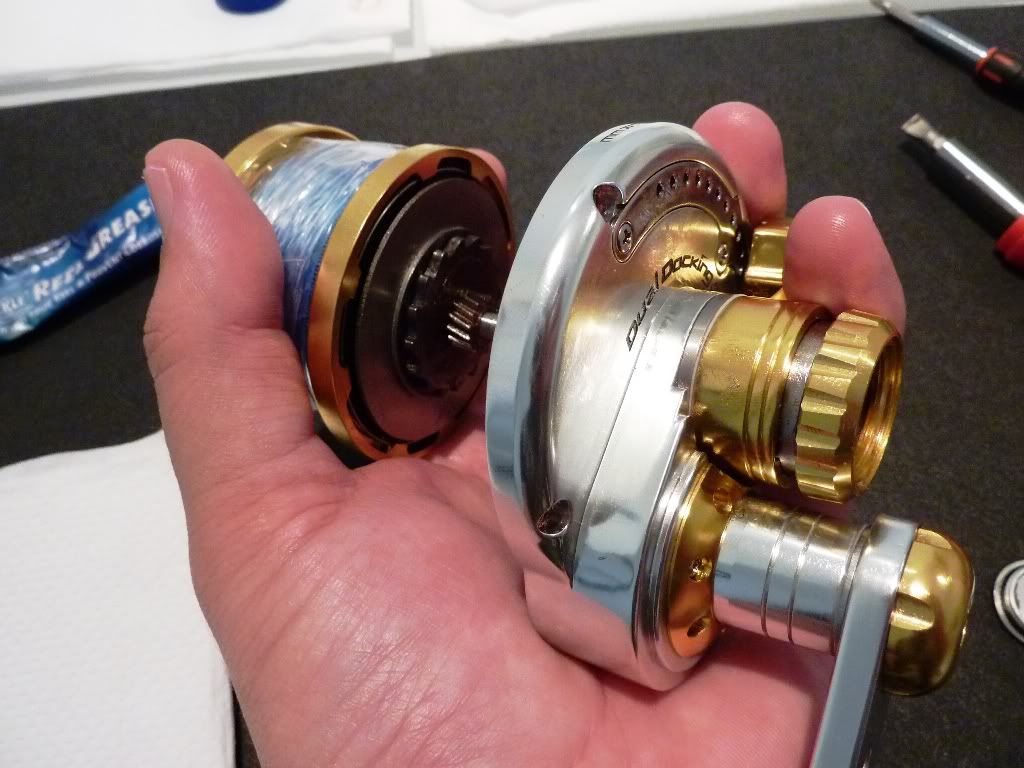
Then remove the spool from the drive gear
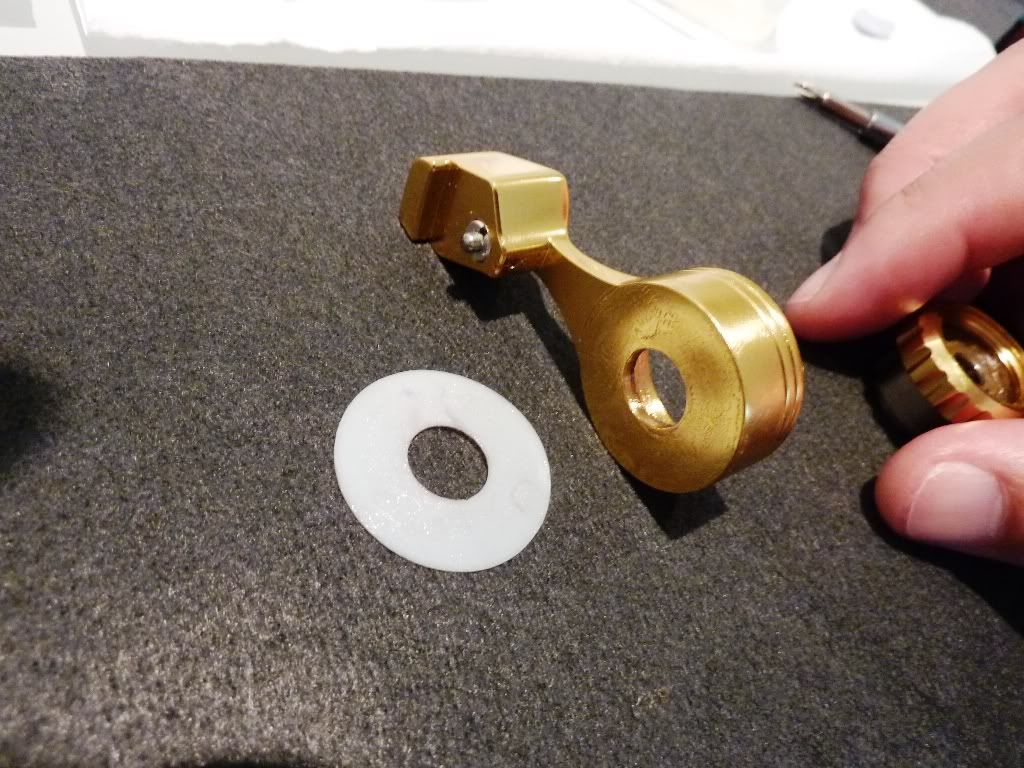
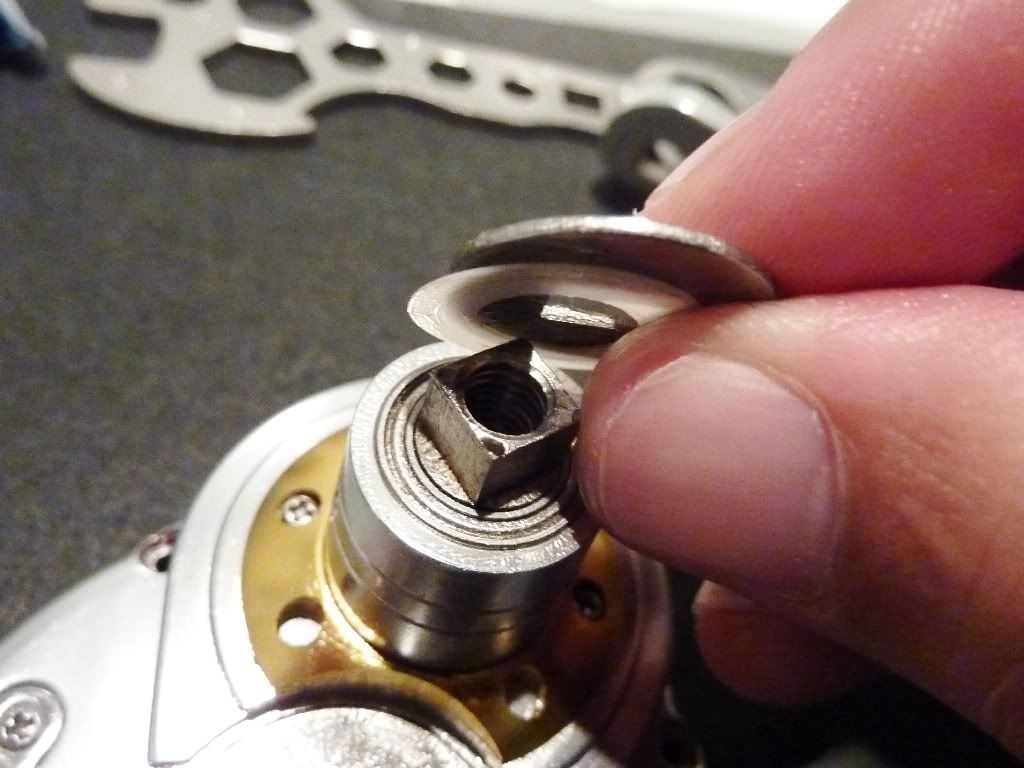
I'll remove the drag lever and tension set
Split the washer, drag lever and tension set
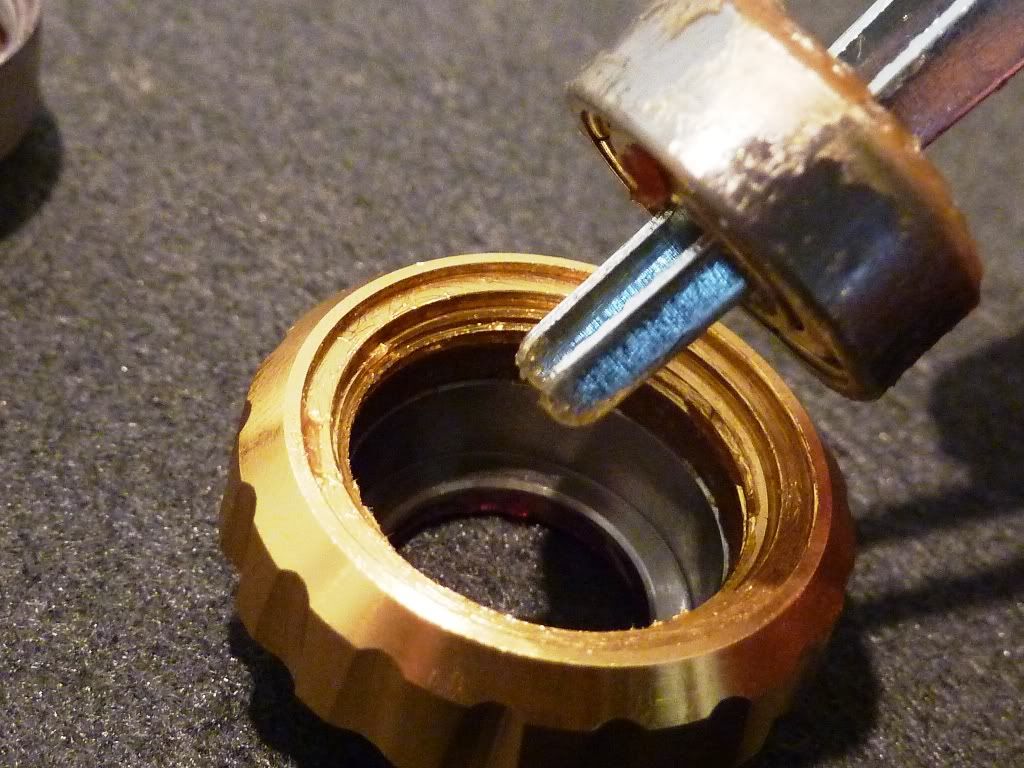
I'll unscrew the tension set and clean
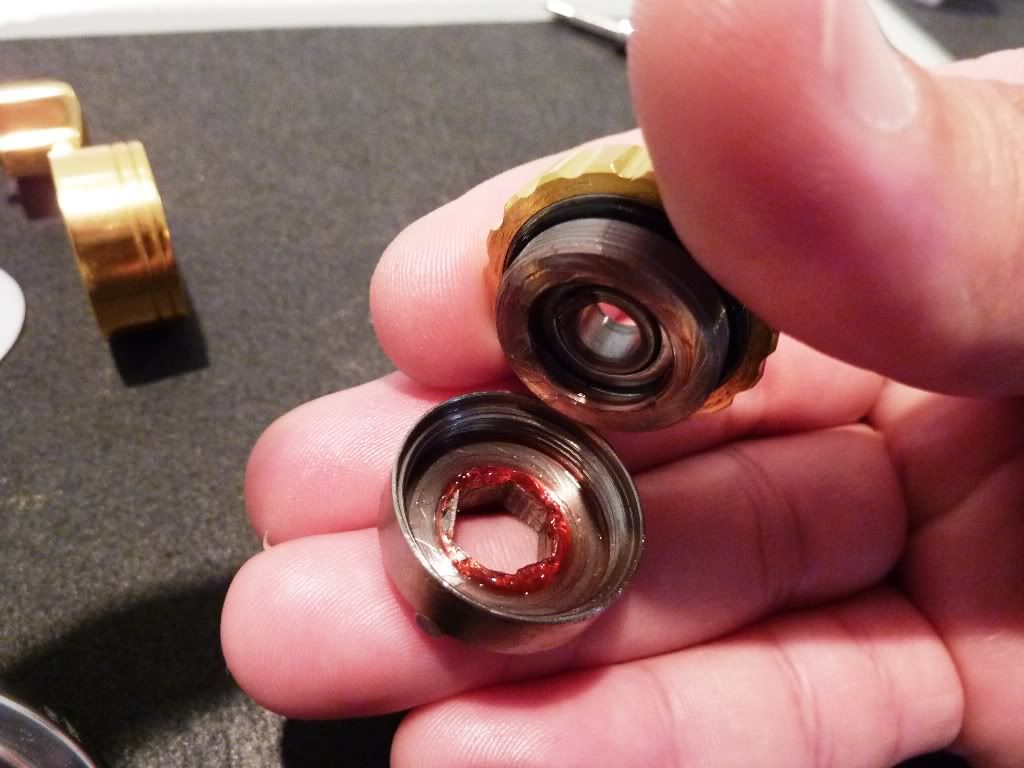
Flick it over and remove the locking wire
Remove the bearing (6mm x 17mm x 6mm), I clean this one up too
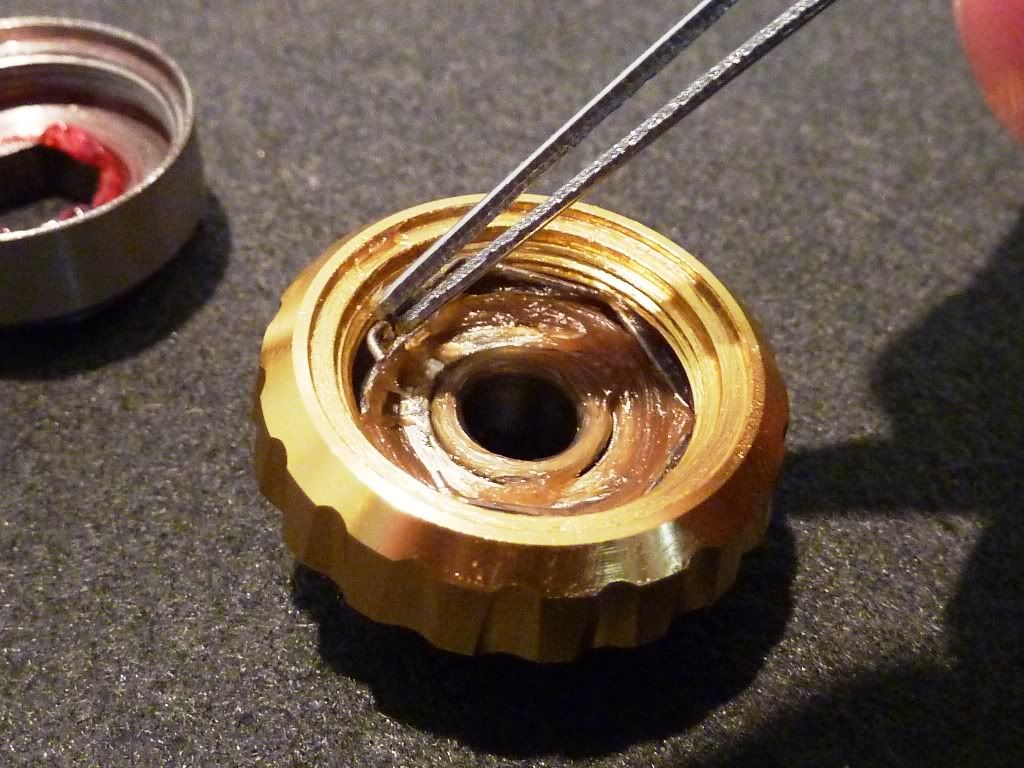
I run the brush around the inside with a light coat of grease
I place the re greased bearing back in, grease the drag lever and put that assembly to the side
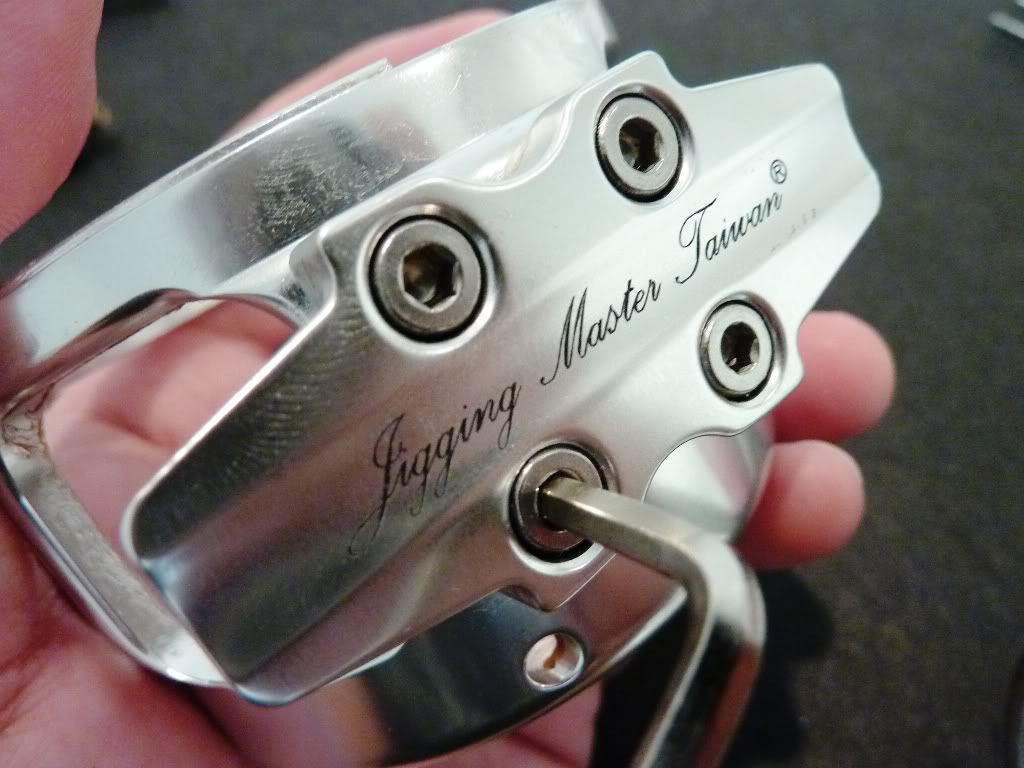
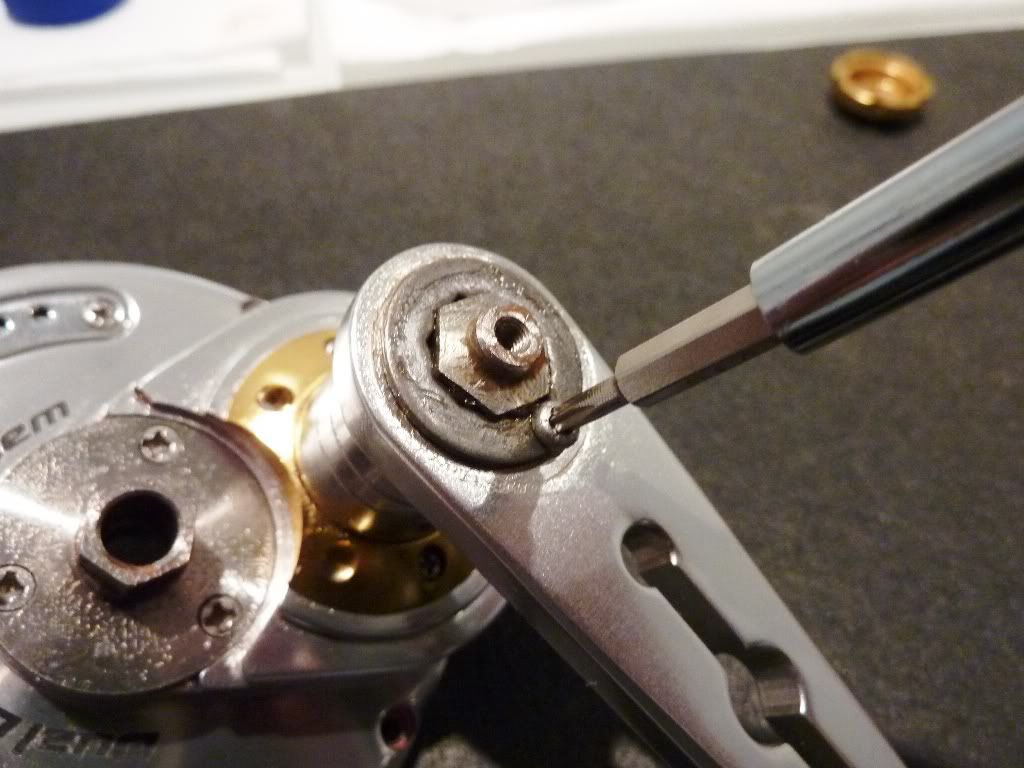
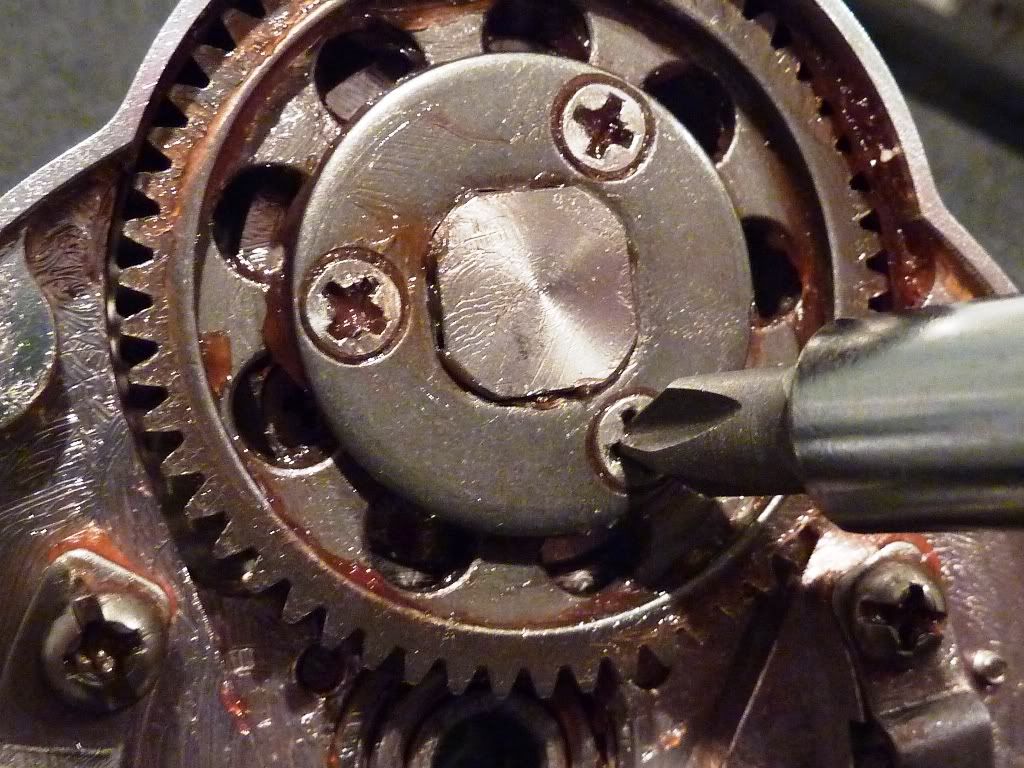
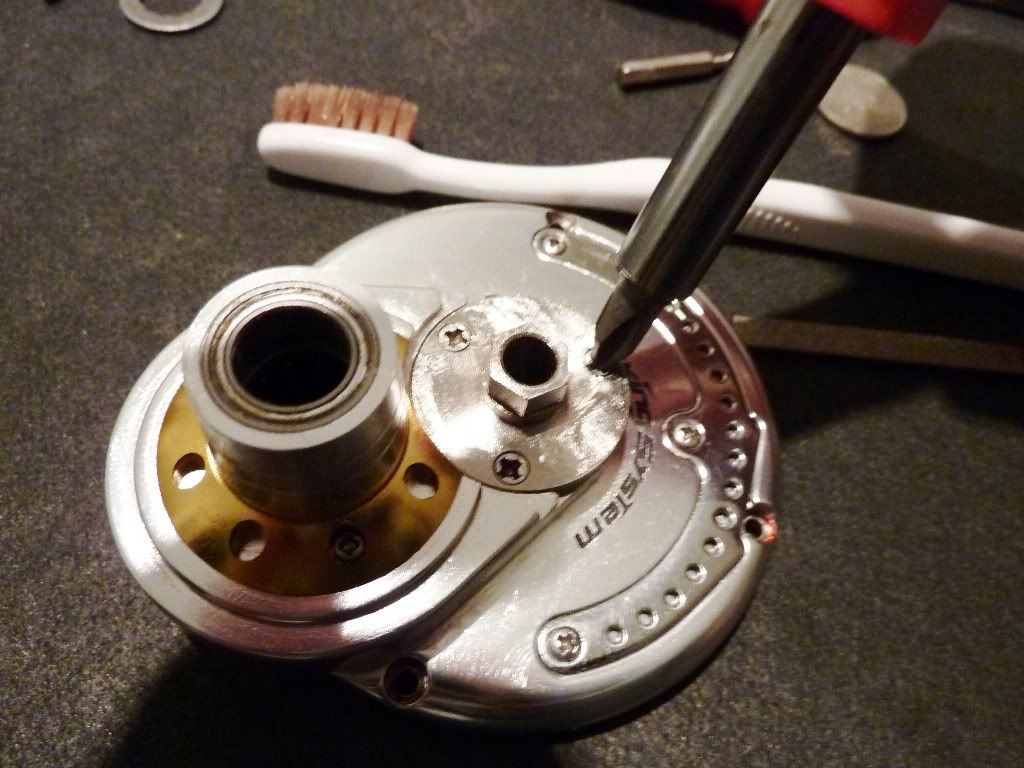
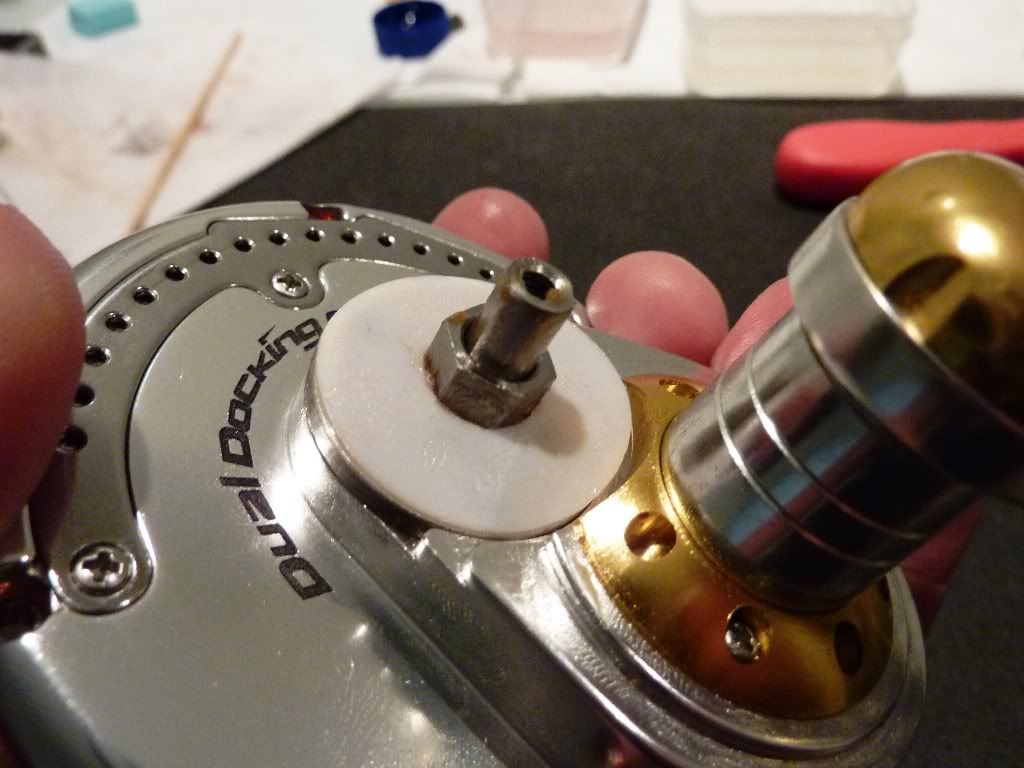
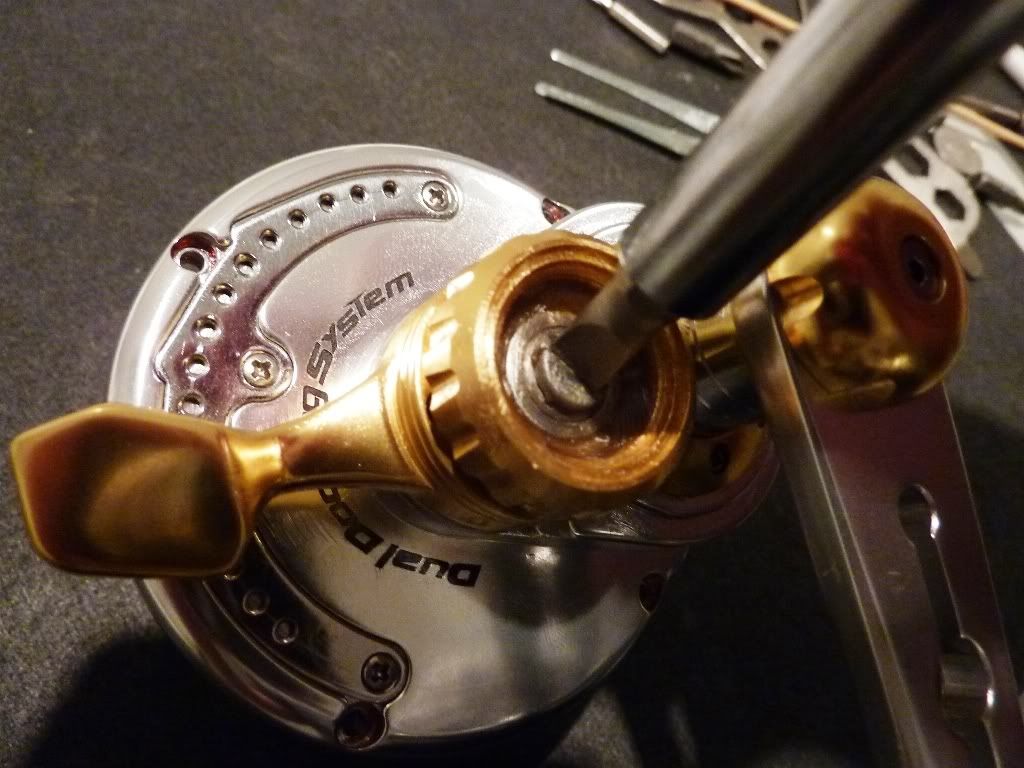
Start to breakdown the gear and handle assembly, remove the handle shaft cap
Remove the locking ring
Unscrew the shaft nut
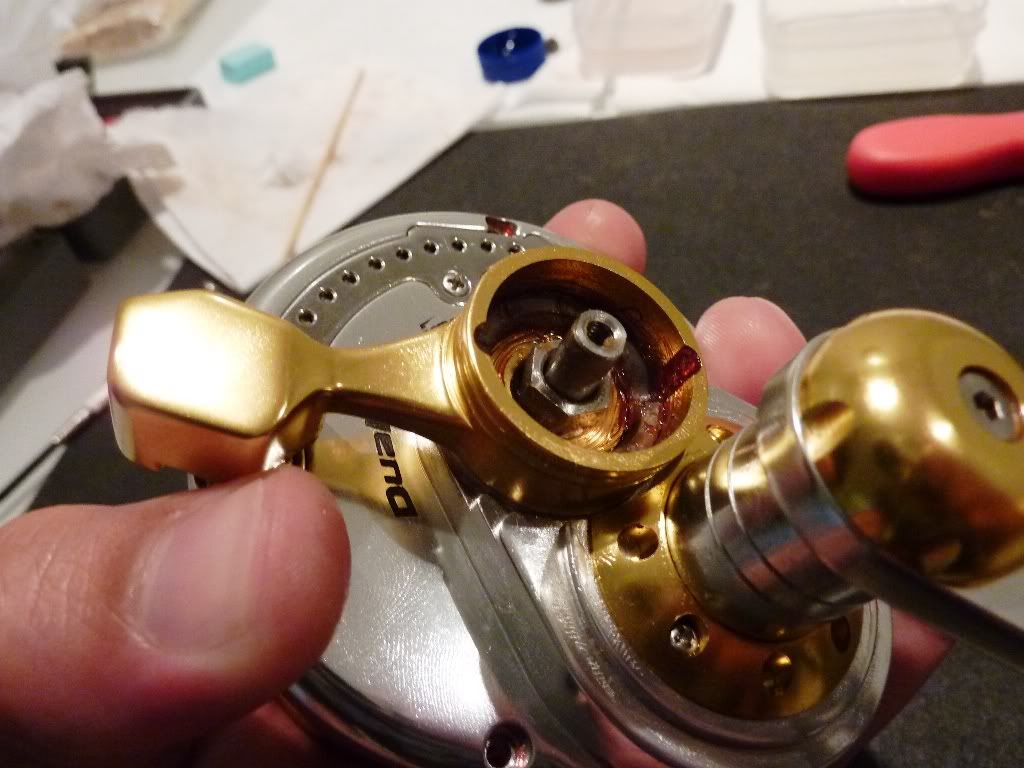
Remove the handle and the 2 washers, plastic washer should be on the shaft housing
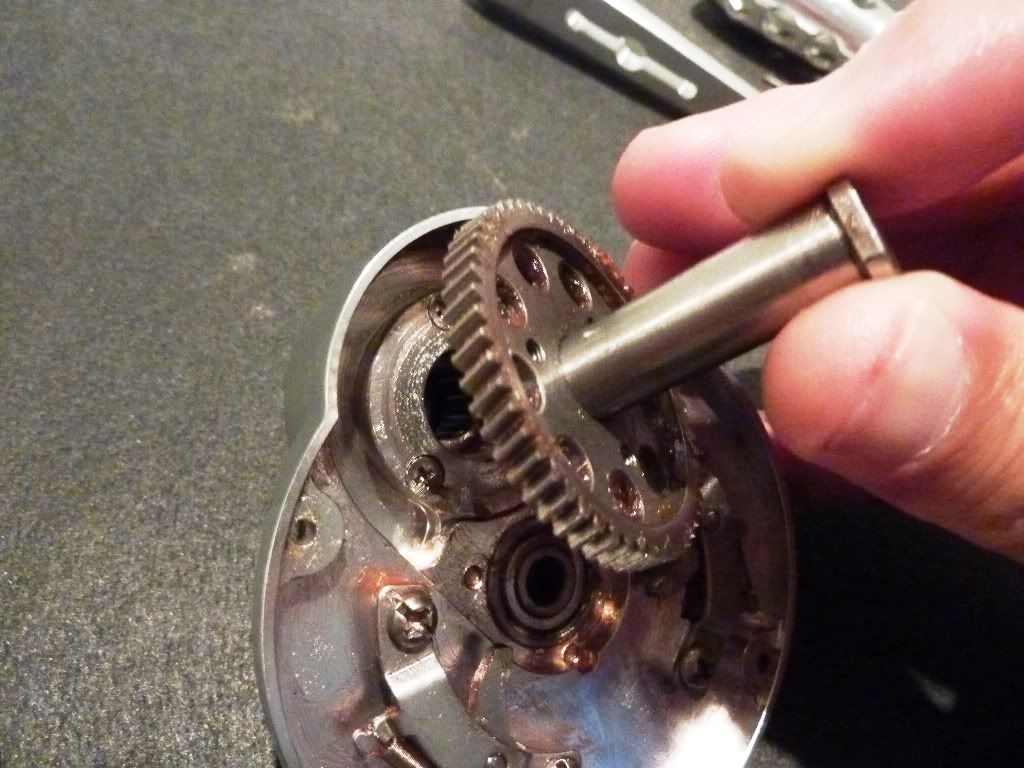
Flip the housing over and remove the main gear plate, can be tight if its not been off before..they need to grease the threads
Once off, slide the shaft out and remove the main gear including the white plastic washer
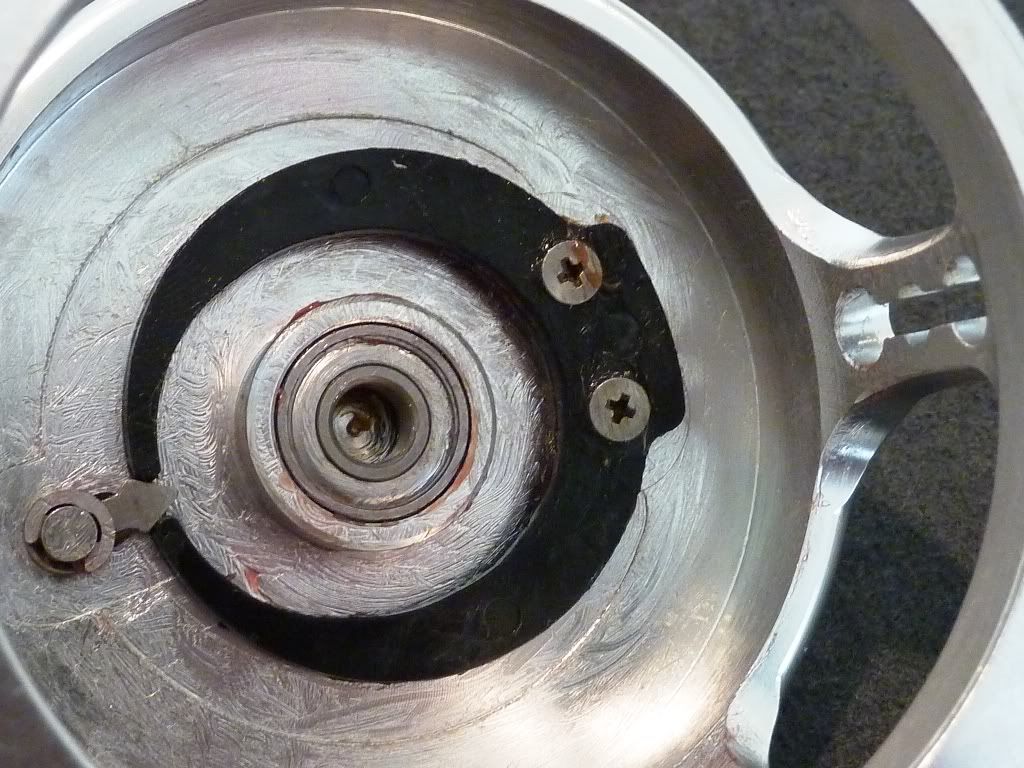
Remove the bearing (10mm x 15mm x 4mm) from the housing
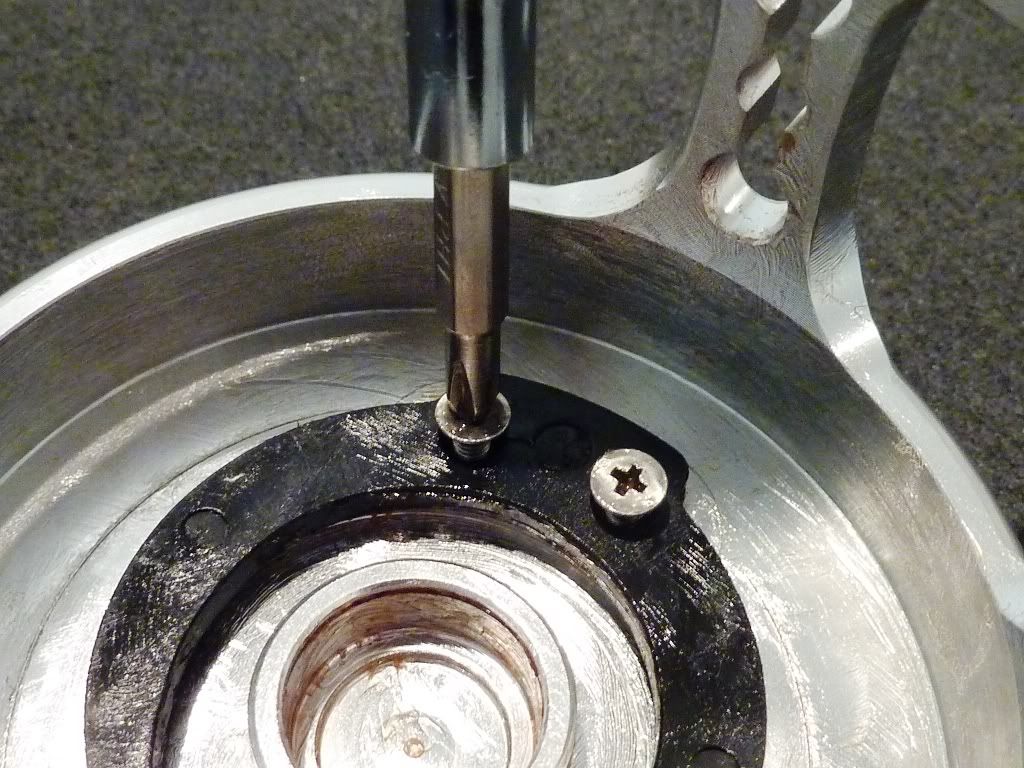
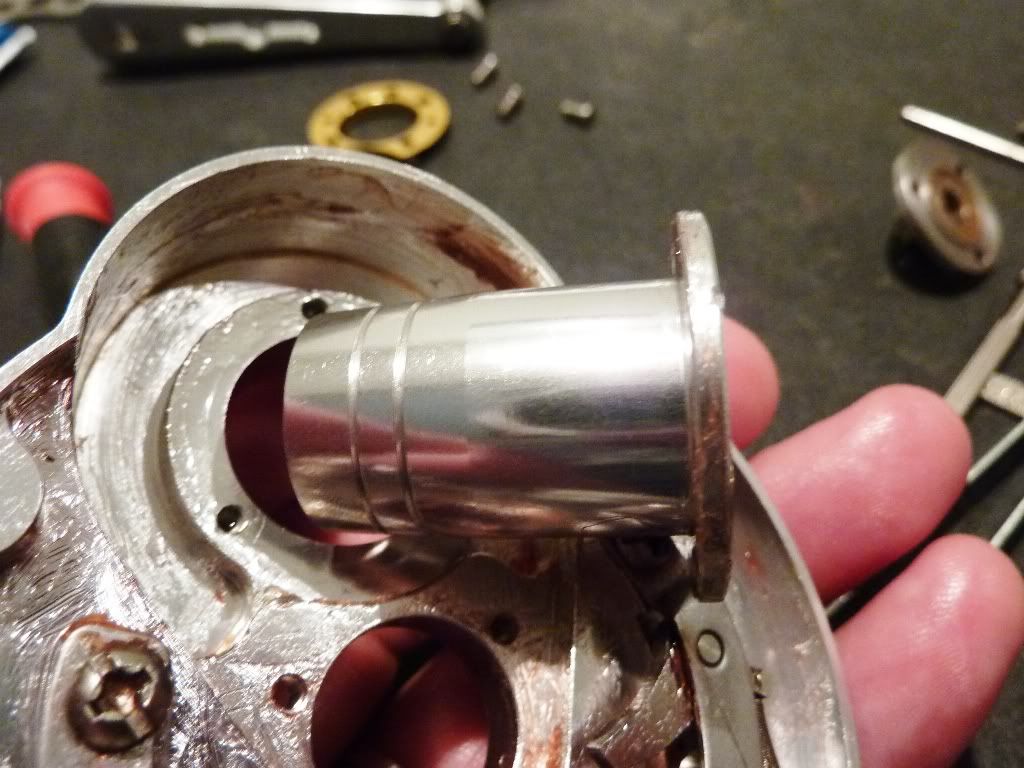
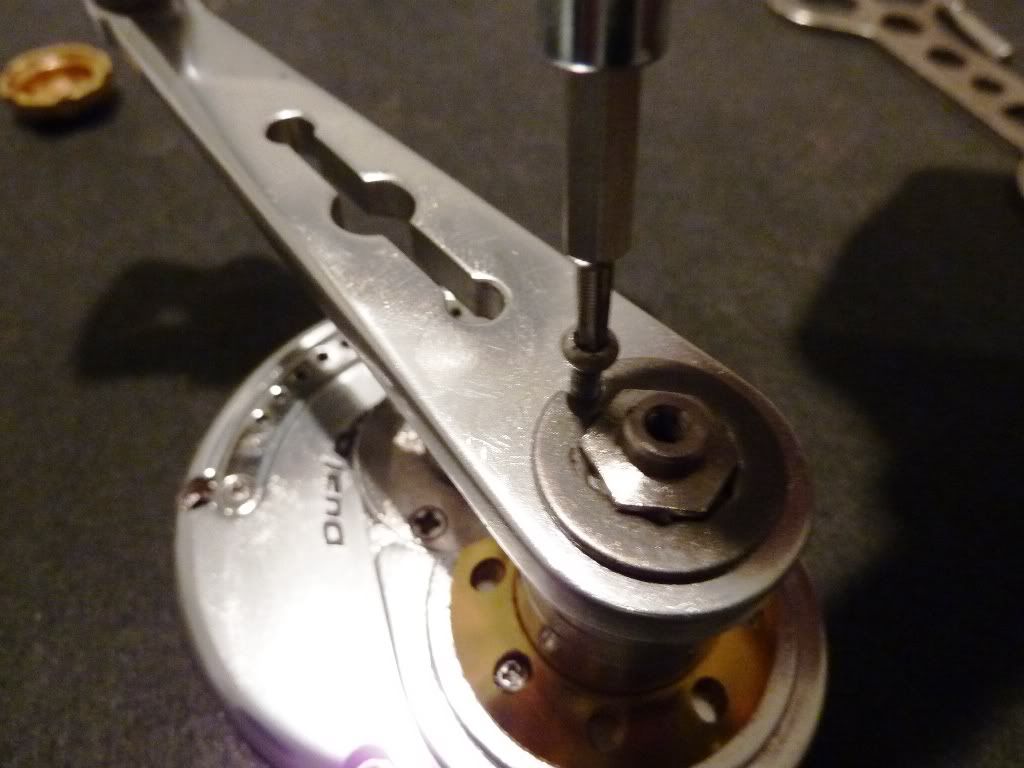
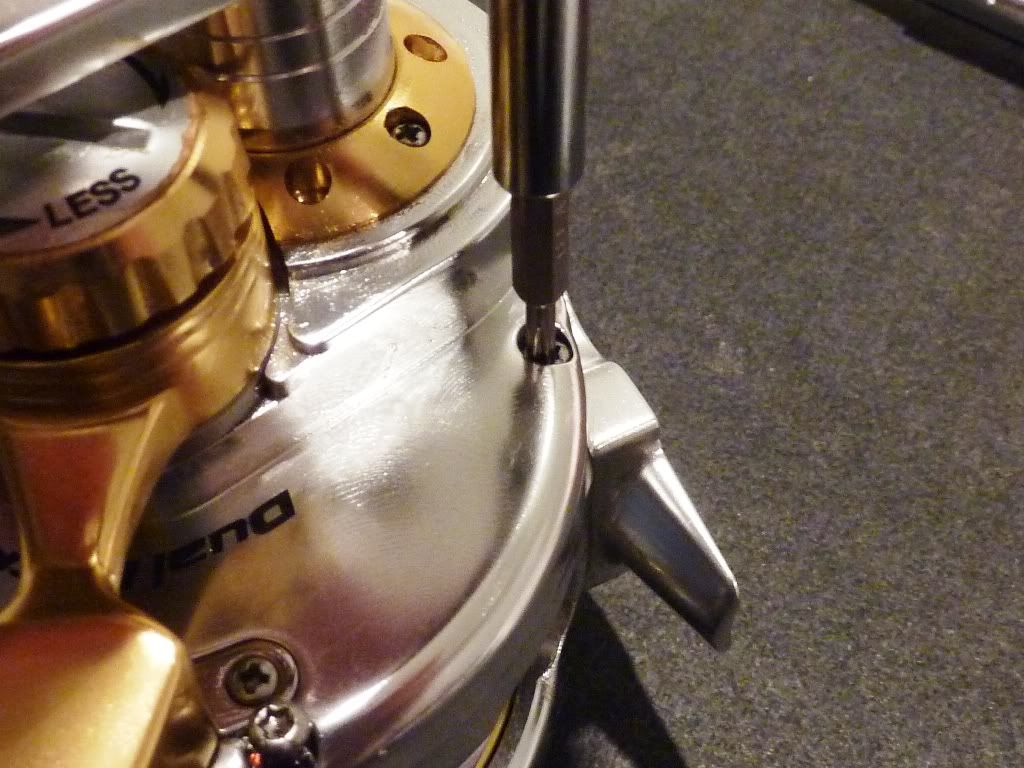
Now I remove the 3 screws holding the shaft housing (containing the one way bearing)...need to grease these screw threads!!
Turn the main assembly over and remove the shaft bearing (10mm x 15mm x 4mm)
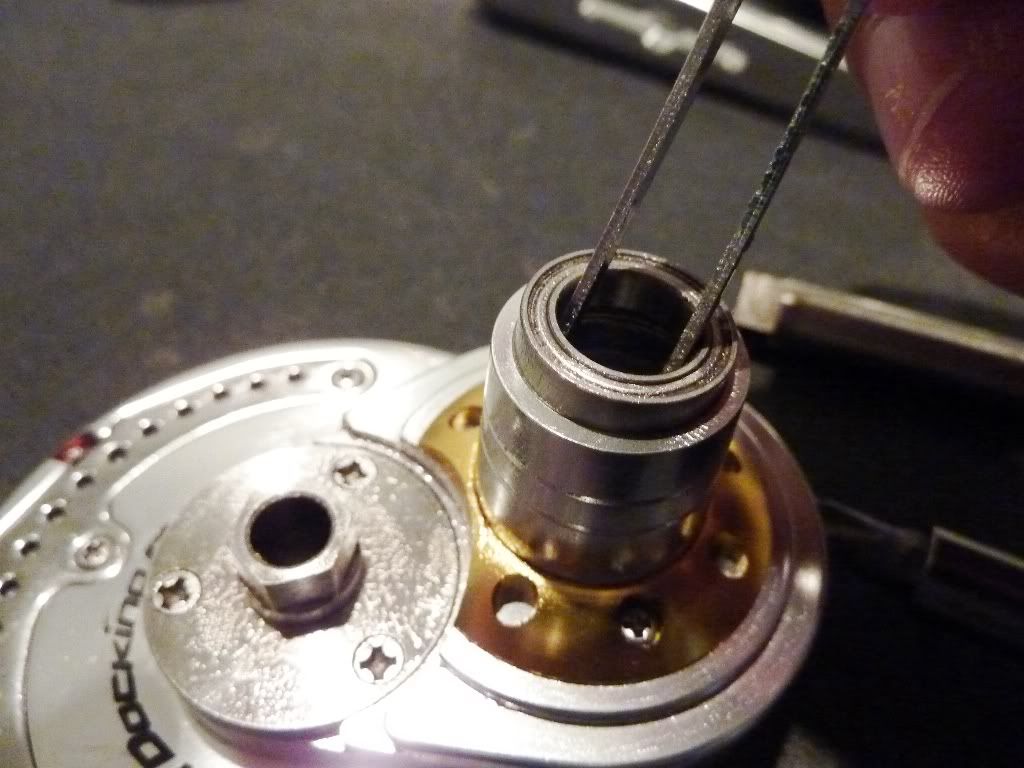
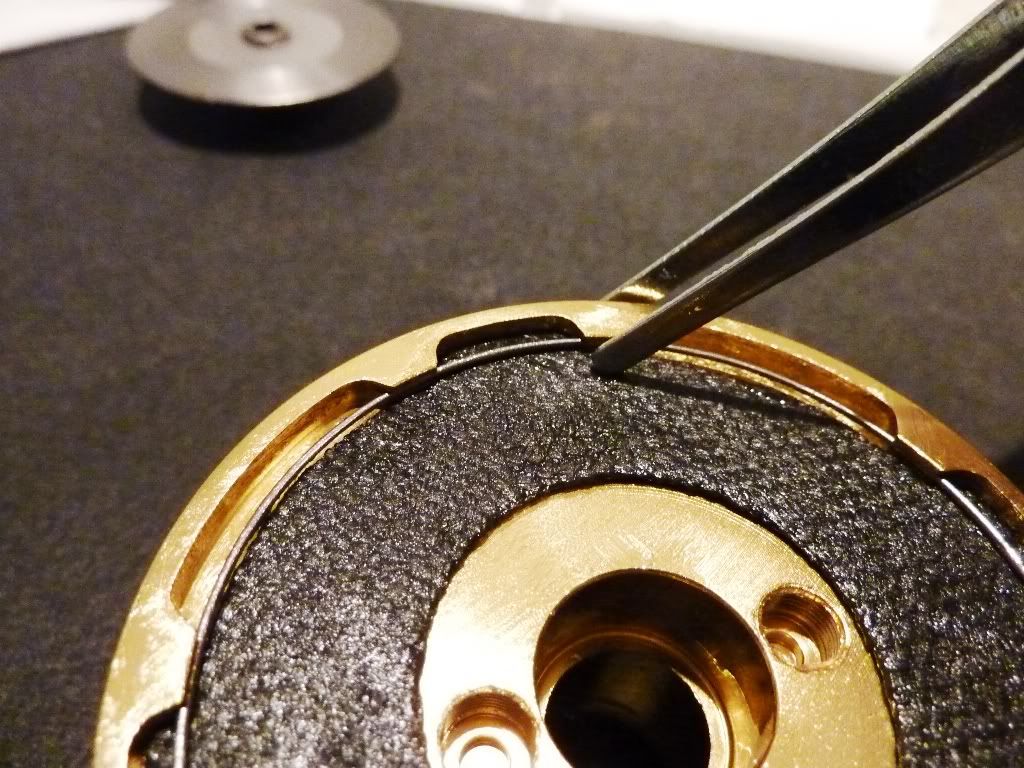
Remove the support ring from the housing (2 screws)
Whilst I am there I remove the spool/drag shaft plate to remove the bearing (6mm x 17mm x 6mm)
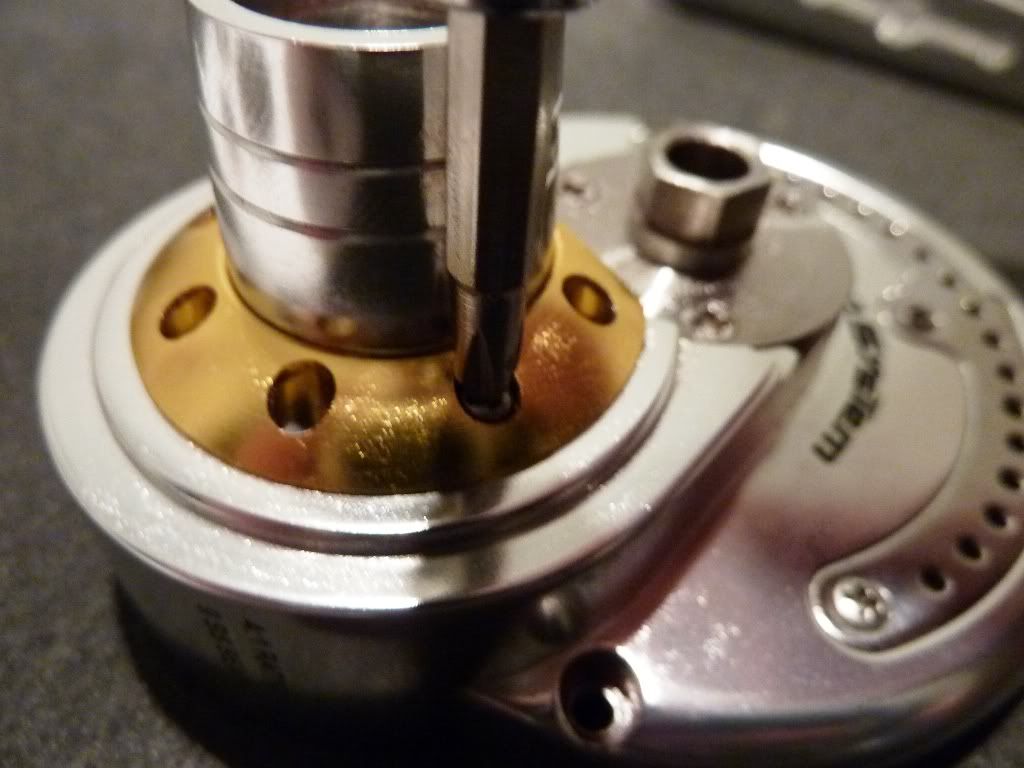
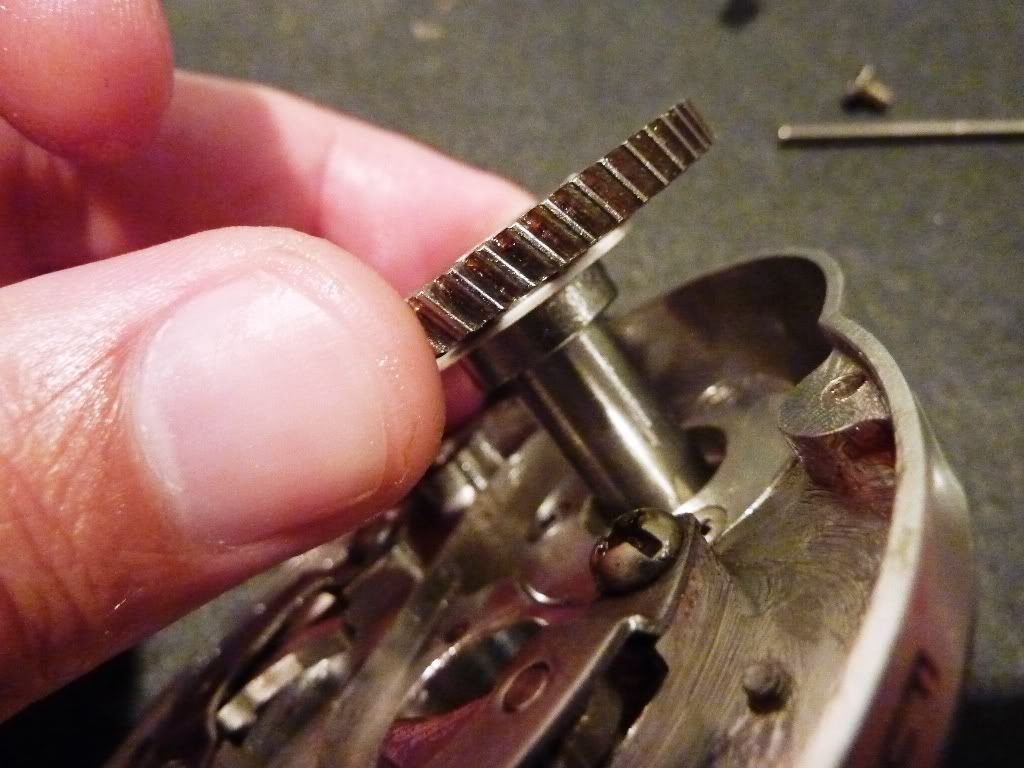
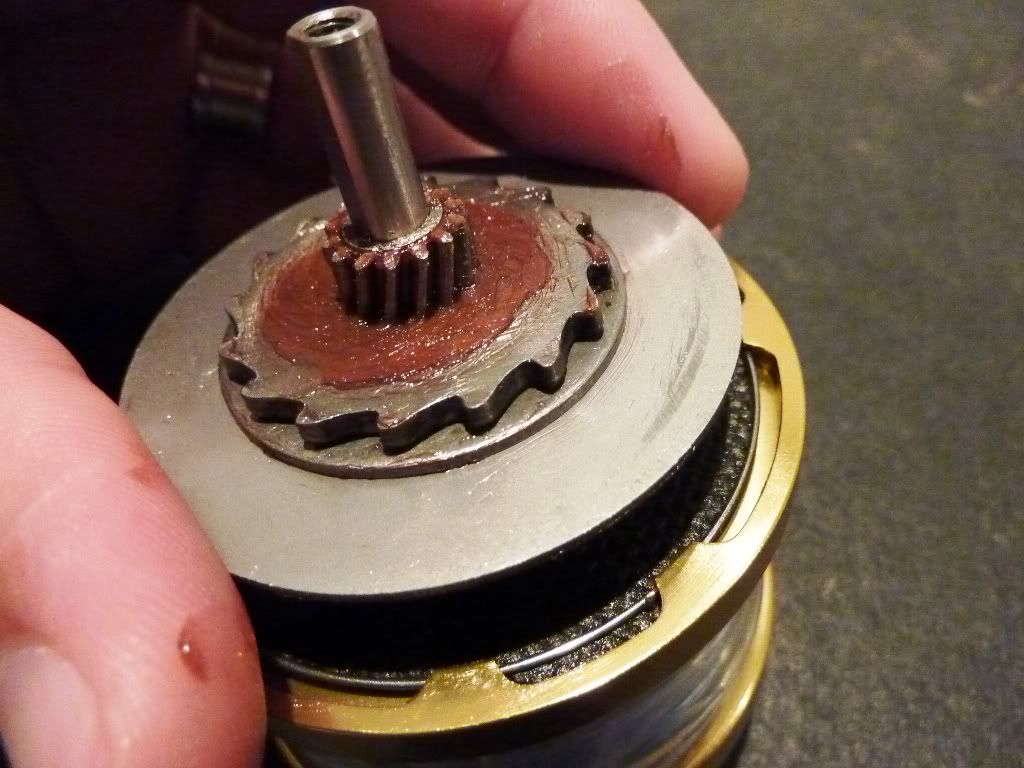
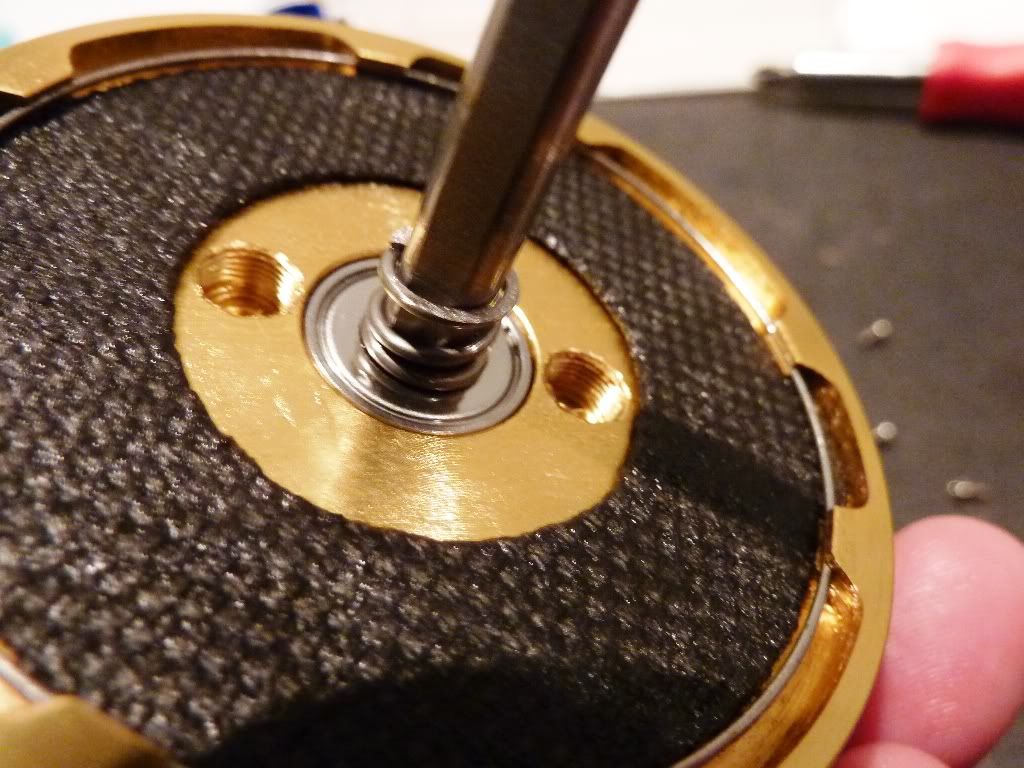
Pop the bearing out, clean and re grease and start to remove the gear shaft
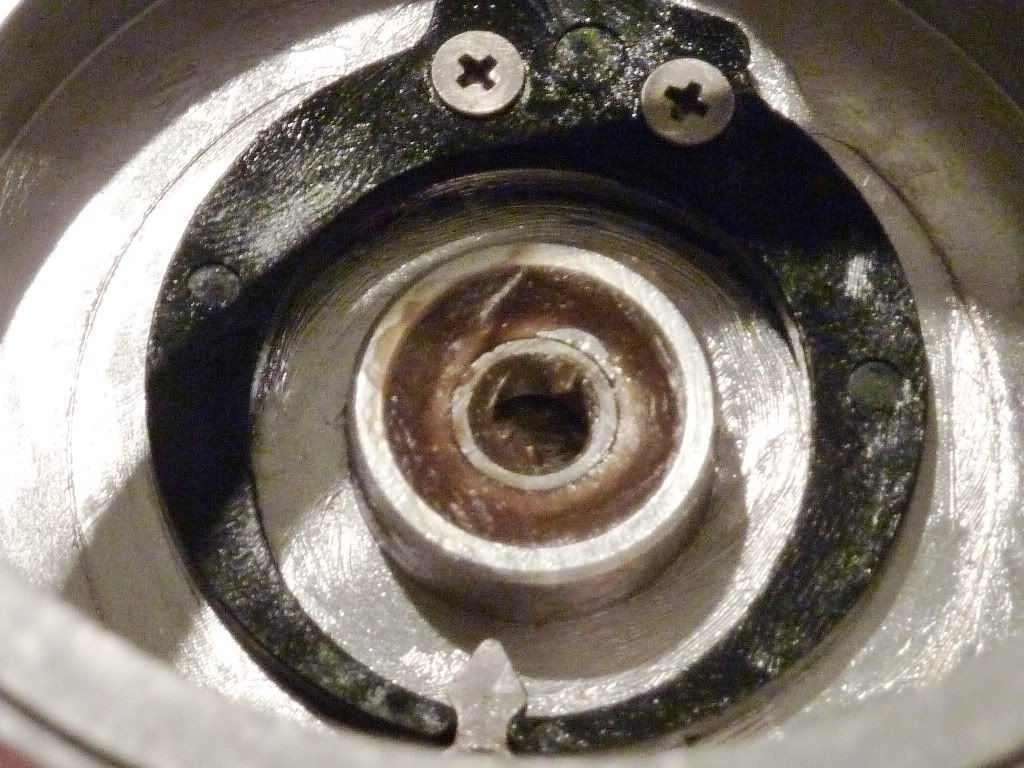
Once the gear shaft is out I check the one way bearing
I remove the drag stop and then clean and grease both sides of the plate
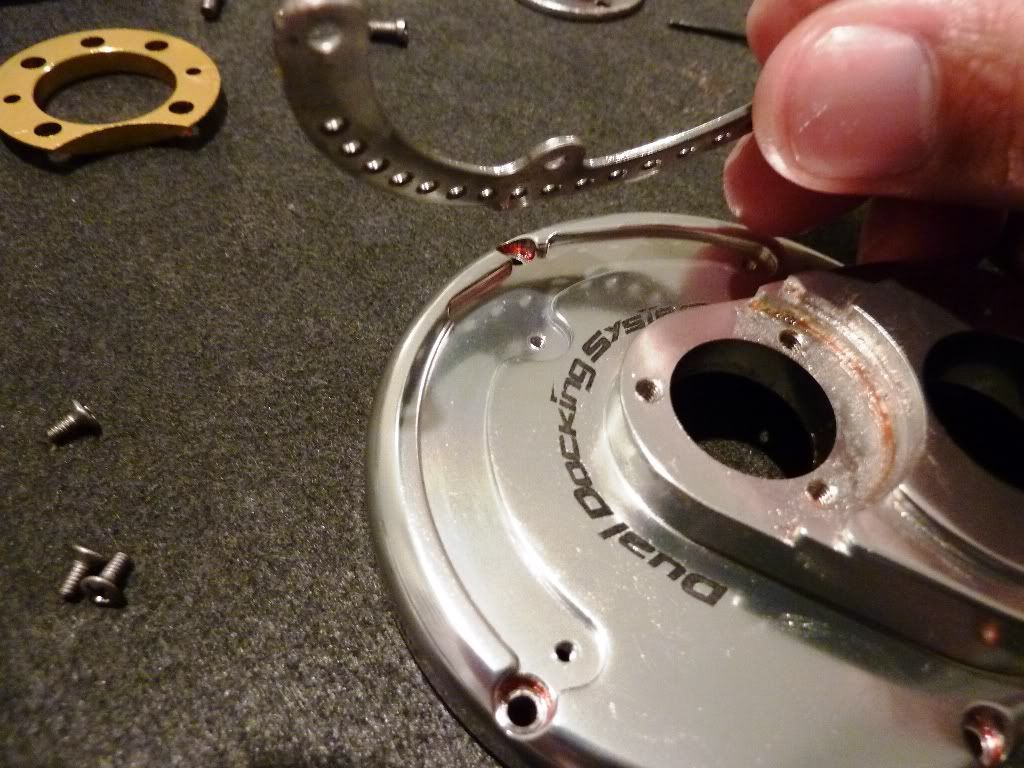
Drop of oil to the pawls
Finally can start putting it back together, drag stop back on and re insert the shaft housing
Shaft support ring back on
Spool/drag shaft plate back on
Turn over and replace the re greased bearing
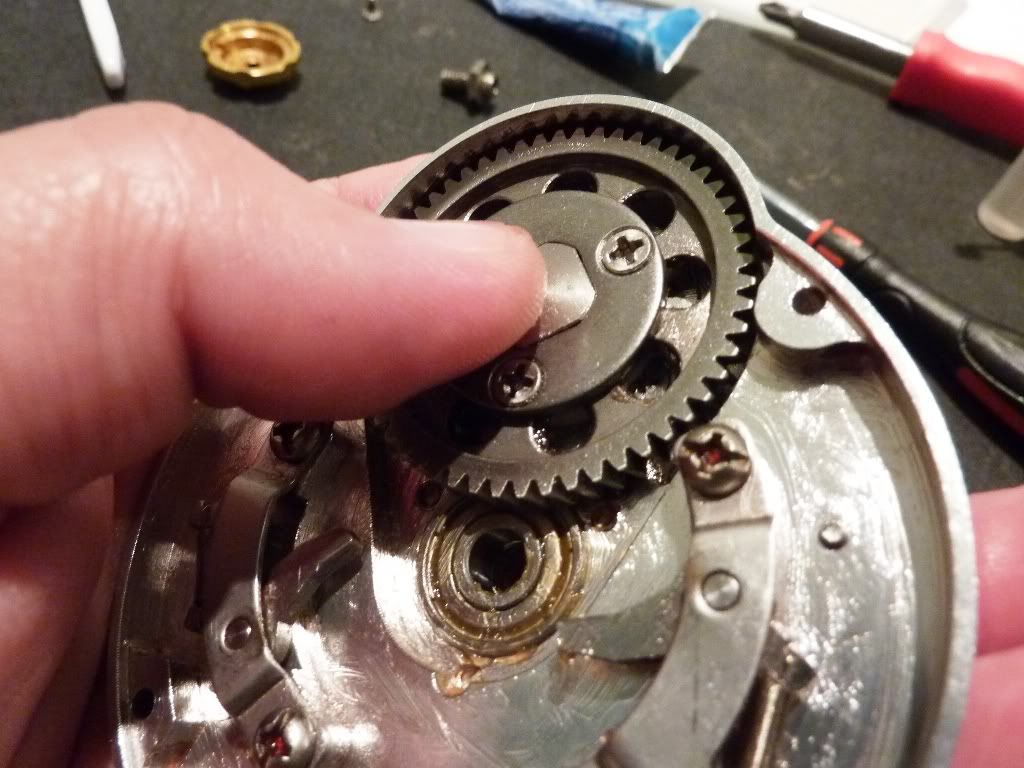
Gear and gear plate back together..don't forget to grease threads
Gear, washer and bearing back in..watch the edges of the shaft and the one way bearing..
Gear back in..
Turnover and replace the 2 shaft washers, plastic on first
Handle back on, shaft screw back in and then the locking ring
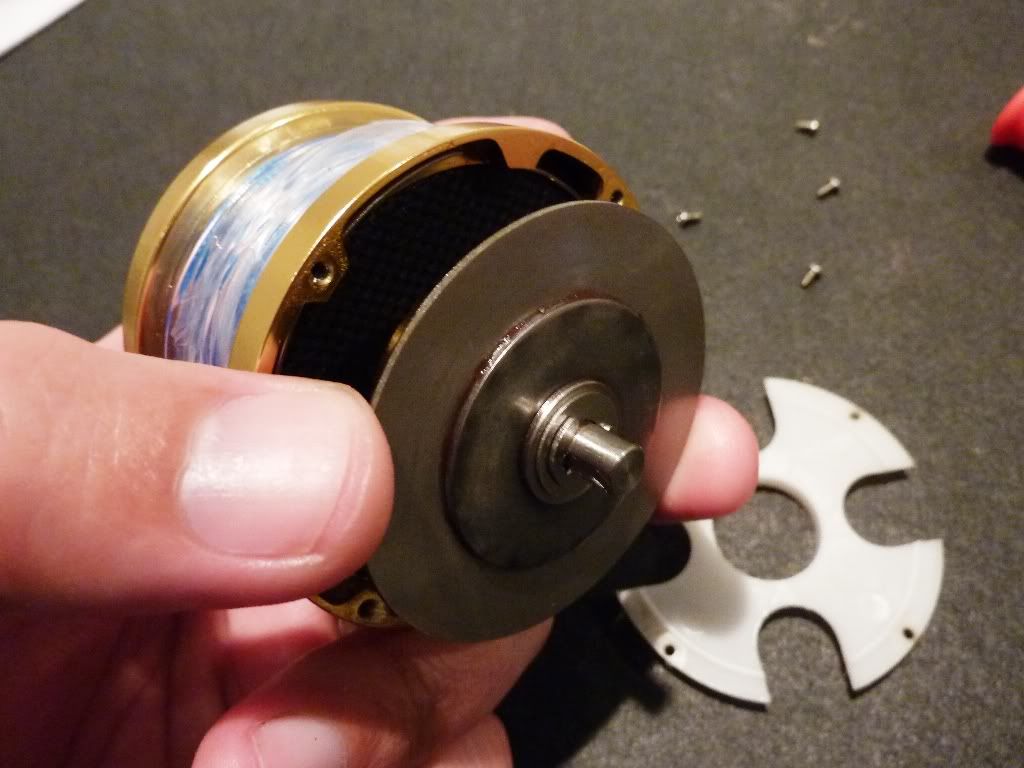
Put that assembly to the side and start on the spool, remove the drive side drag plate
Turnover and remove the plastic retainer (4 screws) and remove the drag plate and shaft
Remove the spring if it hasn't come off already, will be one either side
Remove the bearings (6mm x 15mm x 5mm) from either side, I clean these and oil
Remove the locking wire and remove the drag washer
Once the washers are removed I clean and lightly grease the spool
I clean up the drag plate and check for any problems
Re grease the drag washers and replace, don't forget the locking wire
Replace the spool bearings/drag plate and shaft, don't forget the spring for either side
Screw the plastic retainer plate back on
Make sure that the bearing spacer/sleeve goes back in before you put the spool bearing and top drag plate back on
Place the spool assembly back into the drive assembly
Make sure the white plastic washer is back on
Drag lever back on, to the free spool position
Drag tension adjuster back in
Spool shaft screw back in
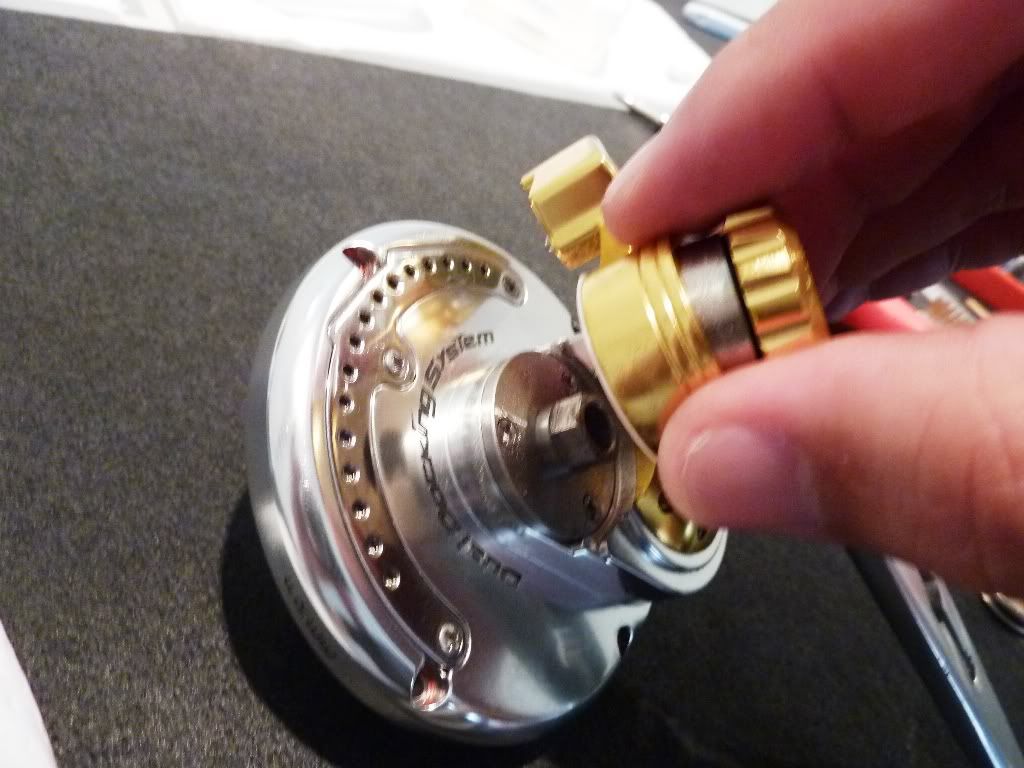
Put the cap back on
Take the housing with the re greased bearing and slide back on to the spool/drive assembly
Finally housing and drive assembly back together
Screws back in
And done..
So, you can see I didn't take out the handle bearing (6mm x 10mm x 3mm) but I did add a bit of Inox to it,
I think the reels are great, had a few Yellow Tail Kingfish on it the last time I was home.. The key to a well performing reel is simply regular maintenance, I had a Silstar baitrunner (used to be the cheap version of the Shimano baitrunners at the time) for 10 years before the CAST main gear cracked,
Anyway, hope it all made sense - apologise for the description of some of the parts, I just call em what I think they are...if you have any questions just let me know..
I have 2 JM reels, a PE3 and a PE5N..The PE3 is on a custom built 150 (CTS) and a the PE5 sits on a 350 (CTS) both built by Kieron at Reel Rods back in NZ - this is the PE5N
Remove the 4 main body screws to separate the drive from the housing
Separate the body, I work on the housing first
Inside the housing you will see the plastic tension ring for the clicker held in by 2 countersunk screws and the bearing
Take out the 2 screws and the tension ring will pop out
Remove the bearing (6mm x 15mm x 5mm). I clean this one and re-grease it, usually clean them in white spirit and then soak them in Inox before adding grease...seems to work fine particularly if you service your reels frequently. Once everything is out of the housing I run the brush around with a bit of grease
I remove the gear plate cover, I should say now that like many others I add grease or Inox to all the screws prior to putting them back in. Also, you will see in the picture that the plate is countersunk on on side only..so easy to see if its upside down
Next I will remove the reel foot
Once that is off I grease the surface between the body and seat, including the screws
We will start putting the housing back together, you can see in the photo below that the seat is designed to sit on the body one way only..keeps it simple
Put the gear plate cover back on, screws should be flush with the plate
This is the bottom side of the tension ring, the other side is countersunk for the screws
Topside
Pop that back in, a bit fiddly lining up the clicker and replace the screws
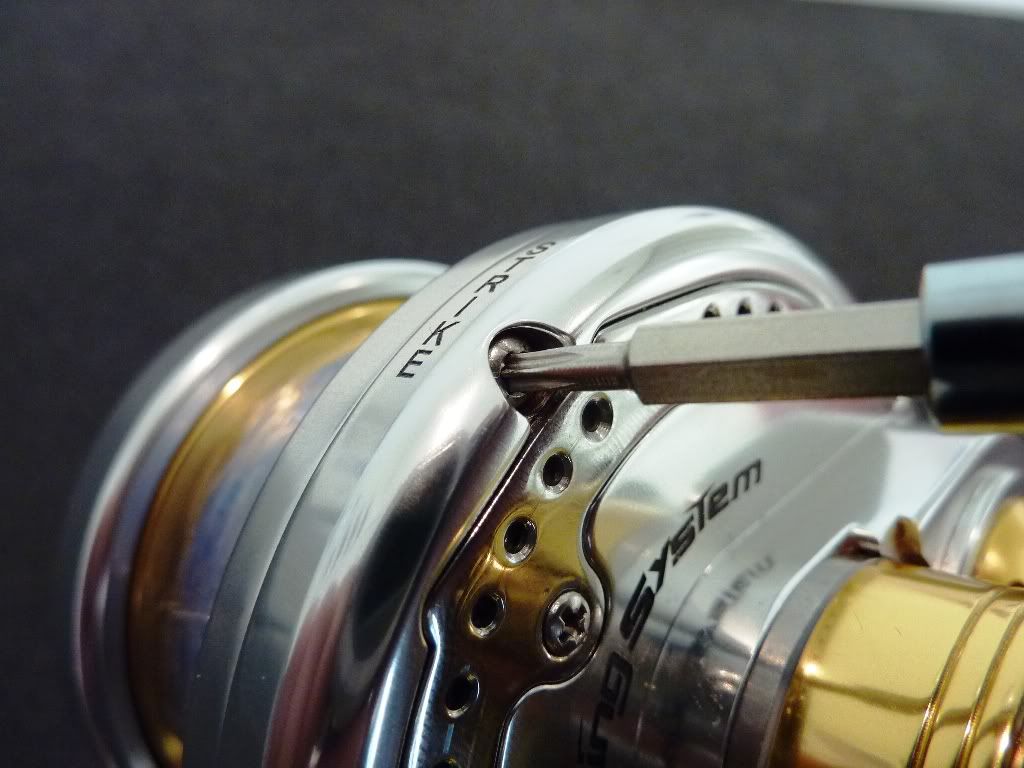
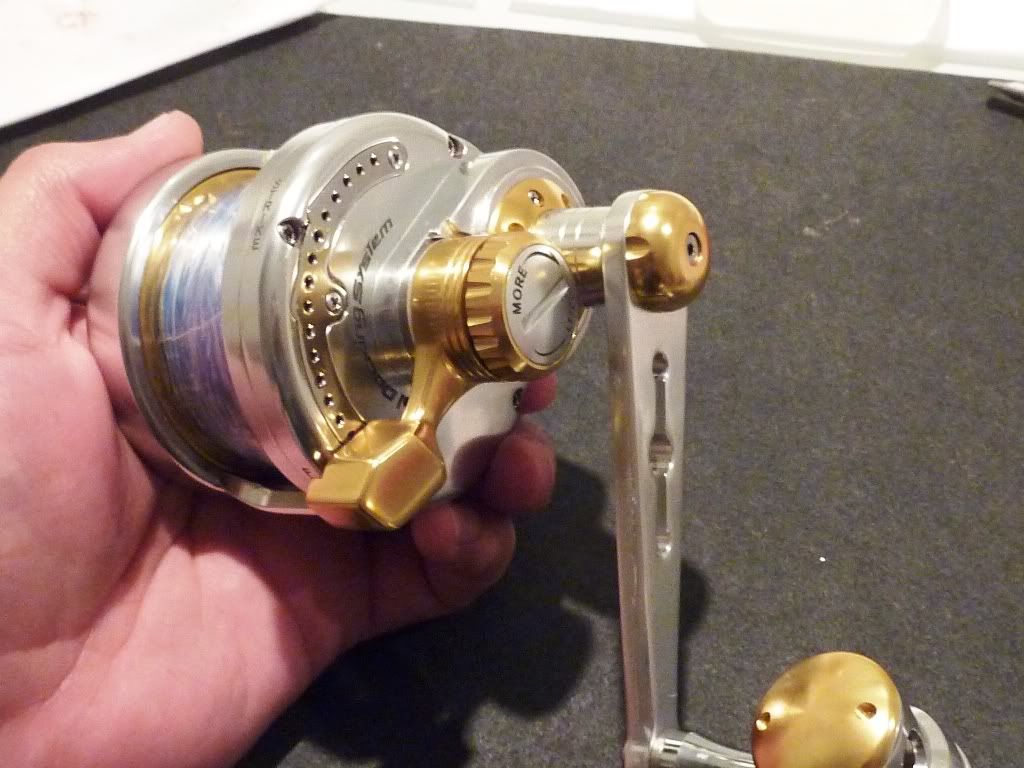
I'll put the housing to the side for now and work on the drive side, I use a coin to remove the drag adjustment cap
Once the cap is off I wind the tension up and push the drag lever to the strike position and remove the shaft screw
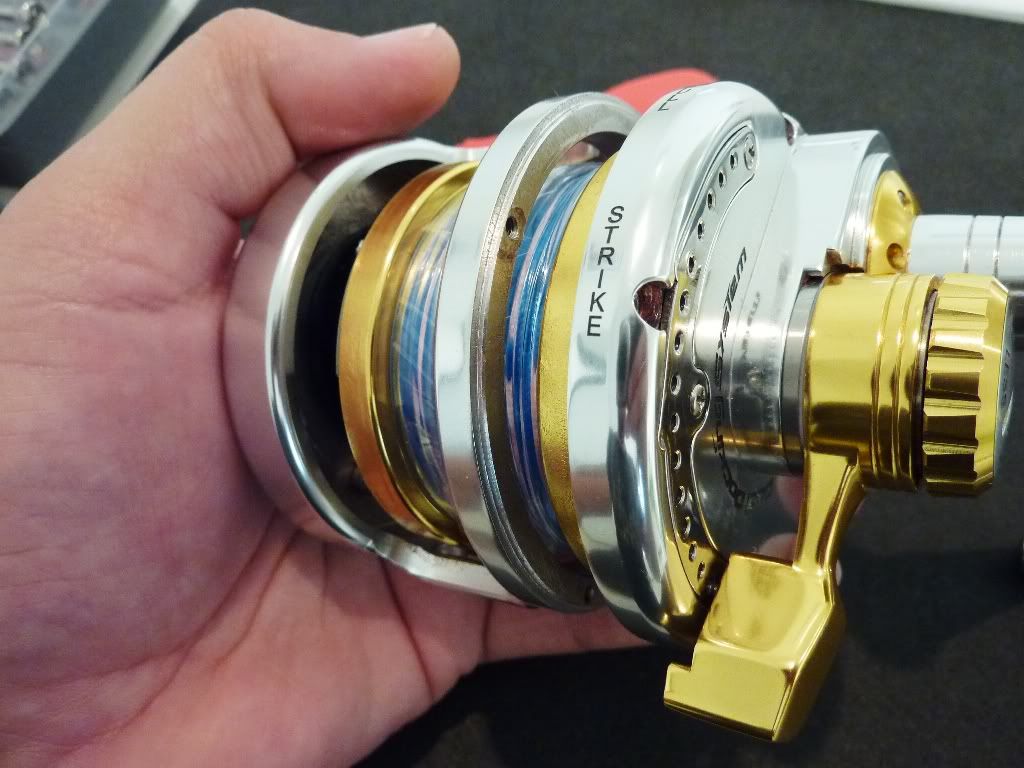
Then remove the spool from the drive gear
I'll remove the drag lever and tension set
Split the washer, drag lever and tension set
I'll unscrew the tension set and clean
Flick it over and remove the locking wire
Remove the bearing (6mm x 17mm x 6mm), I clean this one up too
I run the brush around the inside with a light coat of grease
I place the re greased bearing back in, grease the drag lever and put that assembly to the side
Start to breakdown the gear and handle assembly, remove the handle shaft cap
Remove the locking ring
Unscrew the shaft nut
Remove the handle and the 2 washers, plastic washer should be on the shaft housing
Flip the housing over and remove the main gear plate, can be tight if its not been off before..they need to grease the threads
Once off, slide the shaft out and remove the main gear including the white plastic washer
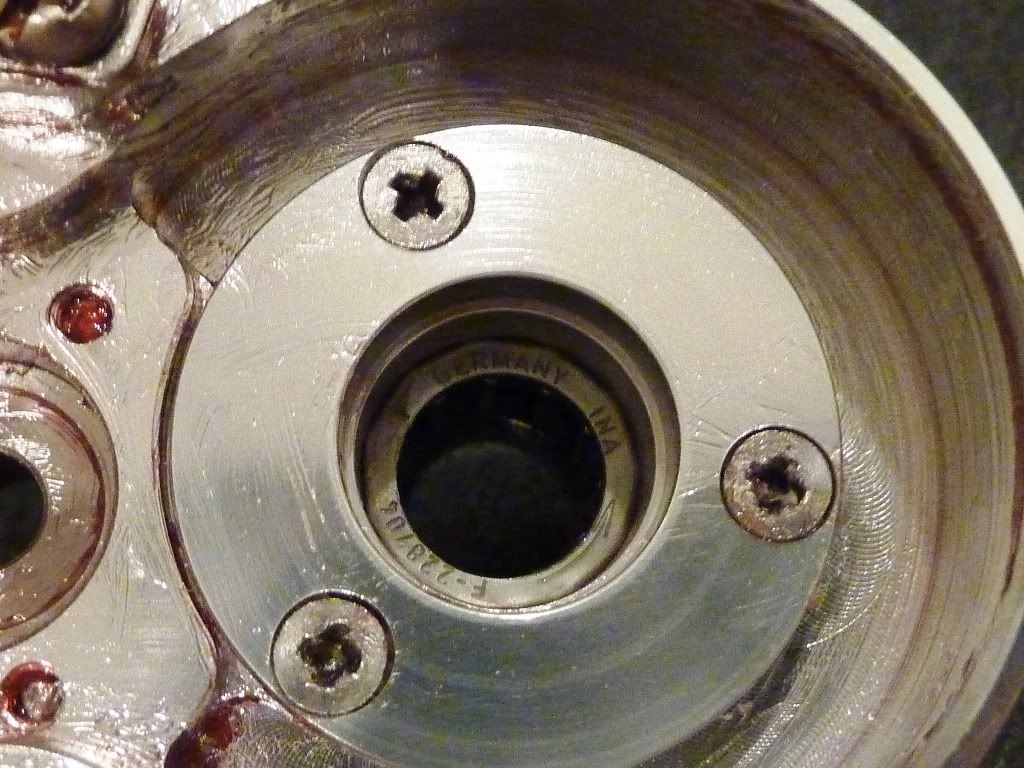
Remove the bearing (10mm x 15mm x 4mm) from the housing
Now I remove the 3 screws holding the shaft housing (containing the one way bearing)...need to grease these screw threads!!
Turn the main assembly over and remove the shaft bearing (10mm x 15mm x 4mm)
Remove the support ring from the housing (2 screws)
Whilst I am there I remove the spool/drag shaft plate to remove the bearing (6mm x 17mm x 6mm)
Pop the bearing out, clean and re grease and start to remove the gear shaft
Once the gear shaft is out I check the one way bearing
I remove the drag stop and then clean and grease both sides of the plate
Drop of oil to the pawls
Finally can start putting it back together, drag stop back on and re insert the shaft housing
Shaft support ring back on
Spool/drag shaft plate back on
Turn over and replace the re greased bearing
Gear and gear plate back together..don't forget to grease threads
Gear, washer and bearing back in..watch the edges of the shaft and the one way bearing..
Gear back in..
Turnover and replace the 2 shaft washers, plastic on first
Handle back on, shaft screw back in and then the locking ring
Put that assembly to the side and start on the spool, remove the drive side drag plate
Turnover and remove the plastic retainer (4 screws) and remove the drag plate and shaft
Remove the spring if it hasn't come off already, will be one either side
Remove the bearings (6mm x 15mm x 5mm) from either side, I clean these and oil
Remove the locking wire and remove the drag washer
Once the washers are removed I clean and lightly grease the spool
I clean up the drag plate and check for any problems
Re grease the drag washers and replace, don't forget the locking wire
Replace the spool bearings/drag plate and shaft, don't forget the spring for either side
Screw the plastic retainer plate back on
Make sure that the bearing spacer/sleeve goes back in before you put the spool bearing and top drag plate back on
Place the spool assembly back into the drive assembly
Make sure the white plastic washer is back on
Drag lever back on, to the free spool position
Drag tension adjuster back in
Spool shaft screw back in
Put the cap back on
Take the housing with the re greased bearing and slide back on to the spool/drive assembly
Finally housing and drive assembly back together
Screws back in
And done..
So, you can see I didn't take out the handle bearing (6mm x 10mm x 3mm) but I did add a bit of Inox to it,
I think the reels are great, had a few Yellow Tail Kingfish on it the last time I was home.. The key to a well performing reel is simply regular maintenance, I had a Silstar baitrunner (used to be the cheap version of the Shimano baitrunners at the time) for 10 years before the CAST main gear cracked,
Anyway, hope it all made sense - apologise for the description of some of the parts, I just call em what I think they are...if you have any questions just let me know..
Title: Re: Jigging Master PE5N
Post by: Bryan Young on June 18, 2011, 04:23:45 PM
Post by: Bryan Young on June 18, 2011, 04:23:45 PM
Very nice Clem. Those are good looking reel. You really ought to try open those spool bearing up, clean them completely out, then lube with a lite viscosity lubricant. Your free spool times will amaze you, allowing your jigs to drop faster into the abis.
Title: Re: Jigging Master PE5N
Post by: kamuwela on June 18, 2011, 07:26:32 PM
Post by: kamuwela on June 18, 2011, 07:26:32 PM
great job thank's a million.
Title: Re: Jigging Master PE5N
Post by: mackereljoe on June 18, 2011, 08:08:16 PM
Post by: mackereljoe on June 18, 2011, 08:08:16 PM
That's a very nice reel. Well done and thank you for sharing.
Title: Re: Jigging Master PE5N
Post by: basto on June 18, 2011, 09:24:56 PM
Post by: basto on June 18, 2011, 09:24:56 PM
Great job Clem. I have this reel and a PE8, so this will be a very handy reference for me. Beautiful reels! Thank you.
Title: Re: Jigging Master PE5N
Post by: wallacewt on June 19, 2011, 01:03:04 AM
Post by: wallacewt on June 19, 2011, 01:03:04 AM
hi clem. nice photos,you made it look very easy.good job.
freespool and drag pressure?
likes and dislikes?
freespool and drag pressure?
likes and dislikes?
Title: Re: Jigging Master PE5N
Post by: Alto Mare on June 19, 2011, 01:50:17 AM
Post by: Alto Mare on June 19, 2011, 01:50:17 AM
I like the way you use those tweezers, are you a Doctor by any chance? ;D
Very nice job, thanks for sharing.
Very nice job, thanks for sharing.
Title: Re: Jigging Master PE5N
Post by: Clem on June 19, 2011, 05:00:57 AM
Post by: Clem on June 19, 2011, 05:00:57 AM
Bryan, I'll try that..I will get some spare bearings first..
The free spool prior was around 40 sec, after it was approx 2 mins, which is not bad as Inox is quite heavy compared to the high speed oils..Haven't measured the drag as I don't have my scale with me but will update if I can..
Likes:
Appear to be well made
Powerful for their respective size, solid build
Dual drag is awesome the PE5N is spooled with PE5 (78lb), I use Varivas 140lb leader, the heaviest fish I have had on it was a 20kg Kingi...was a decent fight and everything worked perfectly..
Dislikes:
None really, the availability was a bit slow initially but thats improved now..most of the charter boats at home or the boats targeting kingfish use them
Title: Re: Jigging Master PE5N
Post by: wallacewt on June 19, 2011, 08:33:54 AM
Post by: wallacewt on June 19, 2011, 08:33:54 AM
i looked up the stats and 35/60lb drag.very impressive.
Title: Re: Jigging Master PE5N
Post by: Roger on June 19, 2011, 12:47:15 PM
Post by: Roger on June 19, 2011, 12:47:15 PM
Very good job Clem, those JM's are real popular with the jigging crowd......
Title: Re: Jigging Master PE5N
Post by: alantani on June 23, 2011, 05:30:32 PM
Post by: alantani on June 23, 2011, 05:30:32 PM
very nicely done. i have found that a hard piece of plastic works sometimes in place of a coin and will not leave tool marks. we also need to get you a bearing packer for the non-spool bearings. if you have notes or a second chance to open up another reel, can you let us know what the dimensions of the bearings are. that is a very common question. thanks you very much. could you also send me a pm with your address? i'd like to mail something to you. alan
Title: Re: Jigging Master PE5N
Post by: hafnor on June 24, 2011, 09:25:37 AM
Post by: hafnor on June 24, 2011, 09:25:37 AM
Those JM reels are just beautiful. I see already improvements made on this reel from the 09/10 models. the reel foot is mounted directly to the house and the drag shield had another colour... HMM wonder why
Title: Update - One way roller, Germany?
Post by: Clem on June 26, 2011, 06:45:14 AM
Post by: Clem on June 26, 2011, 06:45:14 AM
Just a quick update - I just assumed the bearings would be from Asia? obviously not....From INA, this is actually the PE3
Title: Re: Jigging Master PE5N - Updated to incl bearing sizes
Post by: Black Widow Tackle on August 29, 2011, 01:21:30 PM
Post by: Black Widow Tackle on August 29, 2011, 01:21:30 PM
Can the dual drag reel be used with out the dual drag and only the standard single drag?
Title: Re: Jigging Master PE5N - Updated to incl bearing sizes
Post by: hafnor on September 01, 2011, 01:28:35 PM
Post by: hafnor on September 01, 2011, 01:28:35 PM
Yes, very easily! just remove the washer and the metal washer. since the infrigment with accurate's patent on twin drag all American dealers will sell the JM reels as a single drag config.
Title: Re: Jigging Master PE5N - Updated to incl bearing sizes
Post by: chopsticks on January 28, 2012, 11:12:45 AM
Post by: chopsticks on January 28, 2012, 11:12:45 AM
Outstanding tutorial Clem, with some of the best large clear pictures I've ever seen on a tutorial.
I work for BCS Enterprises Ltd, the New Zealand importer and distributor of Jigging Master reels. I service all our JM reels. They're very popular with the more experienced jiggers because of the outstanding drags, long reel arms and lower ratio of 4 to 1 (4.5 to 1 on the PE3 and PE4). The double AR pawls and strong AR bearing also give a degree of reliability under heavy drag pressure that is missing in most other brands.
We use a light coating of Cal's grease on the carbontex drag washers, on the drag surface and underneath the drag washer also. Prior to shipping a reel to a customer we dismantle the reel arm T-Bar and apply Inox M8 to the T-Bar shaft where it slides into the T-Bar itself. This is very important because saltwater will eventually find it's way into this join and corrode it solid. Very difficult then to get the T-Bar off if it's bearing needs to be replaced.
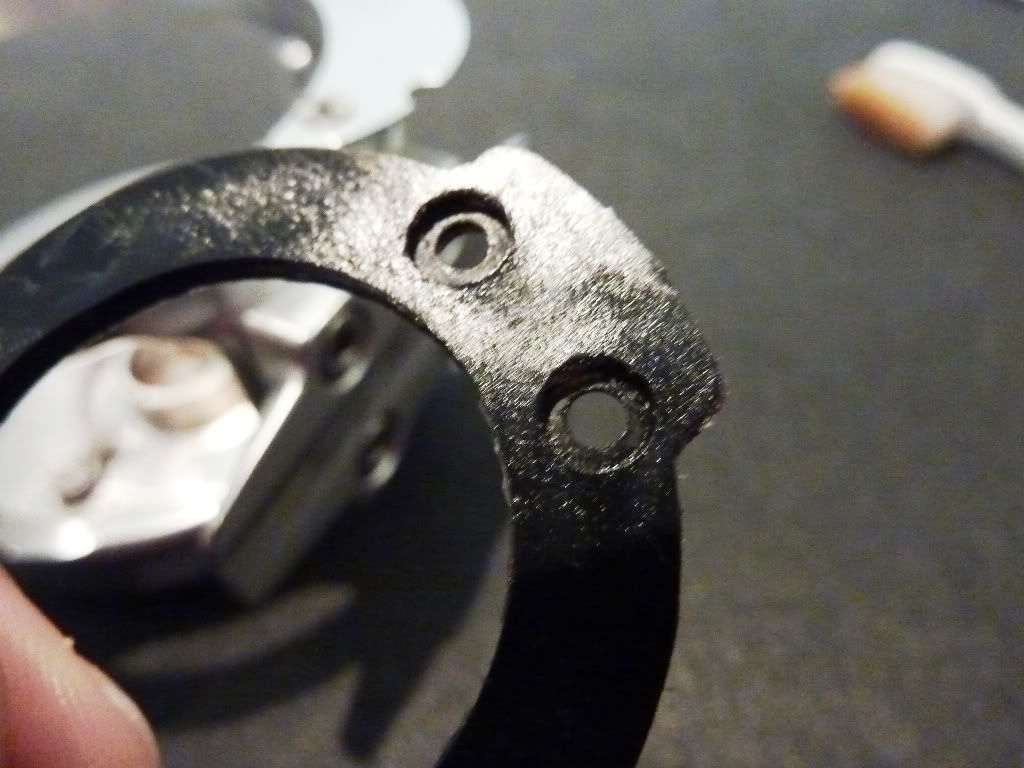
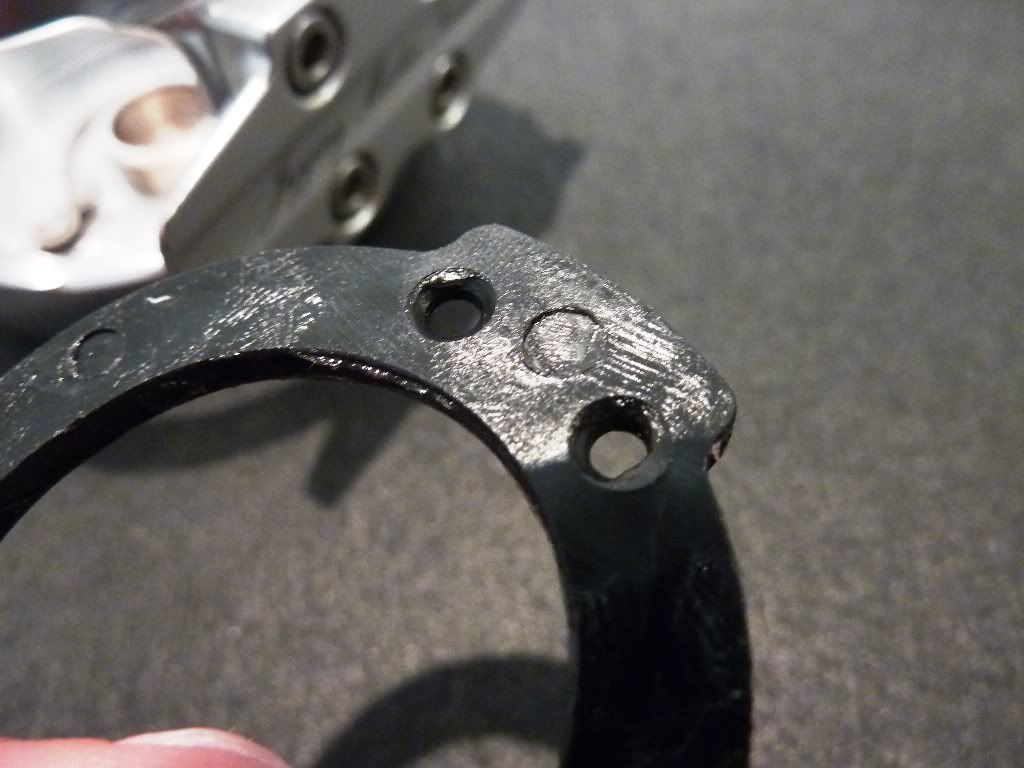
You'll notice that there are two large threaded holes in the spool (drive side) on the PE5N and larger reels. These show up clearly in the pictures above of the drag washer/spool. These two holes originally held two threaded housings with spring loaded steel balls which made contact with detents in the drive side drag plate when under load and gave a slight clicking sound. Trouble was they started in some cases to work loose (unwind) and would jam the reel solid. Not nice when out fishing. When this happened we removed them from all new reels prior to shipment and thankfully JM no longer install these little clickers but the holes remain. There is a similar ball clicker underneath the tip of the drag lever shown in picture #19 from the top which should be oiled with Corrosion X or similar at service time.
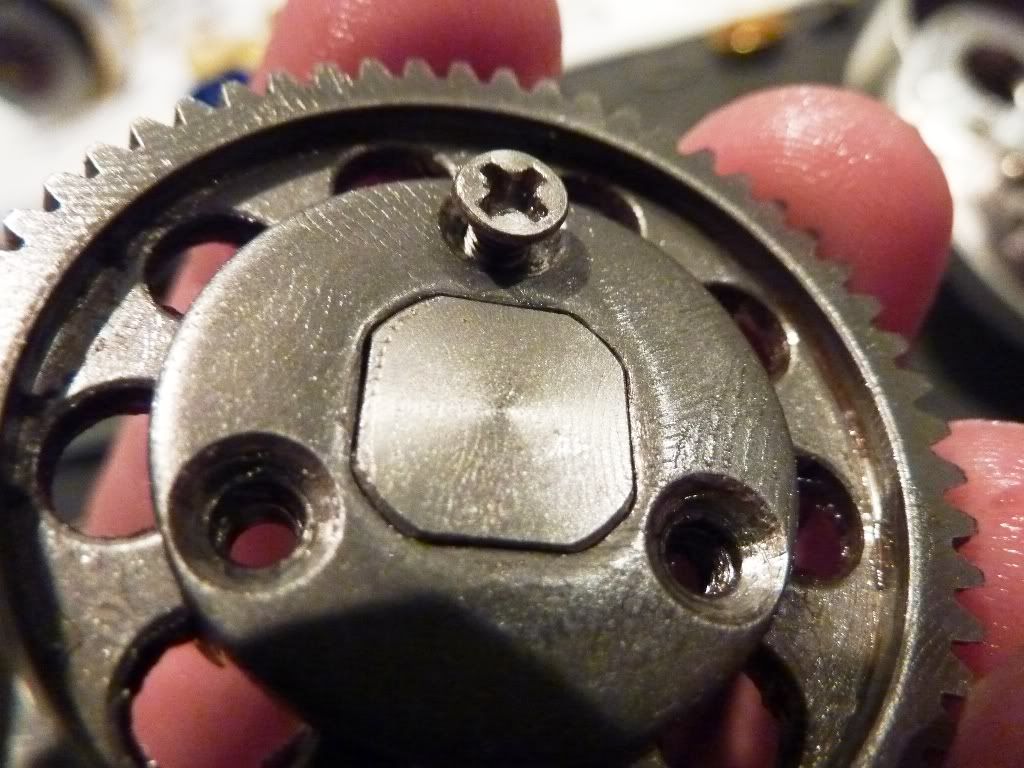
The JM PE3, PE4 and PE5N have a machined reel foot as shown in the above pictures. The JM PE5, PE6, PE7 and PE8 have the pressed stainless reel feet. The plastic drag shield referred to is not actually a drag shield but a gear for the reel clicker. They have changed colour on some reels but not on all of them. Some are still black.
I work for BCS Enterprises Ltd, the New Zealand importer and distributor of Jigging Master reels. I service all our JM reels. They're very popular with the more experienced jiggers because of the outstanding drags, long reel arms and lower ratio of 4 to 1 (4.5 to 1 on the PE3 and PE4). The double AR pawls and strong AR bearing also give a degree of reliability under heavy drag pressure that is missing in most other brands.
We use a light coating of Cal's grease on the carbontex drag washers, on the drag surface and underneath the drag washer also. Prior to shipping a reel to a customer we dismantle the reel arm T-Bar and apply Inox M8 to the T-Bar shaft where it slides into the T-Bar itself. This is very important because saltwater will eventually find it's way into this join and corrode it solid. Very difficult then to get the T-Bar off if it's bearing needs to be replaced.
You'll notice that there are two large threaded holes in the spool (drive side) on the PE5N and larger reels. These show up clearly in the pictures above of the drag washer/spool. These two holes originally held two threaded housings with spring loaded steel balls which made contact with detents in the drive side drag plate when under load and gave a slight clicking sound. Trouble was they started in some cases to work loose (unwind) and would jam the reel solid. Not nice when out fishing. When this happened we removed them from all new reels prior to shipment and thankfully JM no longer install these little clickers but the holes remain. There is a similar ball clicker underneath the tip of the drag lever shown in picture #19 from the top which should be oiled with Corrosion X or similar at service time.
Quote from: hafnor on June 24, 2011, 09:25:37 AM
Those JM reels are just beautiful. I see already improvements made on this reel from the 09/10 models. the reel foot is mounted directly to the house and the drag shield had another colour... HMM wonder why
The JM PE3, PE4 and PE5N have a machined reel foot as shown in the above pictures. The JM PE5, PE6, PE7 and PE8 have the pressed stainless reel feet. The plastic drag shield referred to is not actually a drag shield but a gear for the reel clicker. They have changed colour on some reels but not on all of them. Some are still black.
Title: Re: Jigging Master PE5N - Updated to incl bearing sizes
Post by: paal on January 28, 2012, 04:43:34 PM
Post by: paal on January 28, 2012, 04:43:34 PM
Nice job! Nice reel too :)
Title: Re: Jigging Master PE5N - Updated to incl bearing sizes
Post by: basto on July 17, 2014, 05:04:05 AM
Post by: basto on July 17, 2014, 05:04:05 AM
I have put a few kilometres on my PE5n in the last 4 years and it is by far my most used reel for bait and jigging with 60 lb braid. At 570gms it is an ideal weight for me to hold all day.
With a gear ratio of 4:1 , it is so far, my ideal conventional reel for the jobs I use it for.
Parts availability? I will cross that bridge when I come to it, but don`t think it will be anytime soon. My reel is still very tight and operates perfectly.
The best advantage of a twin drag is that you get more drag for less pressure than on a single drag reel.