Title: John Baker 12 Tutorial
Post by: Bryan Young on May 30, 2011, 05:39:28 AM
Post by: Bryan Young on May 30, 2011, 05:39:28 AM
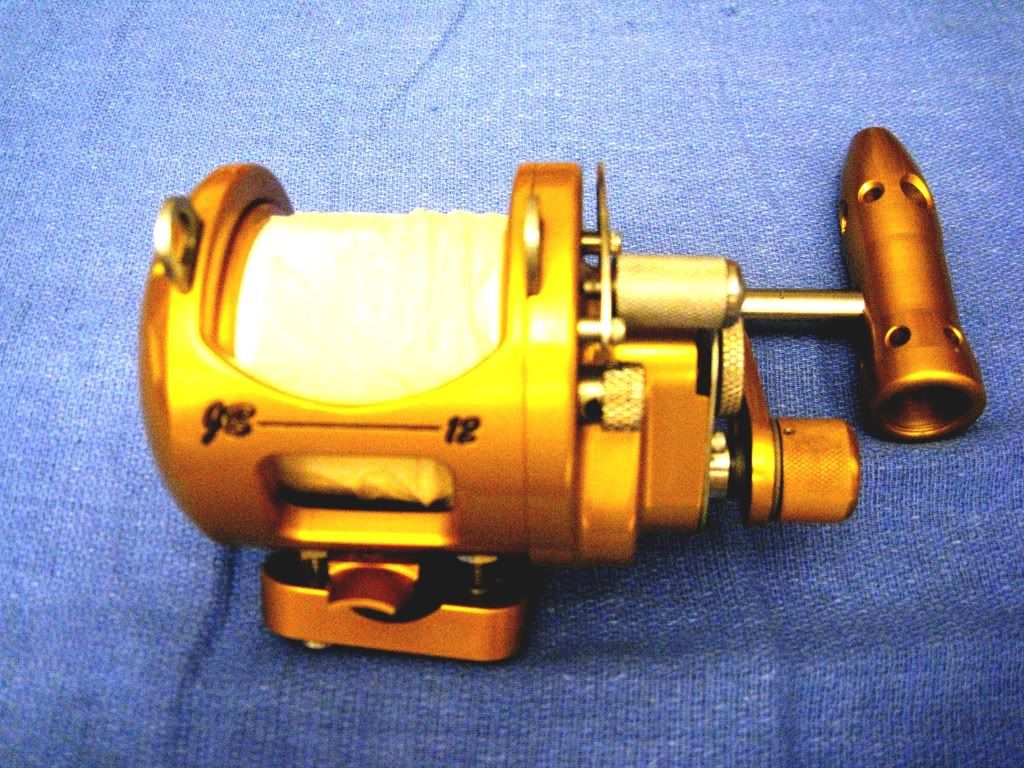
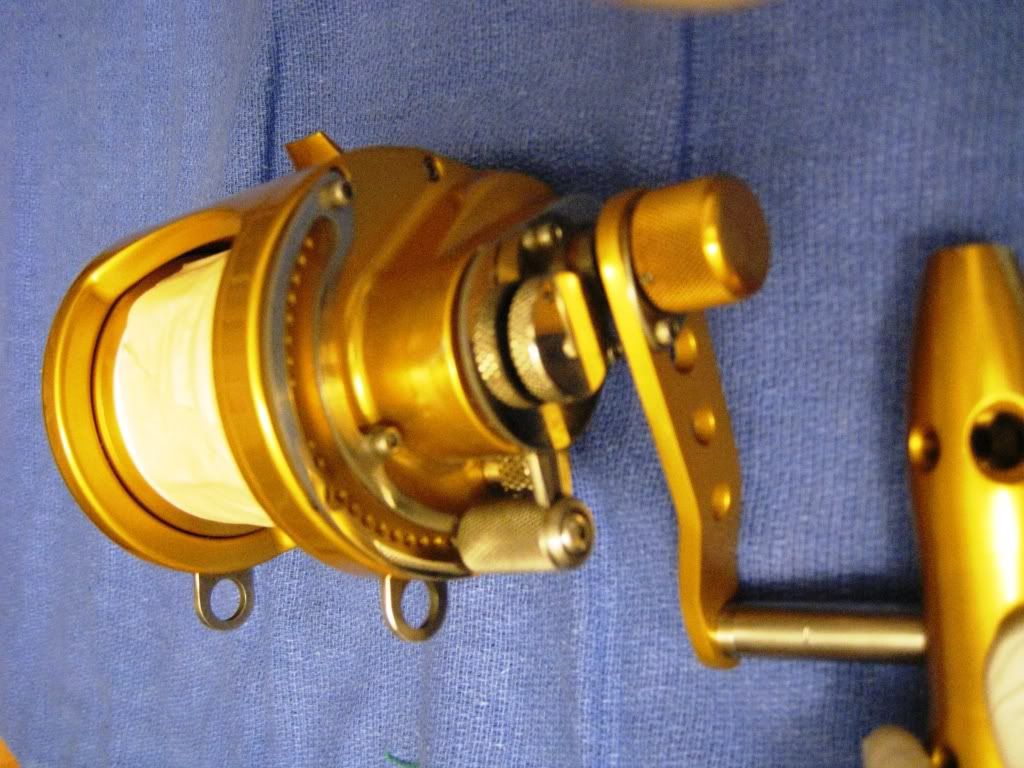
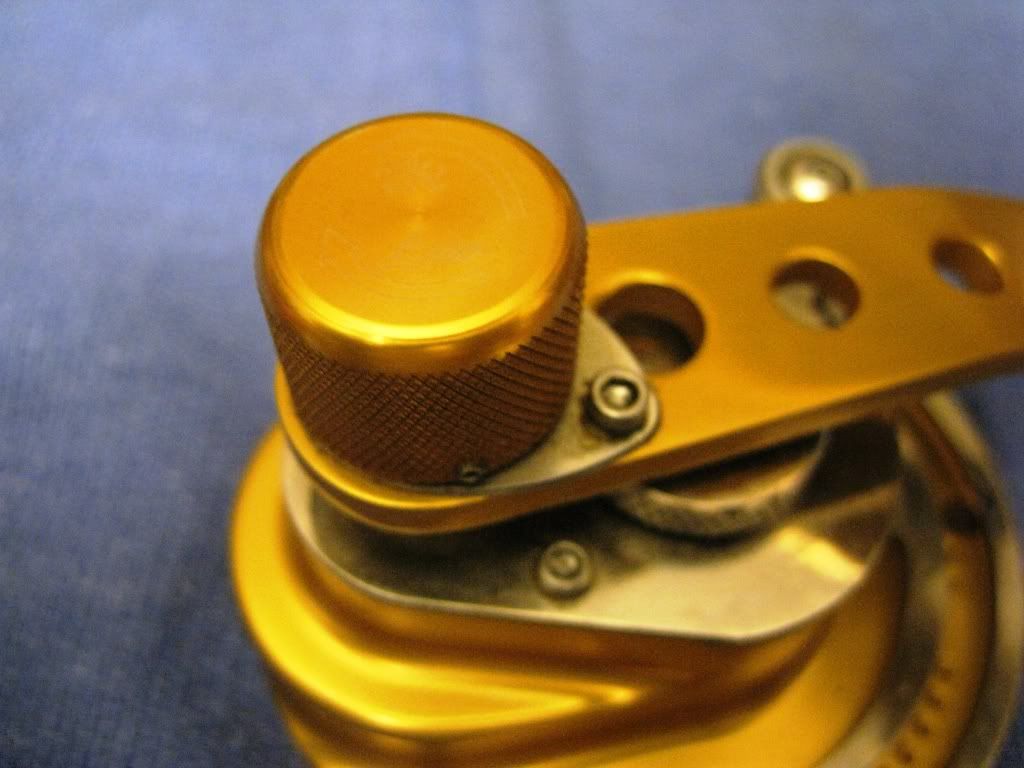
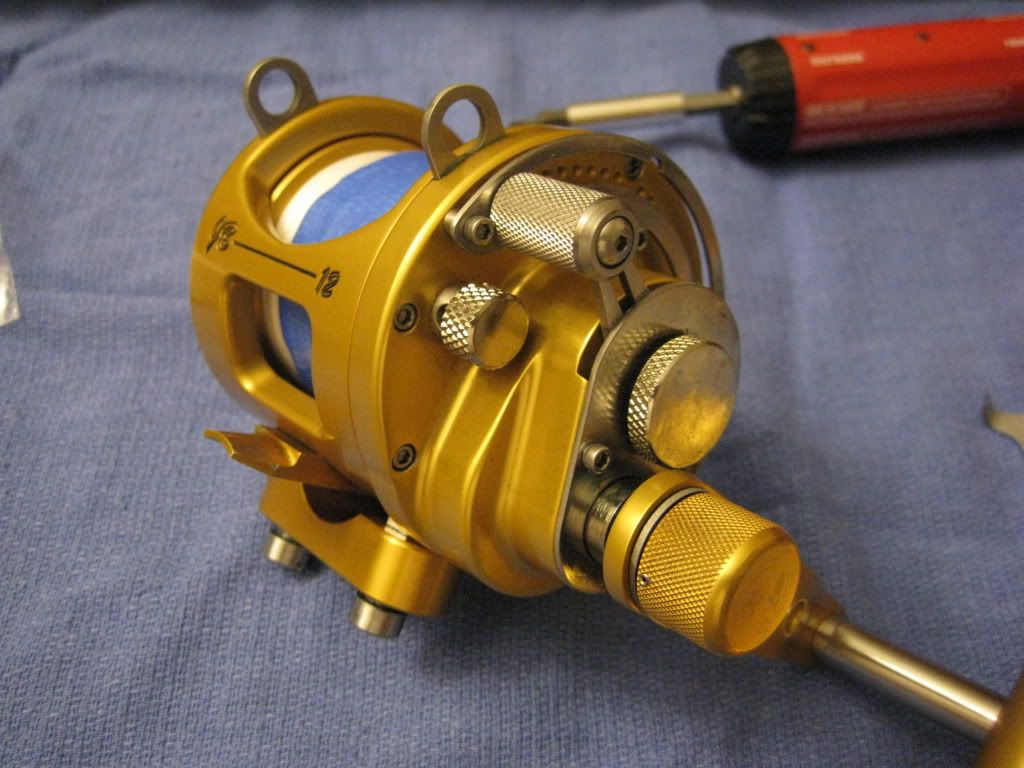
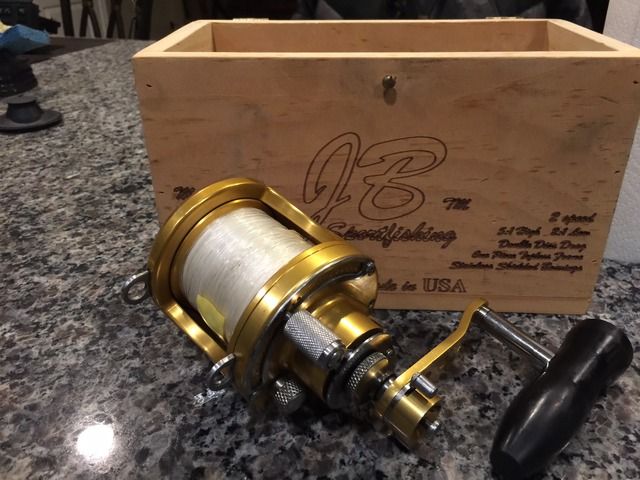
Hi Guys. Here is one beautiful reel. It's a John Baker 12, 2-speed, lever drag reel. It appears to be a common 2 speed lever drag reel, with a different 2-speed shift mechanism. As you can see, there is a knob instead of a common push button.
Sorry, I could not locate any schematics, so this tutorial will be filled with tons of photos. You'd better get something to eat and drink. It's going to be a long one.
Here she is. The John Baker 12, 2-speed, Lever Drag reel. As you can see, it's a 2-piece frame and side plate set up
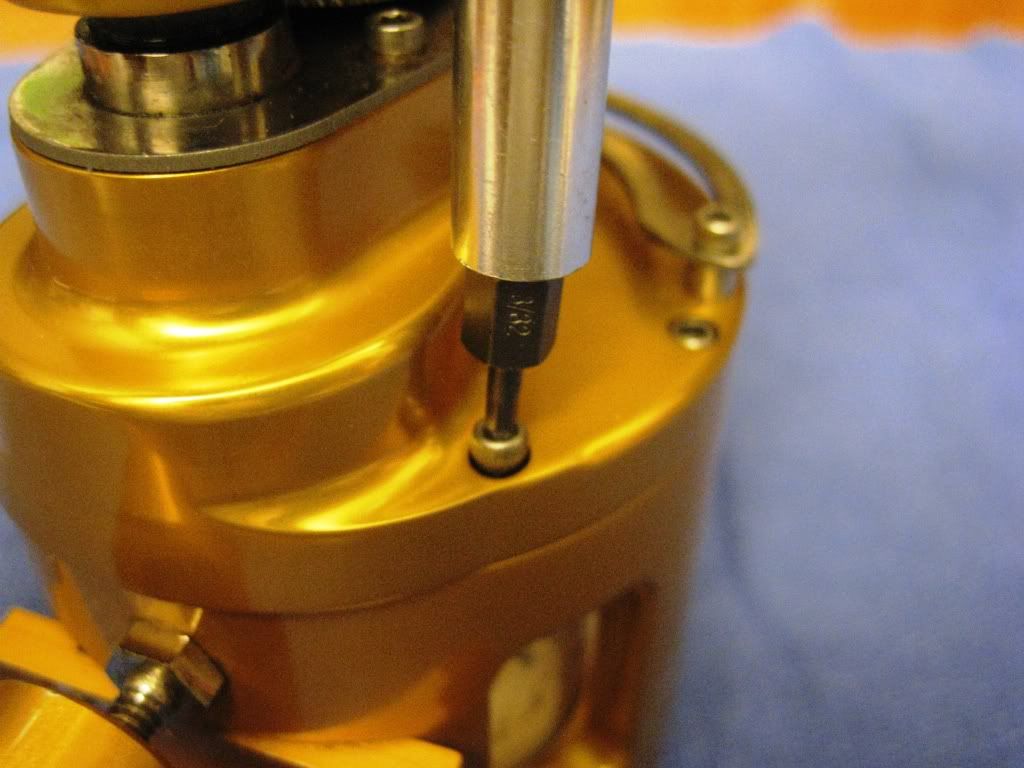
You will need a 3/32" allen wrench or bit to remove the side plate screws. The screws are of the same length, so not to worry about which screw goes where.
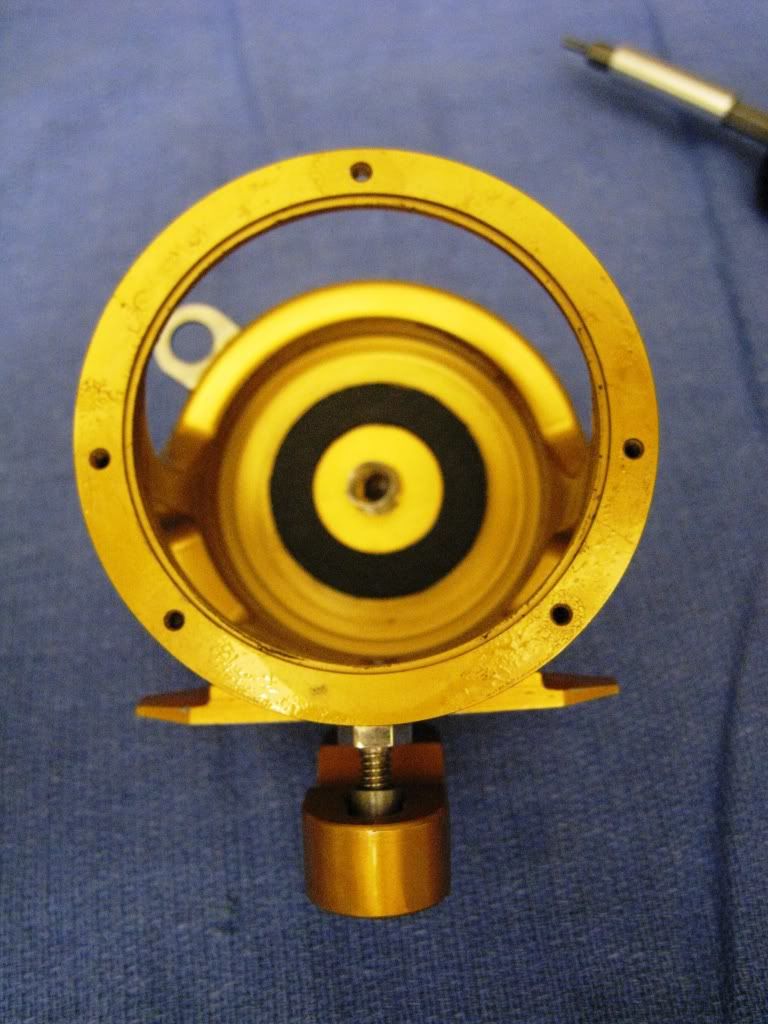
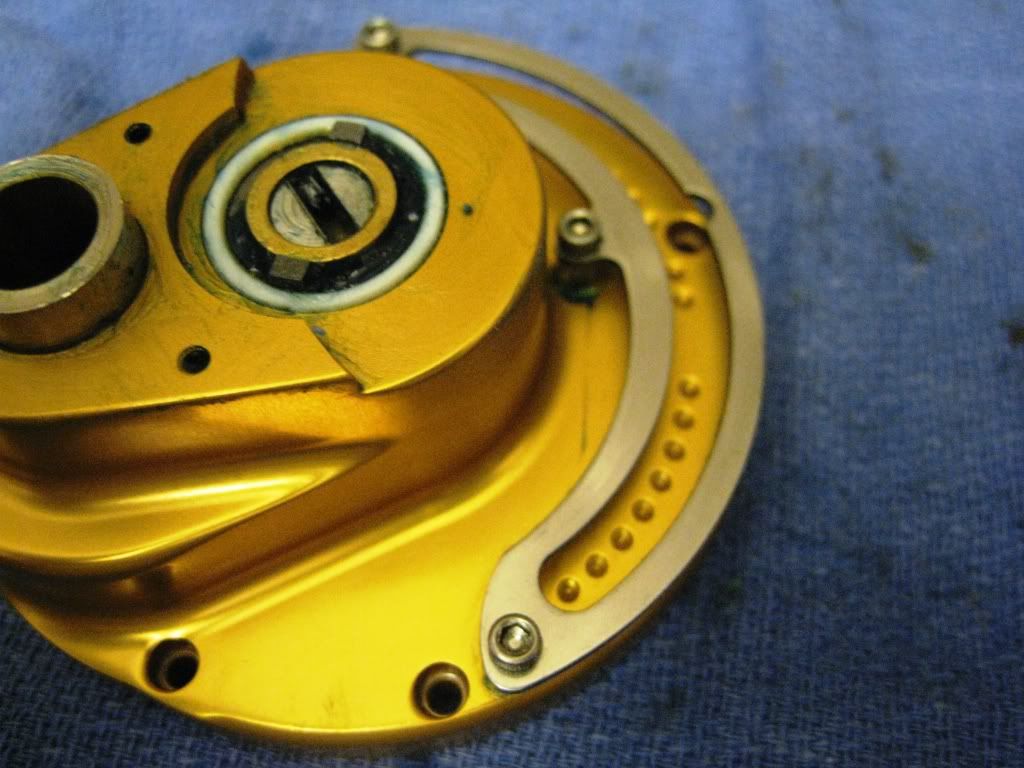
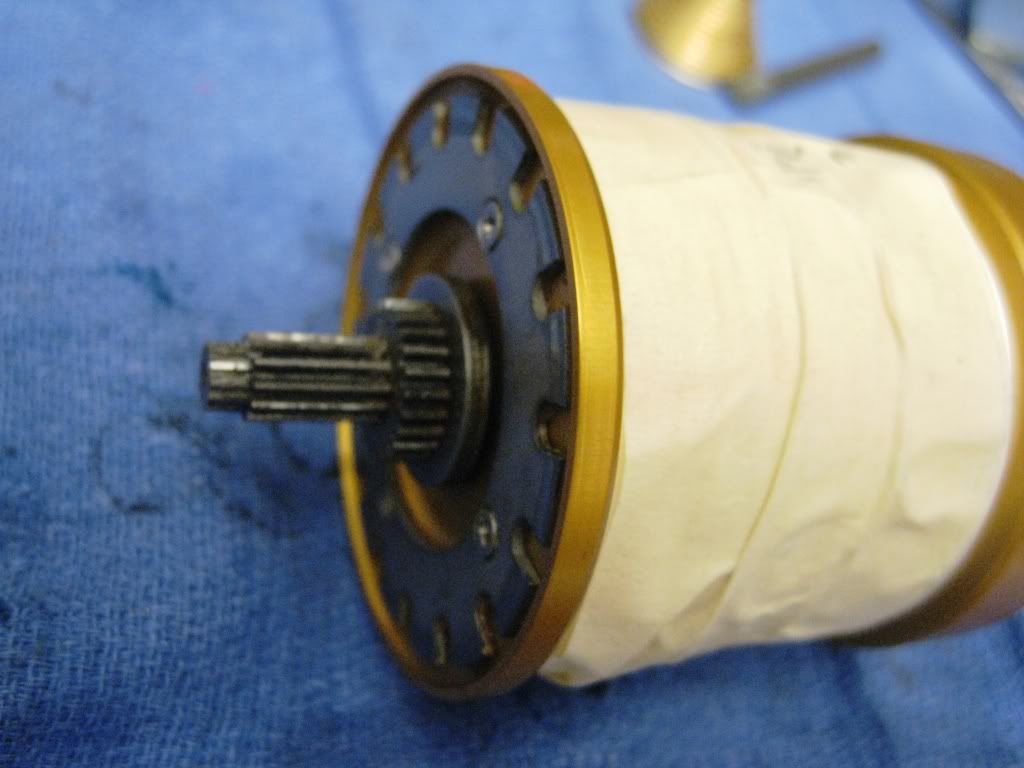
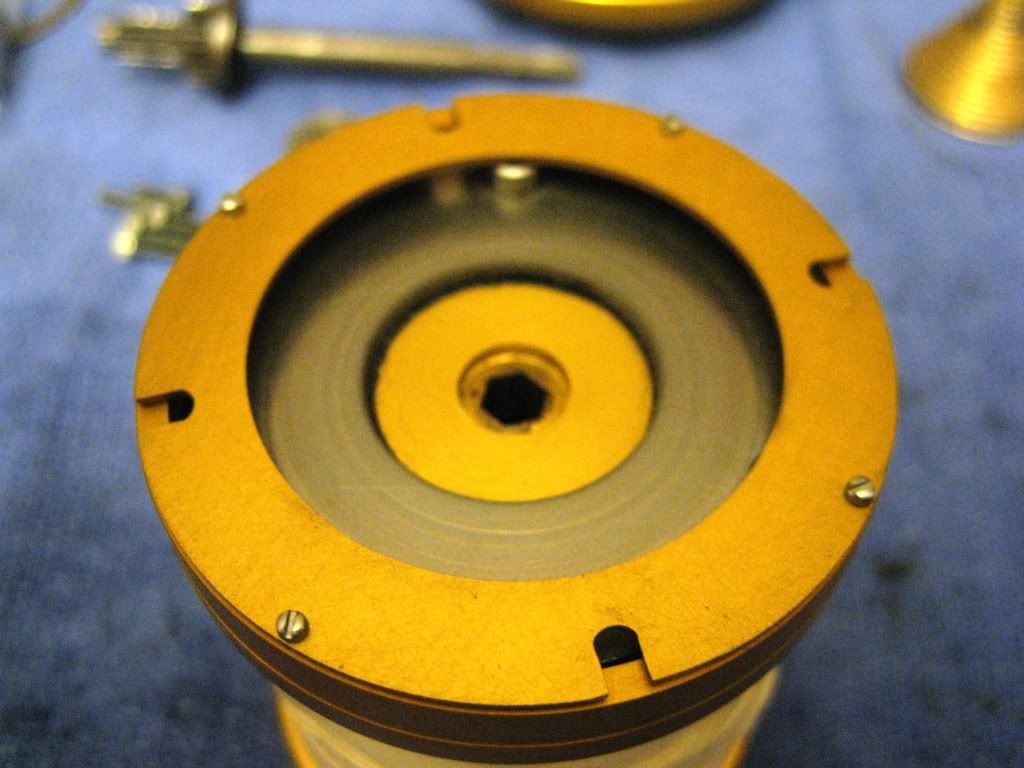
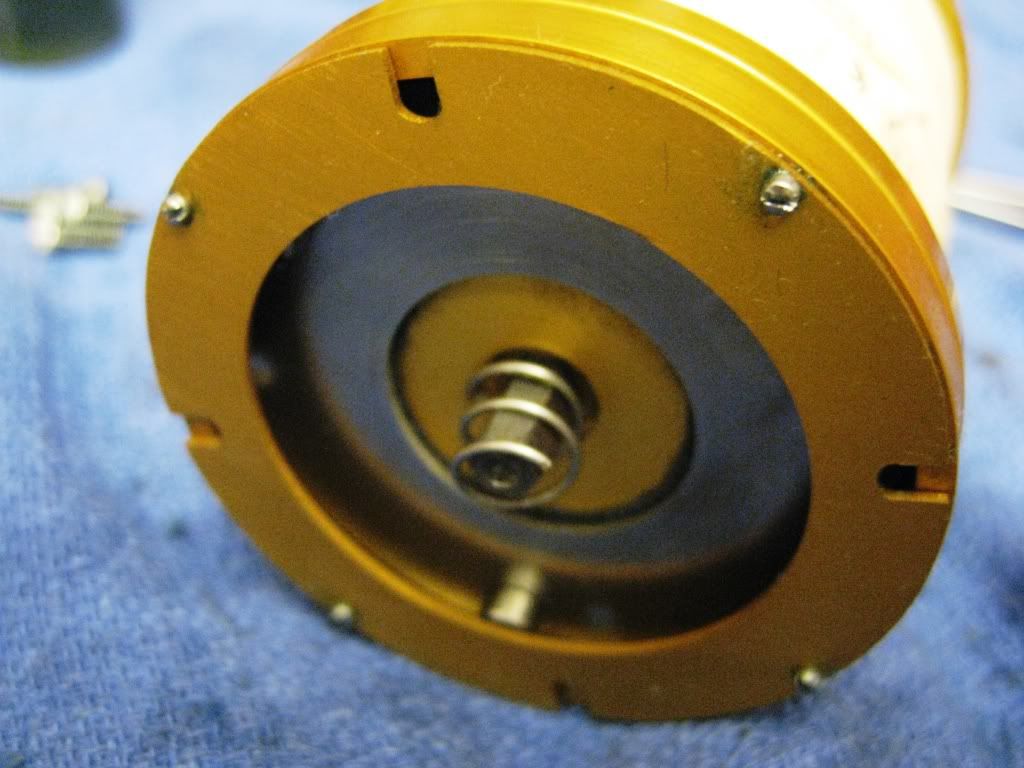
When you take off the side plate, you will see the clicker plate.

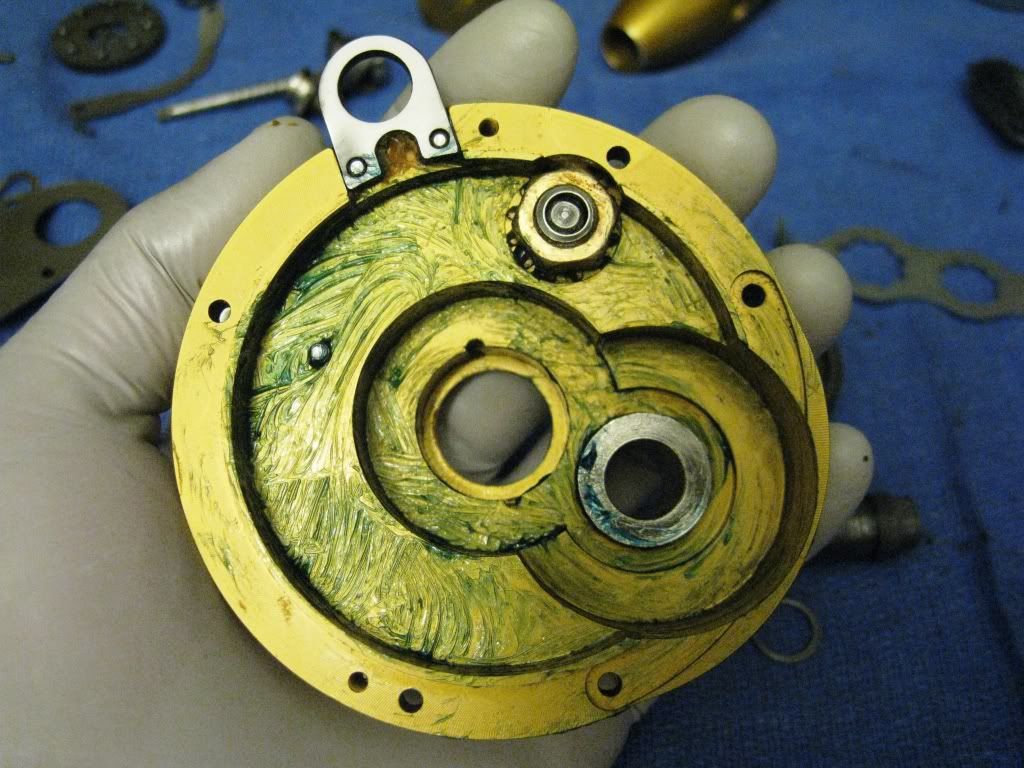
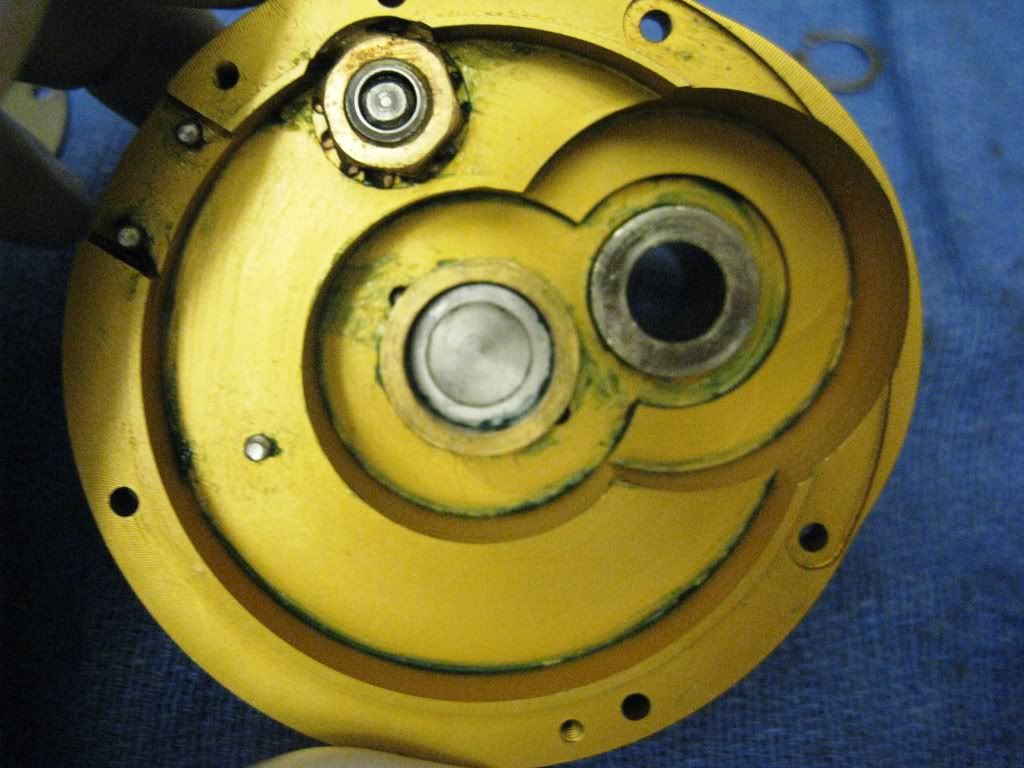
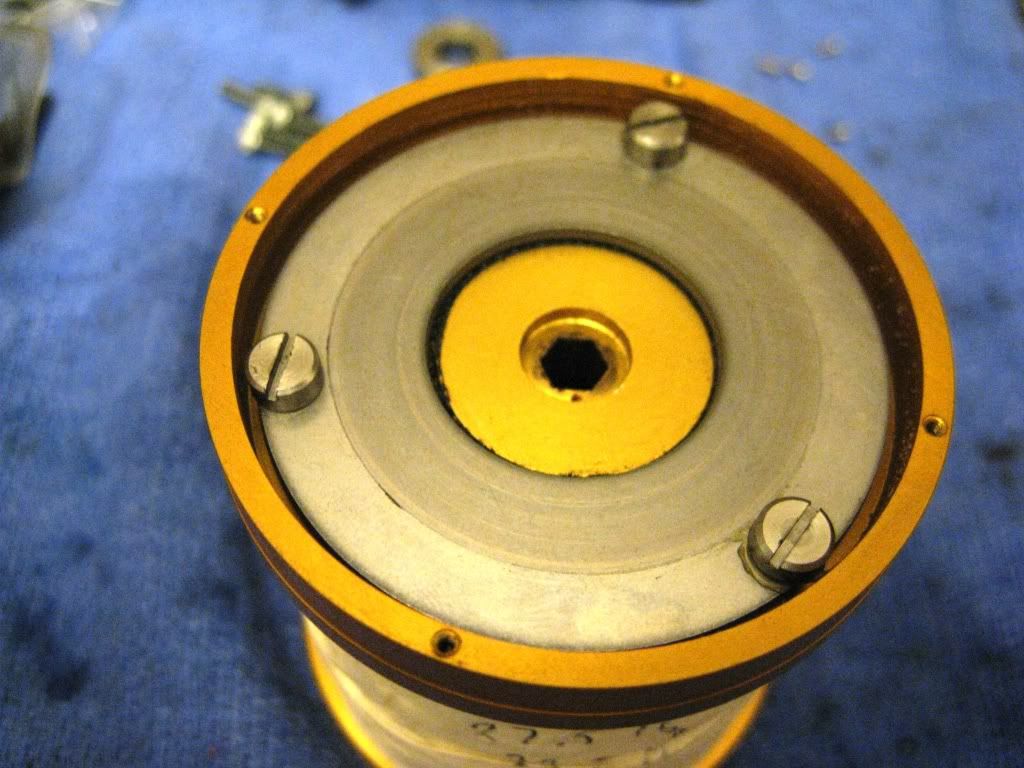
Pull out the spool to expose what is on the left side mounted on the frame.
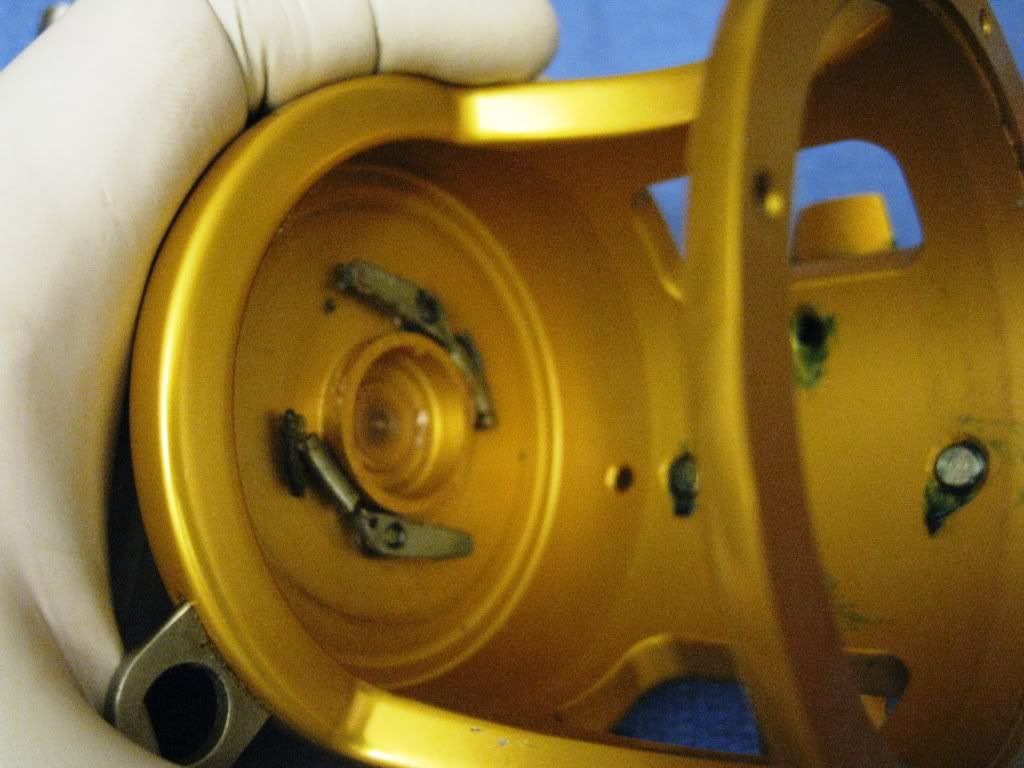
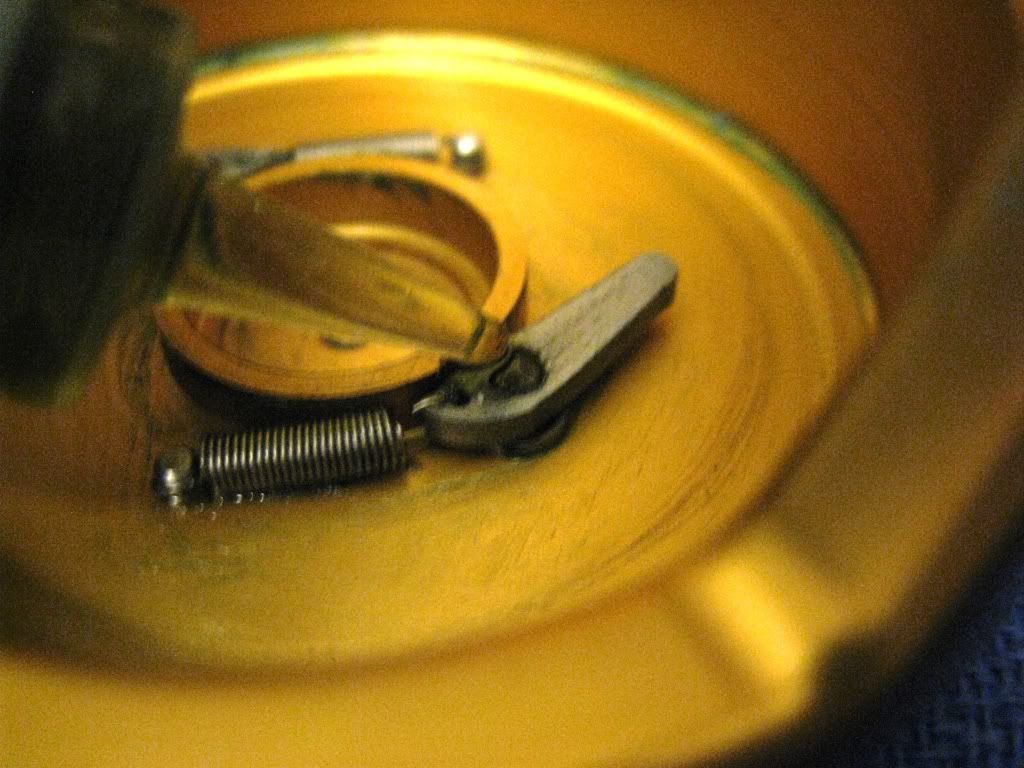
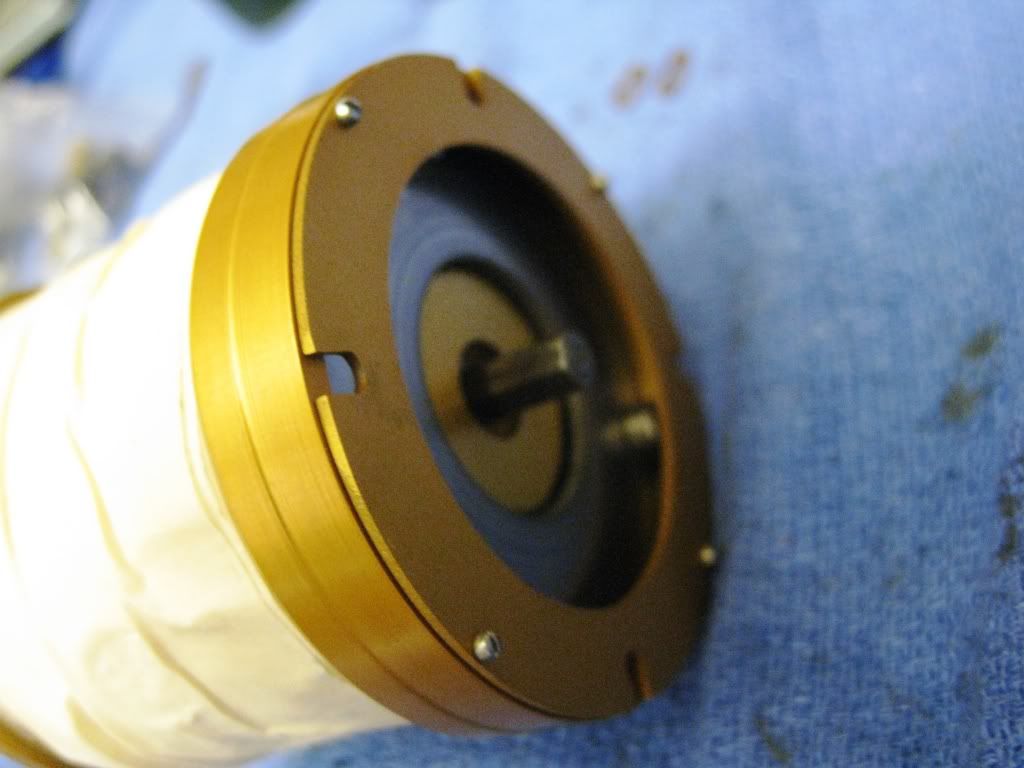
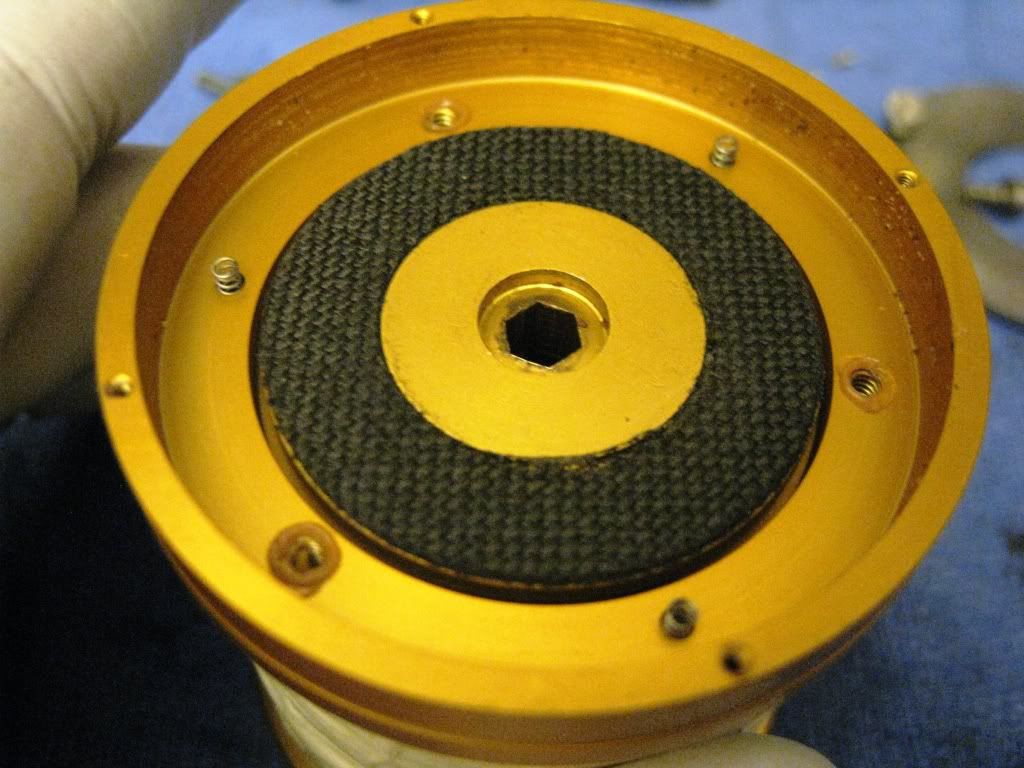
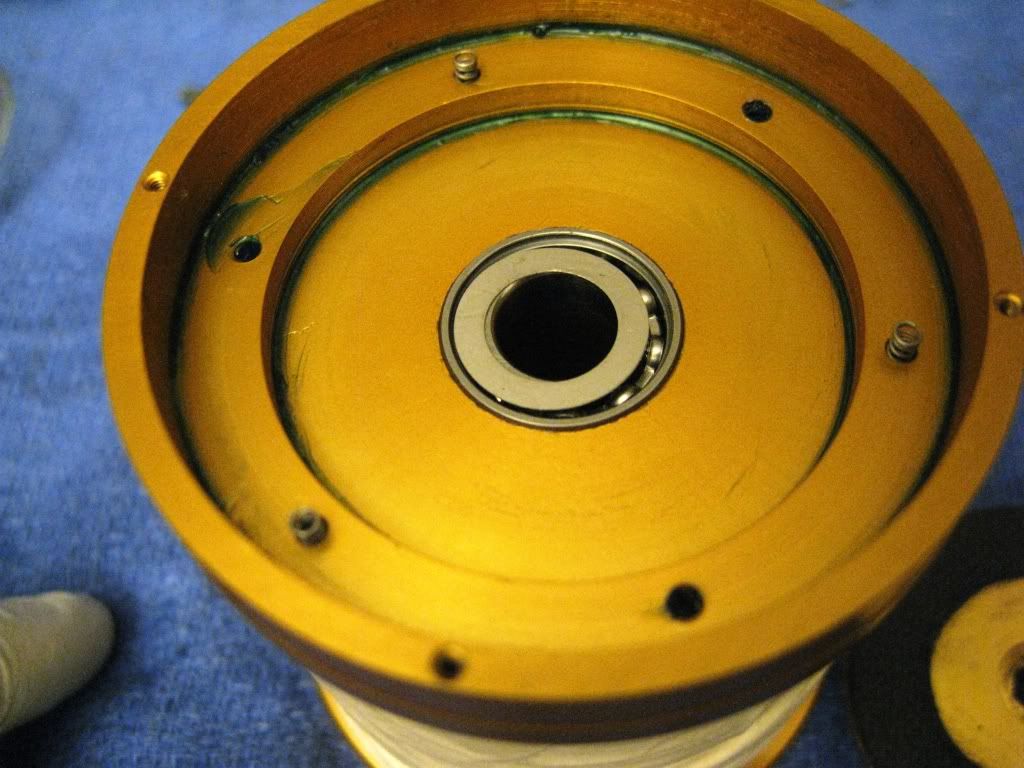
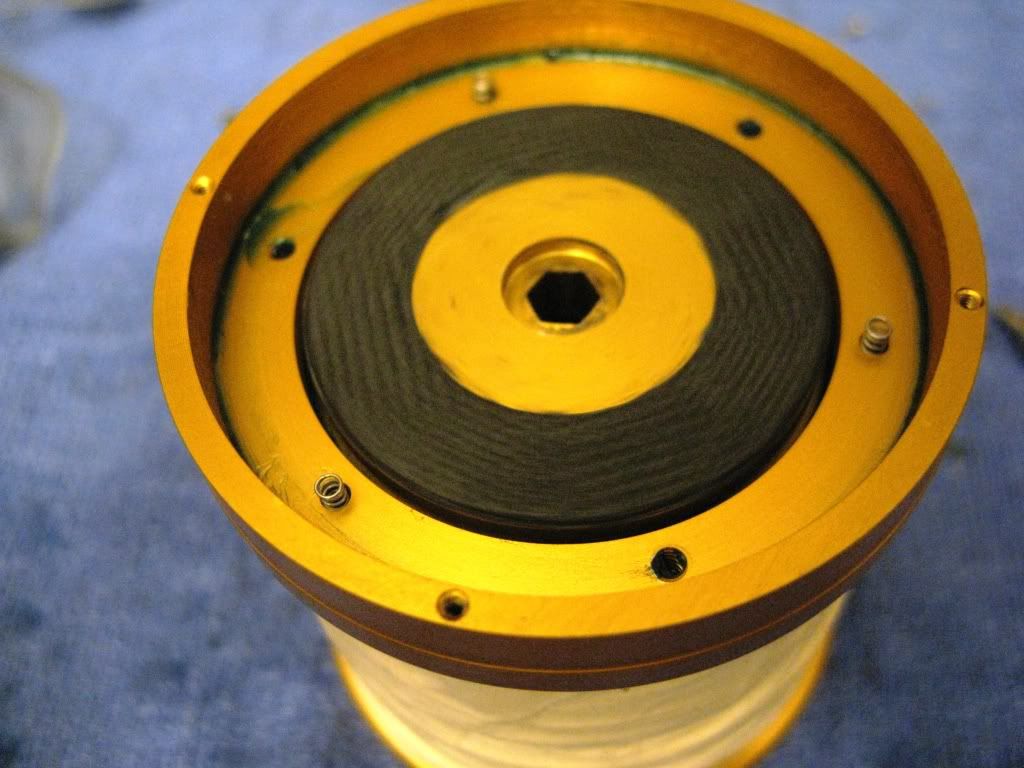
Notice the drags? I used two puller, one on each side, to pull the one of drags. I learned that it's much easier to turn the frame over, tap the frame on your hand and the drag will simply fall out on to your hand.
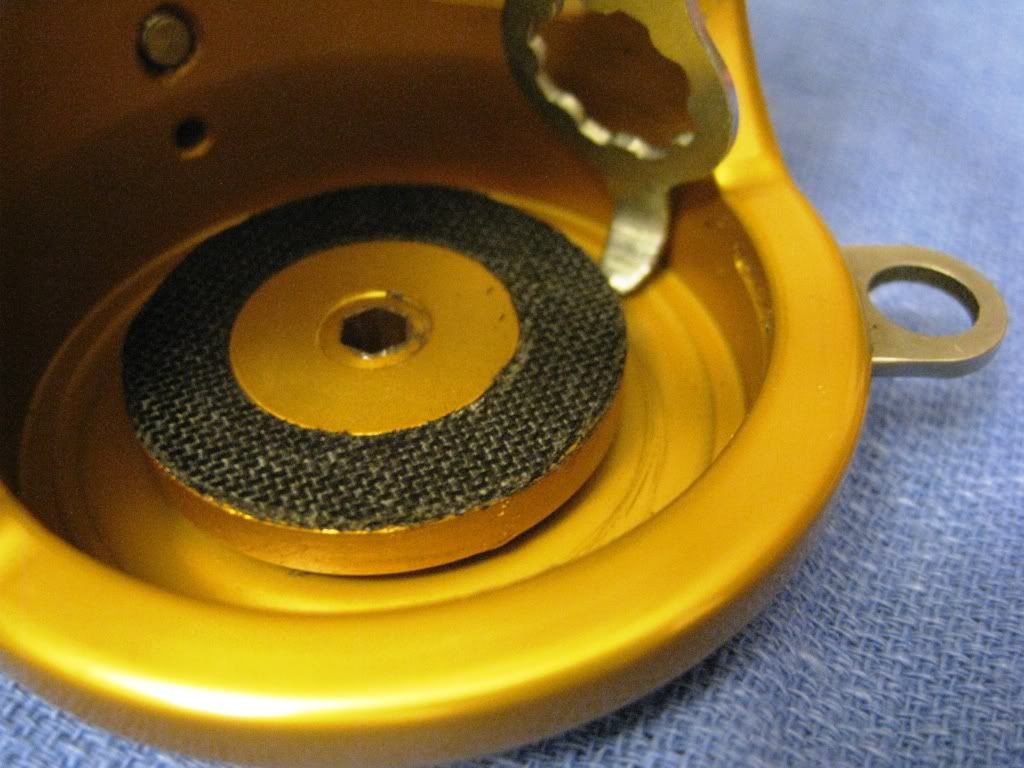
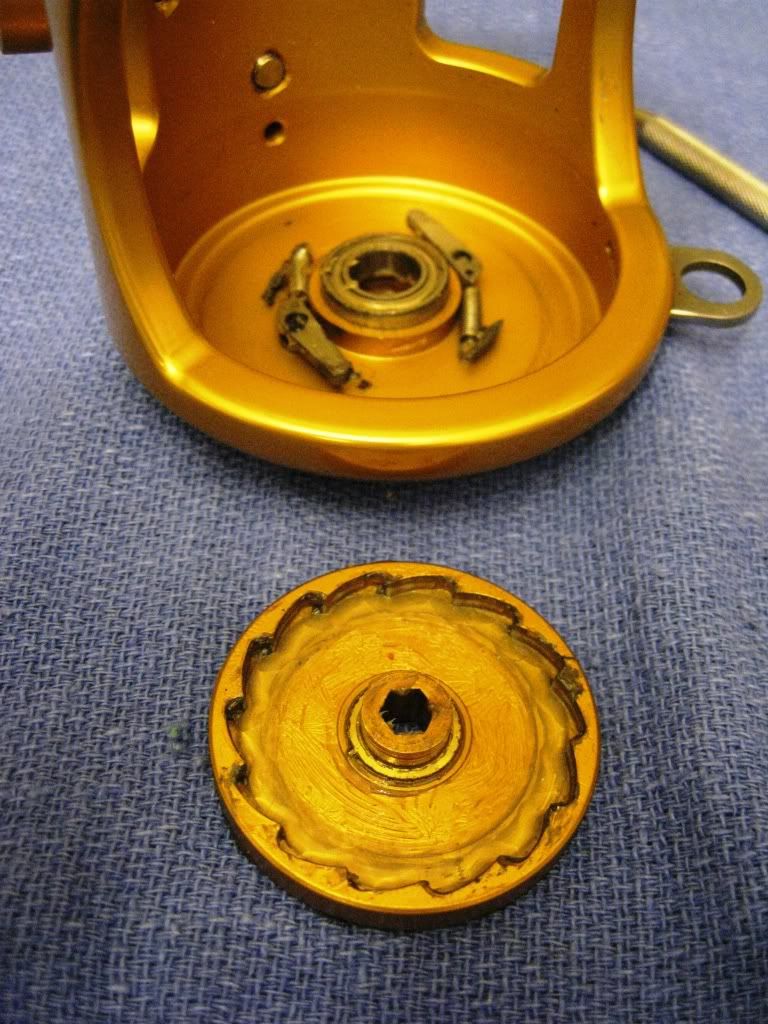
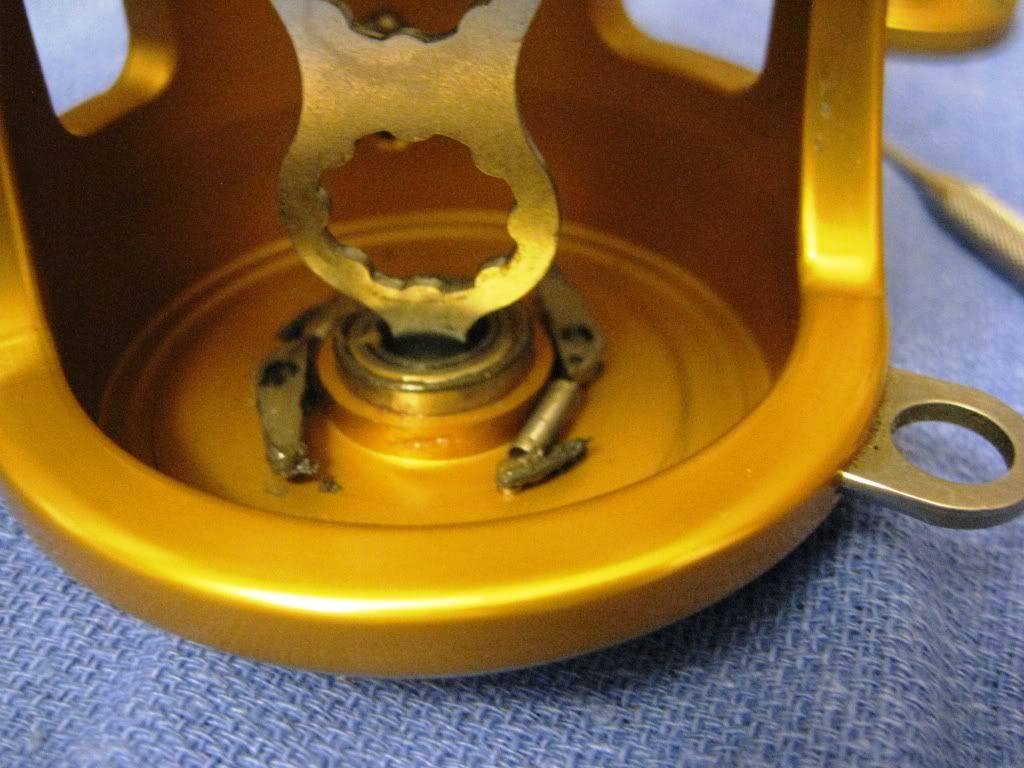
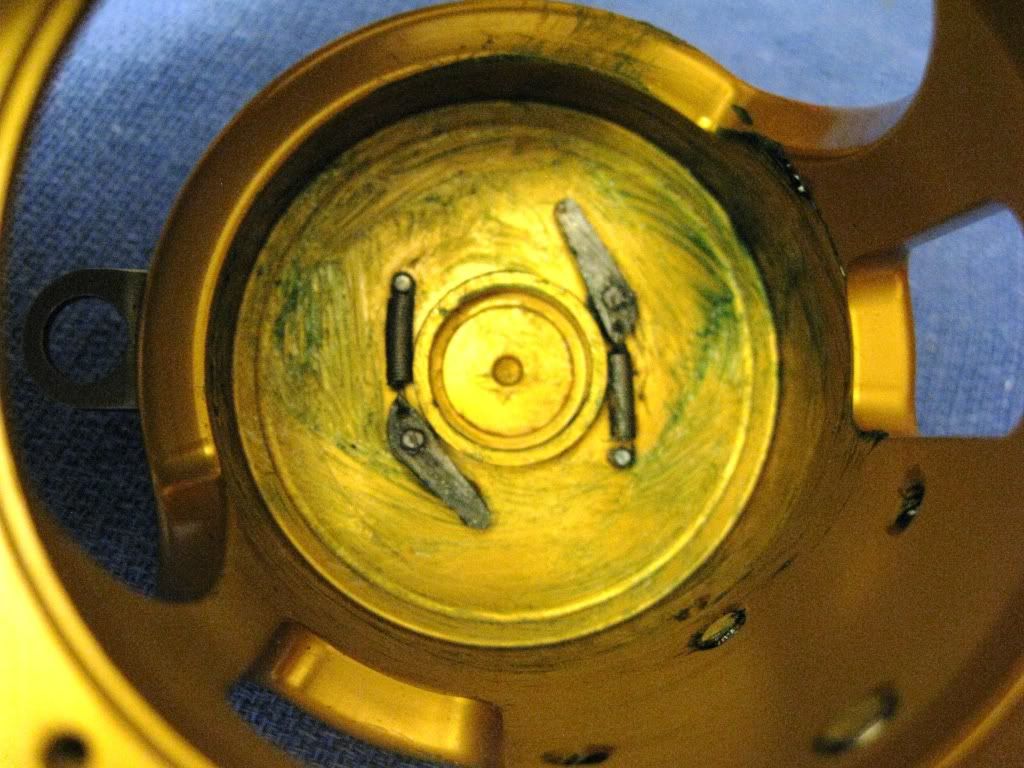
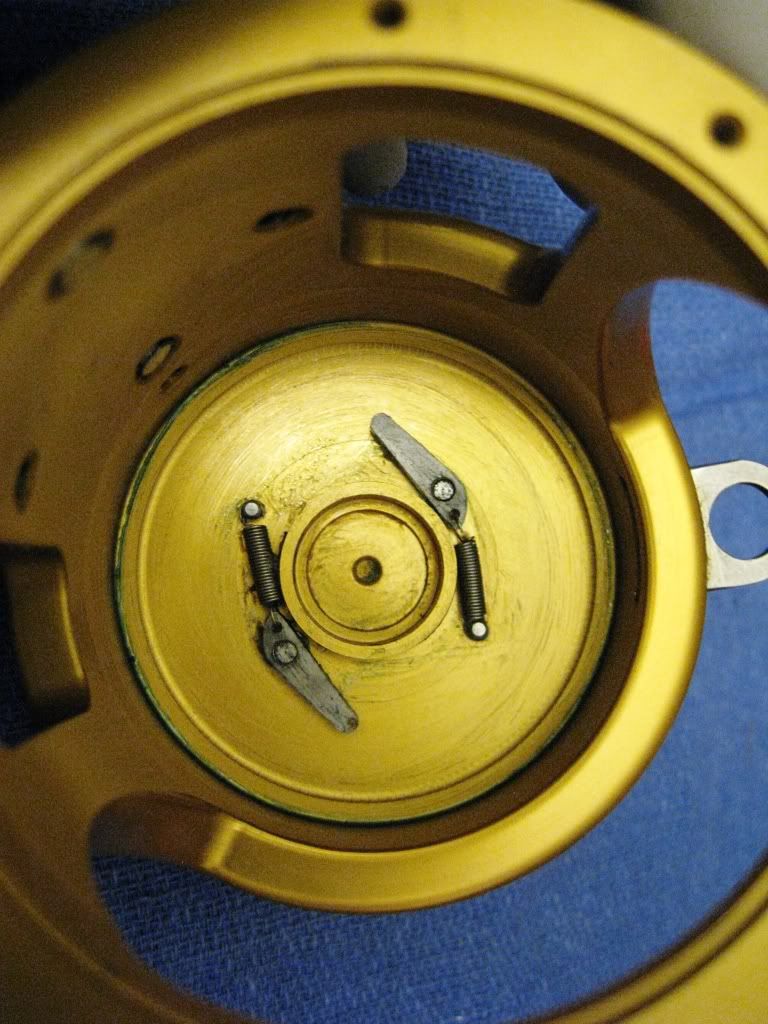
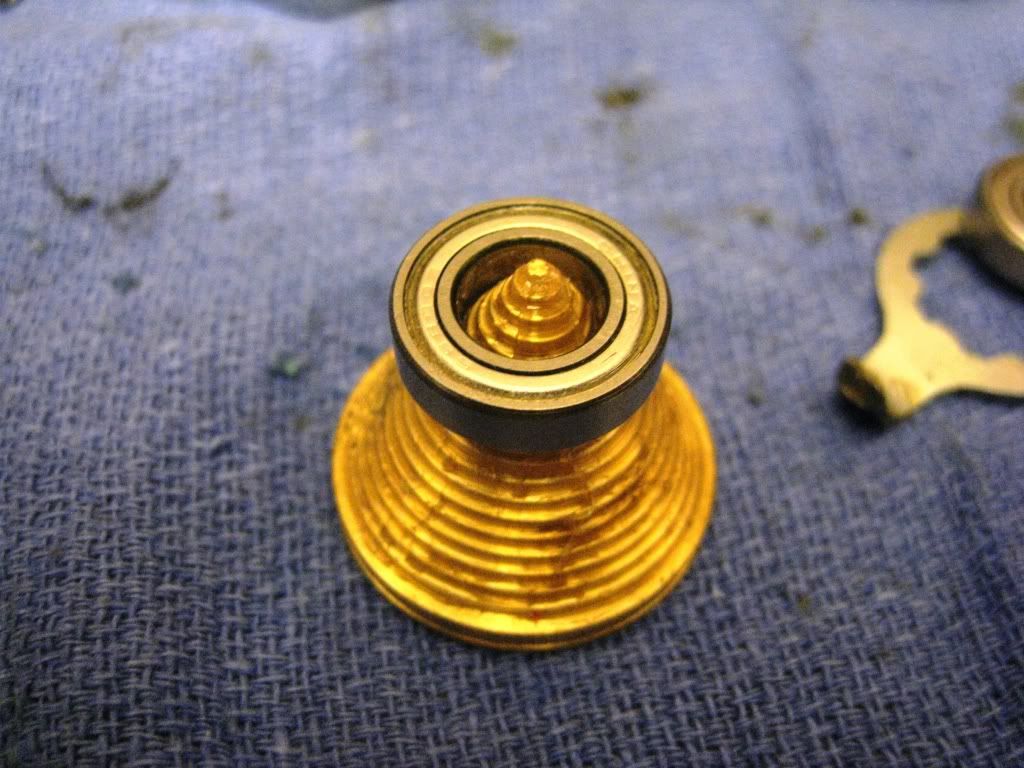
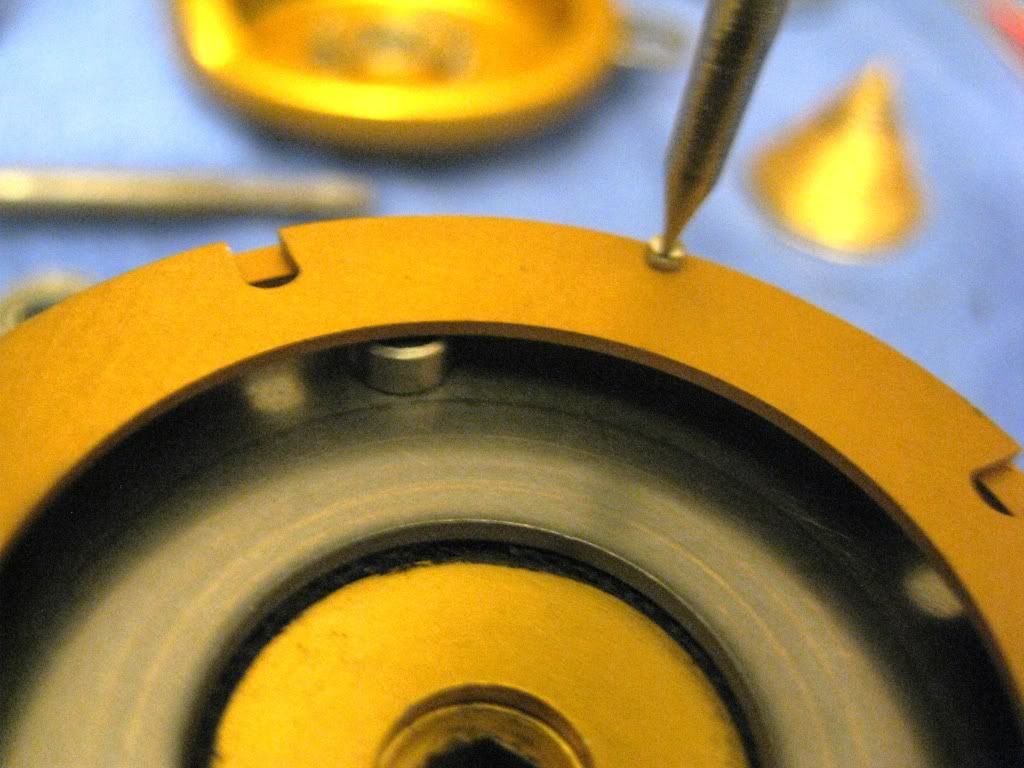
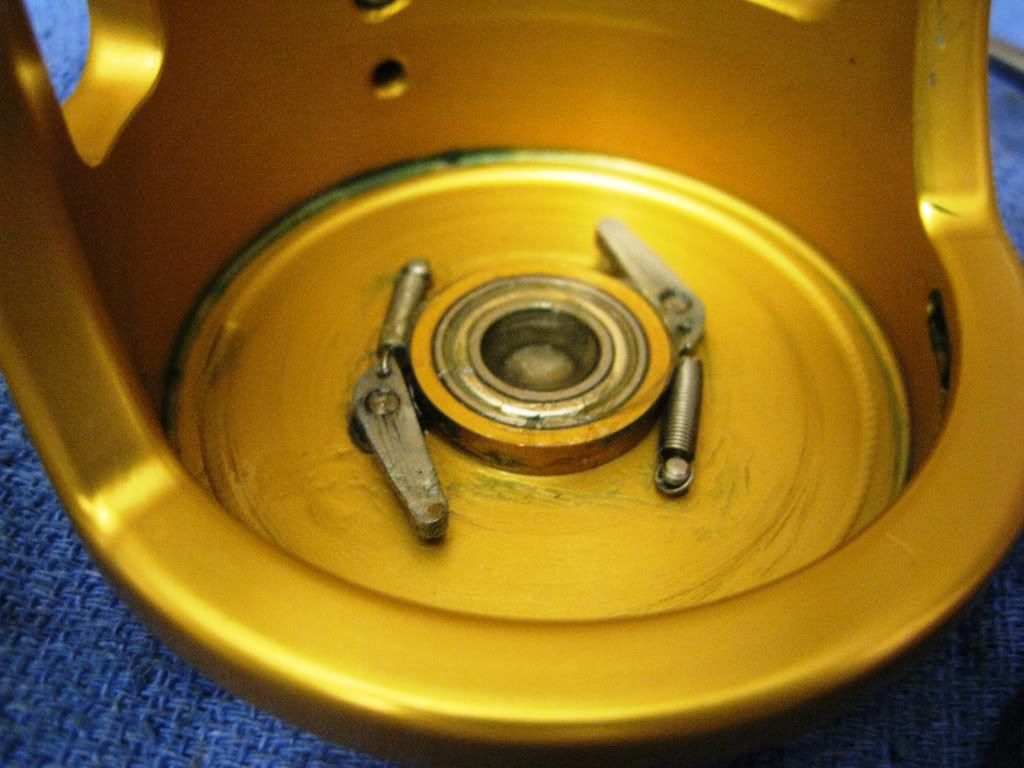
Under the drag, there's the double dogs and left side shaft bearing measuring 10 X 19 X 5 mm (ID x OD x width).
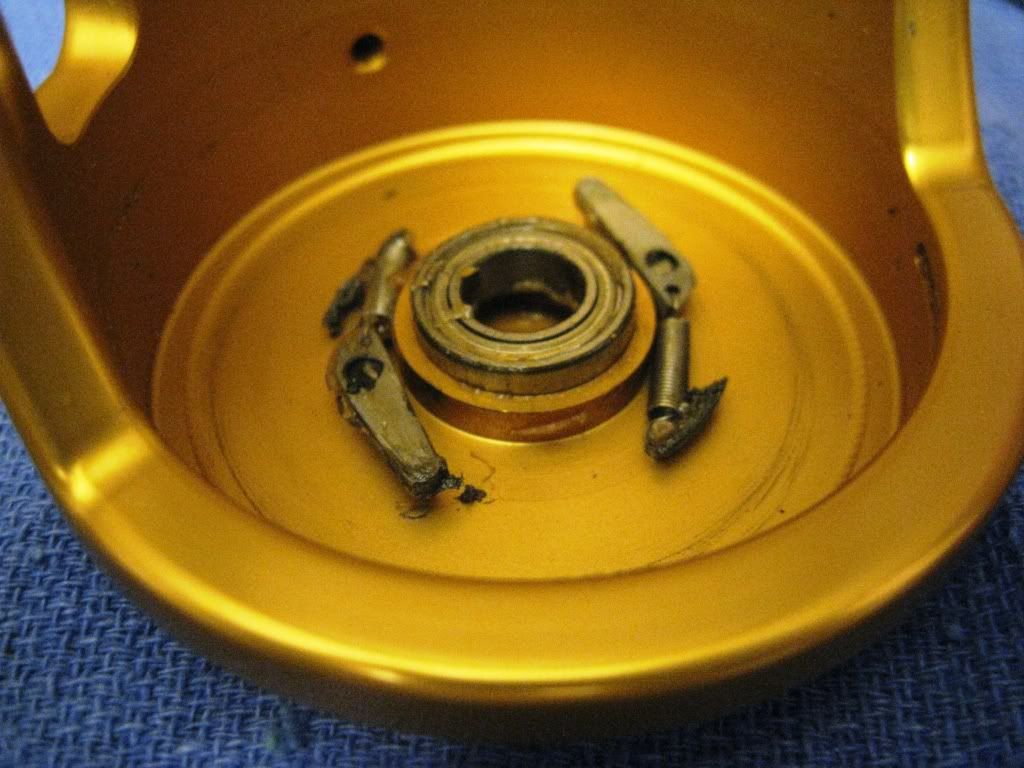
Pull the left side bearing and place aside.
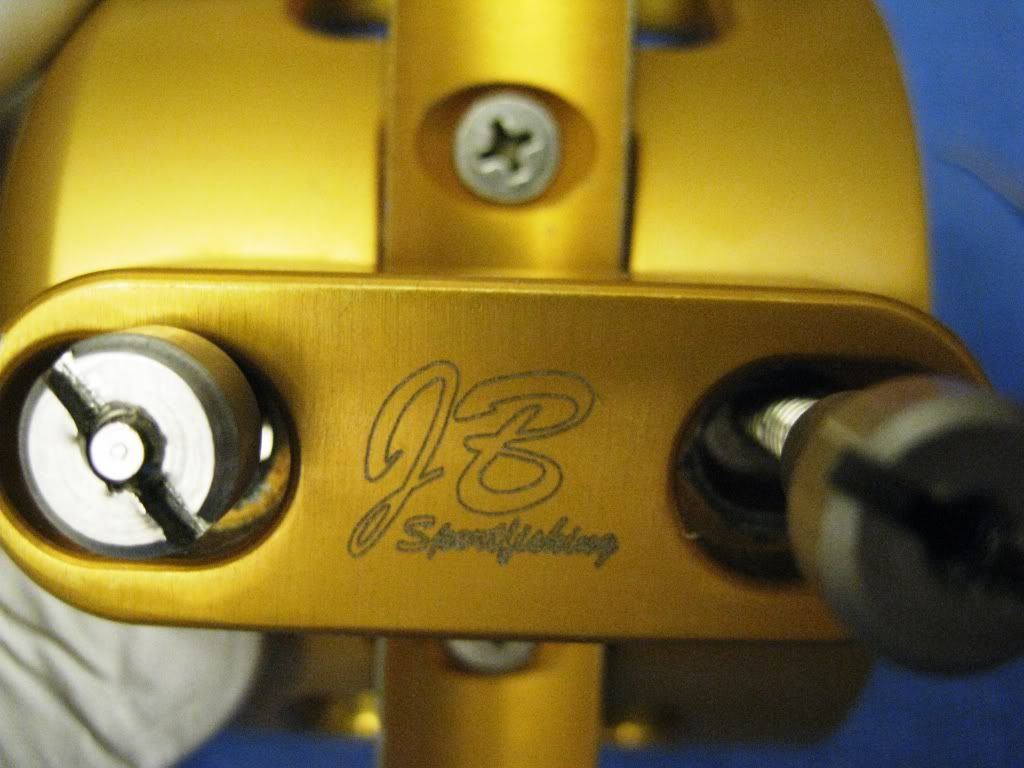
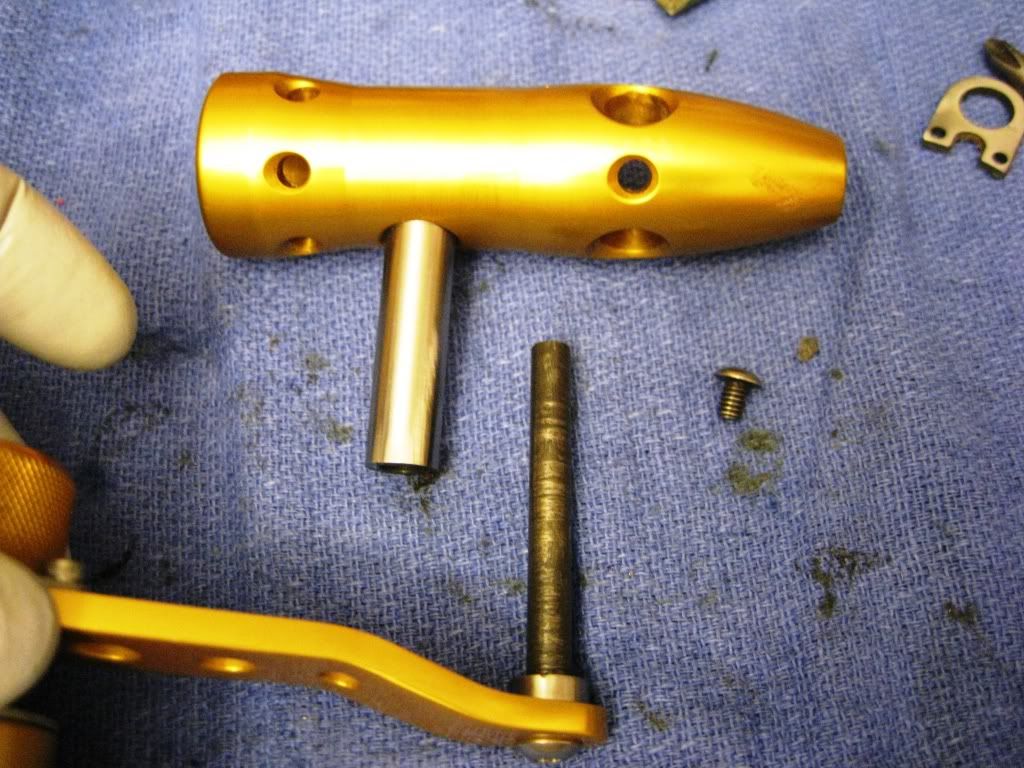
I then disassemble the rod clamp assembly. Check out the laser etching. Very nice.

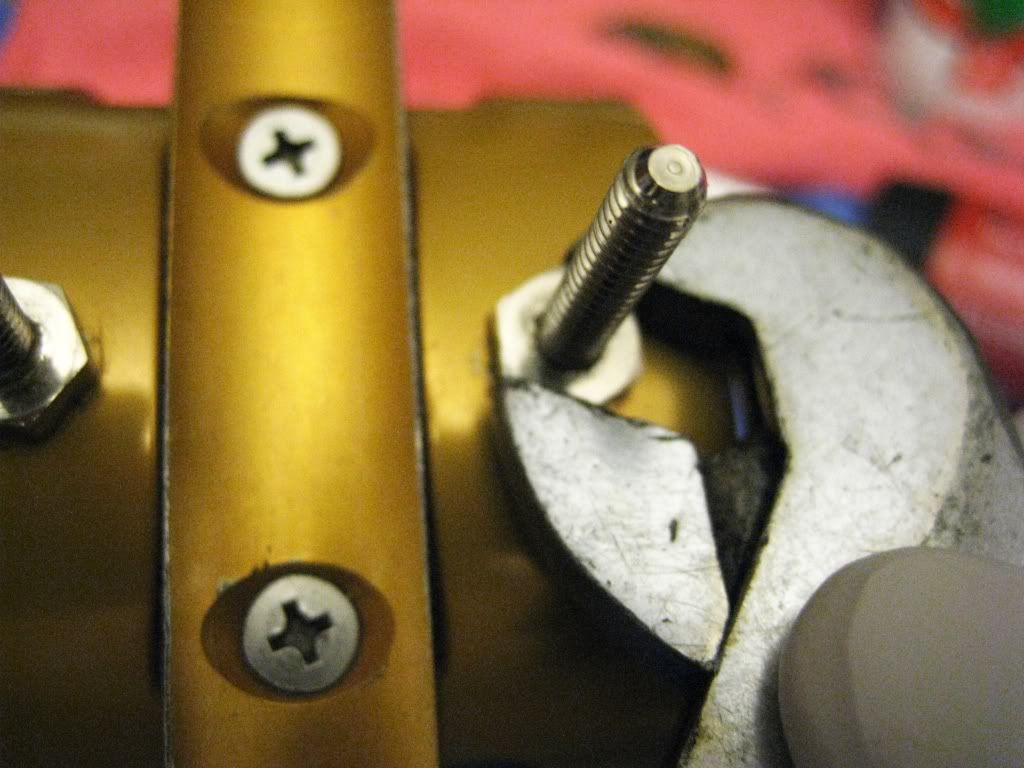
Now remove the reel foot.

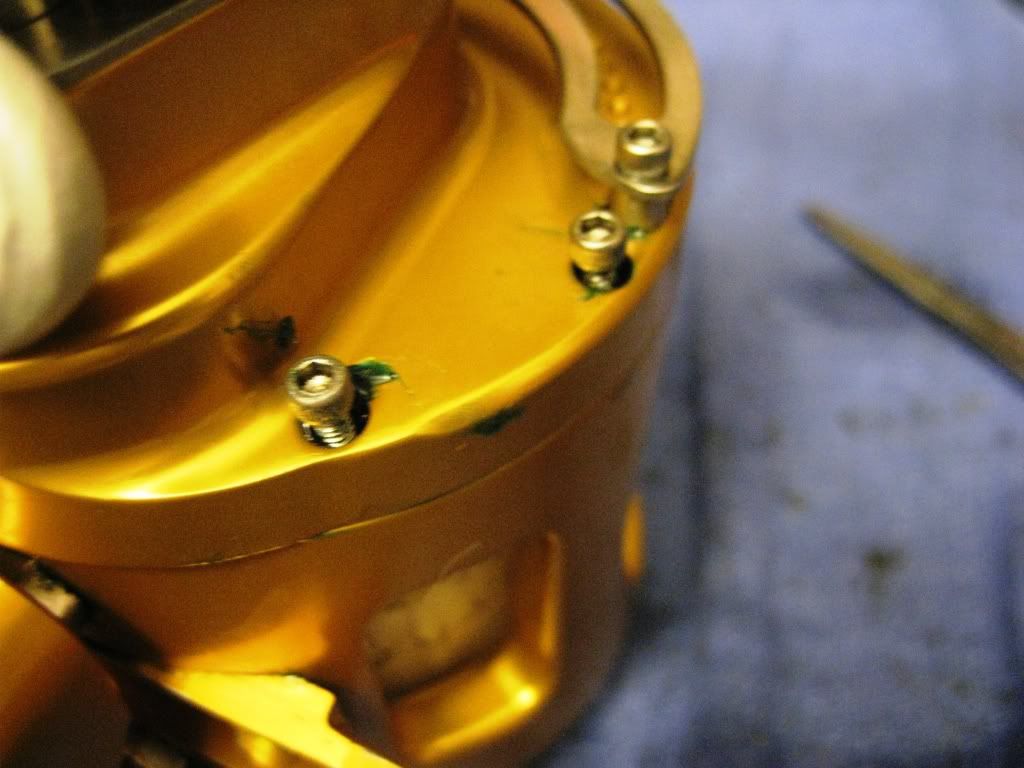
Hmm, it just doesn't want to come off. What can you notice?
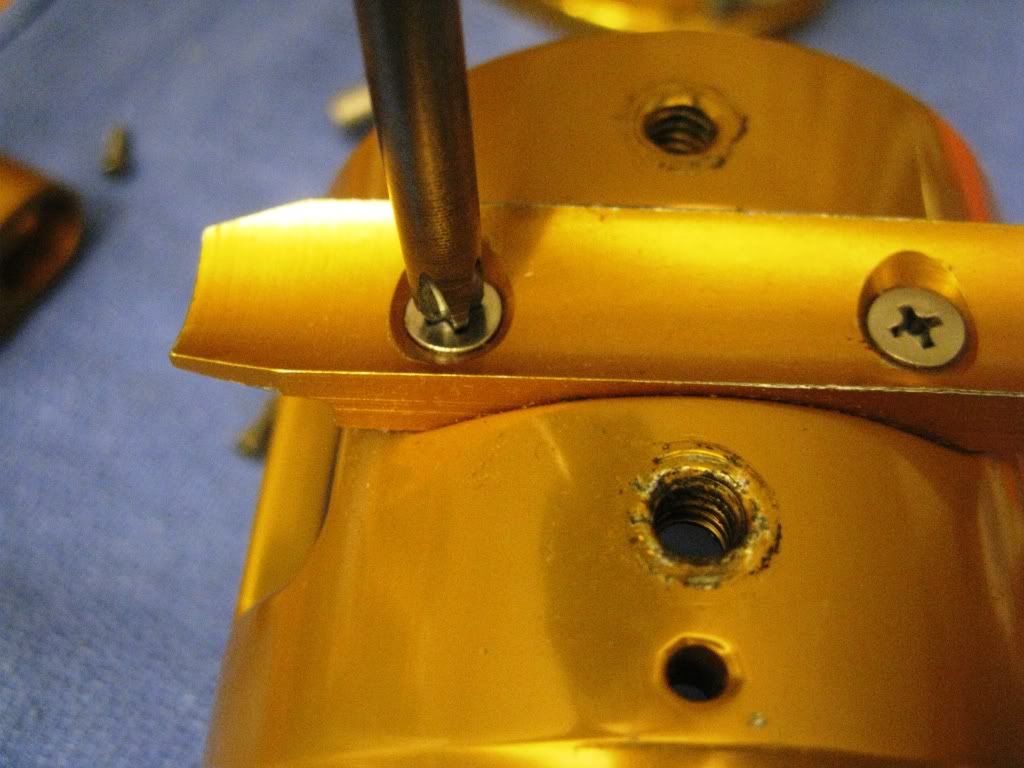
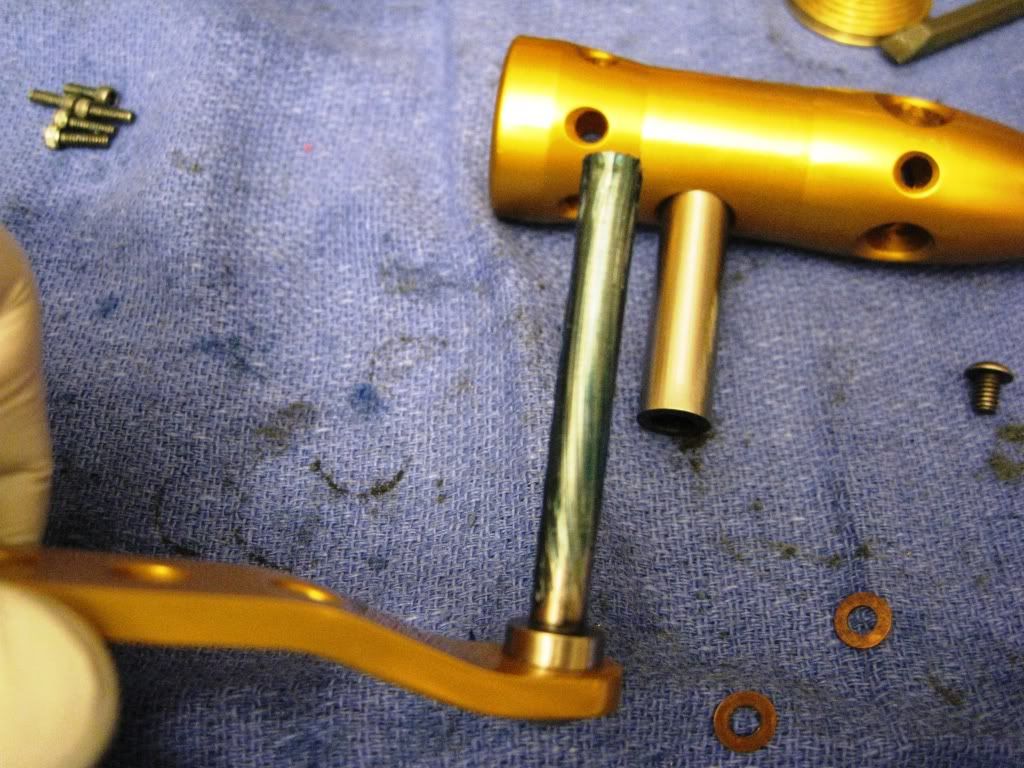
Maybe with the reel foot removed, what do you see?
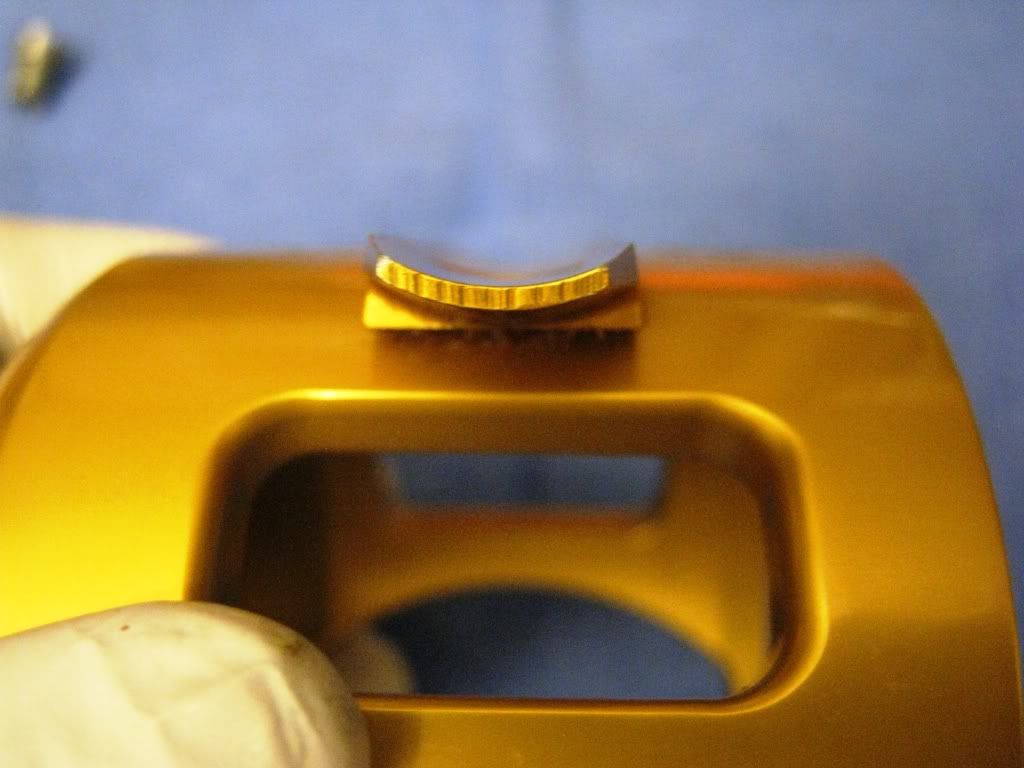
Did you guys see the trapezoidal configuration? Even if the seat screws become loose, the reel seat sits tight.
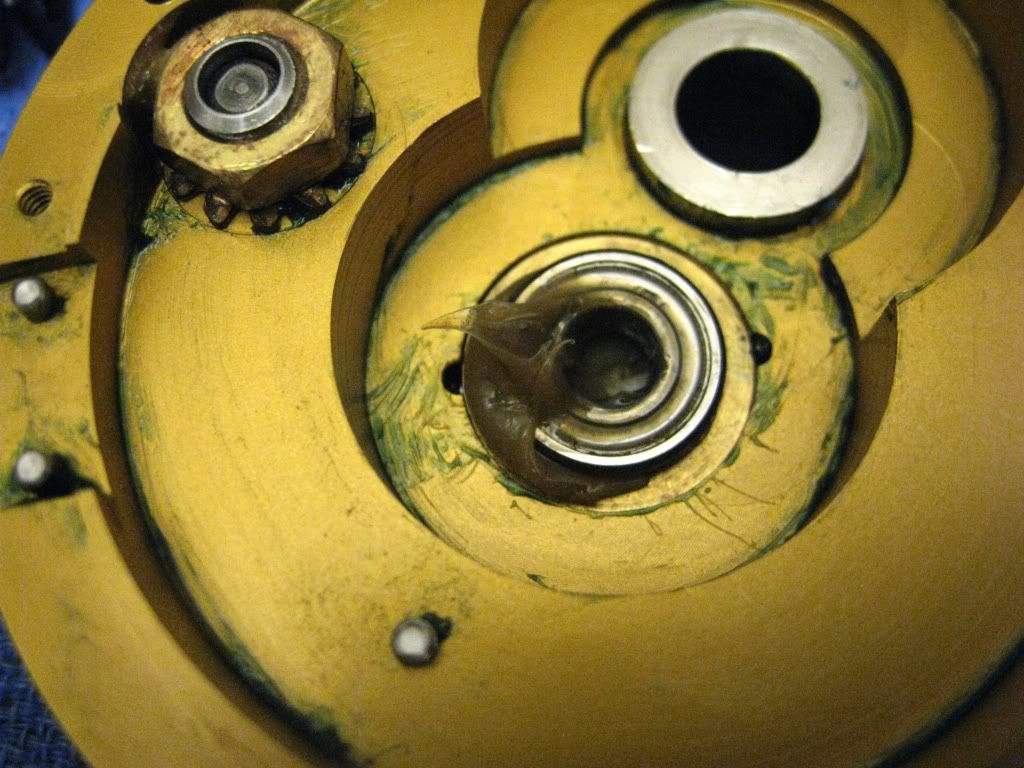
The area is cleaned and greased.
Slide the foot back in place and grease the screw openings and the screws.
Now the reel clamp posts.
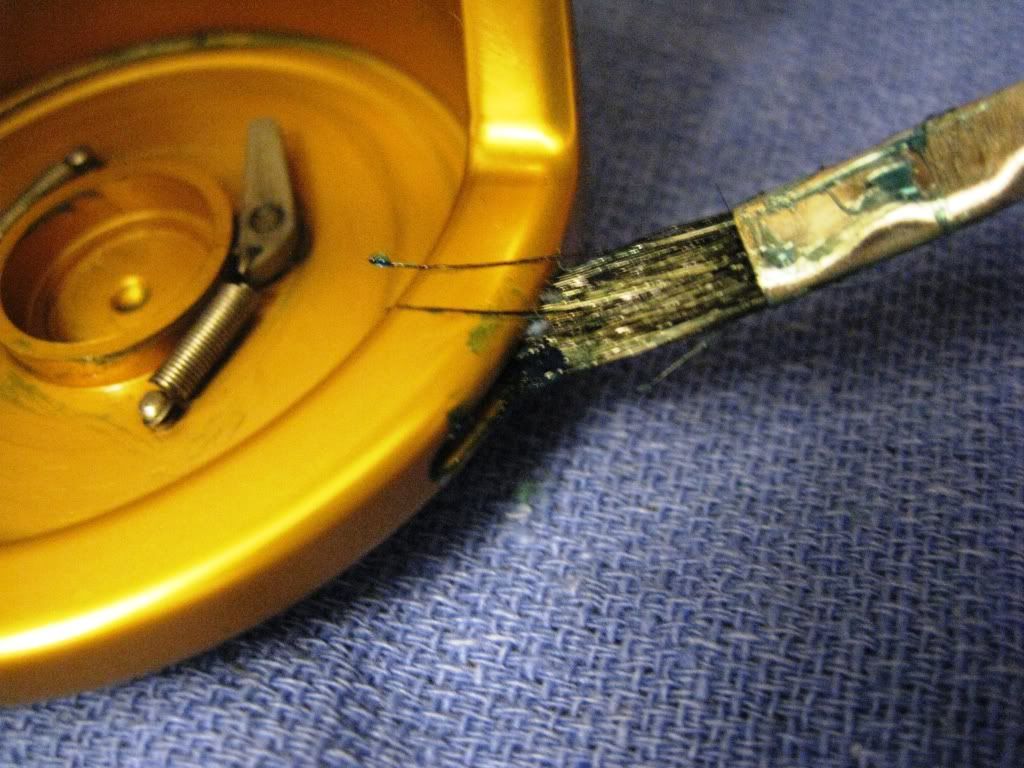
Wipe the left side to remove old grease.
Apply marine grease
And whip off grease to leave a thin film.
Add CorrosionX to the dogs.
Remove the left side harness lug.
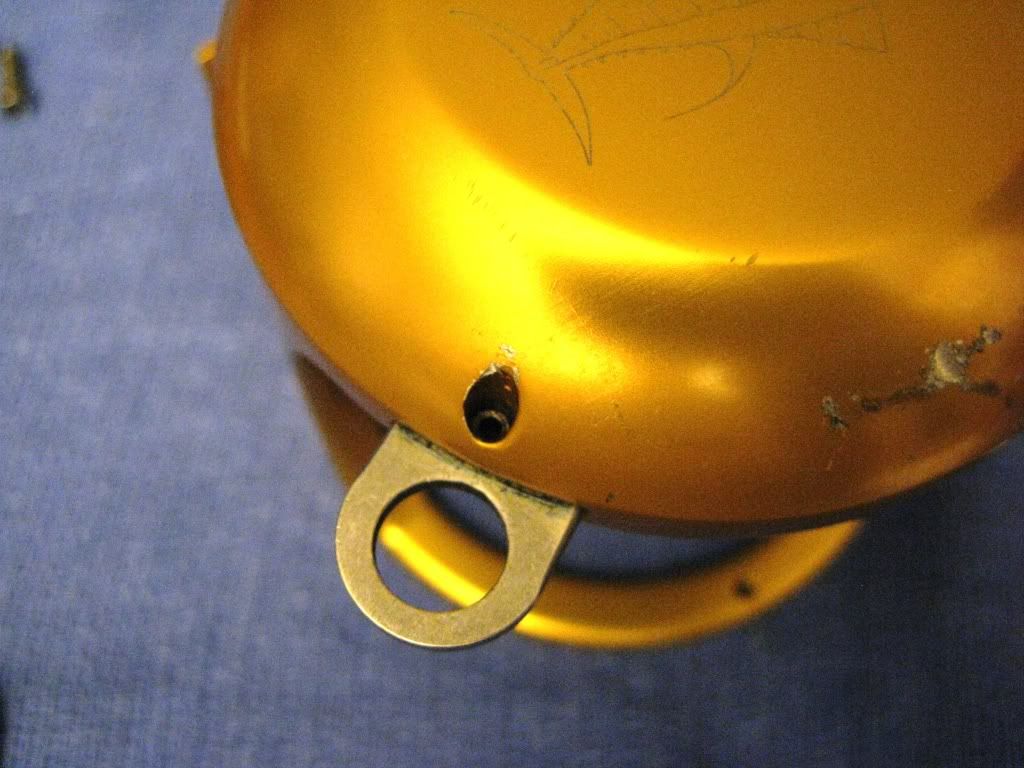
You will need a 1/16" allen wrench.
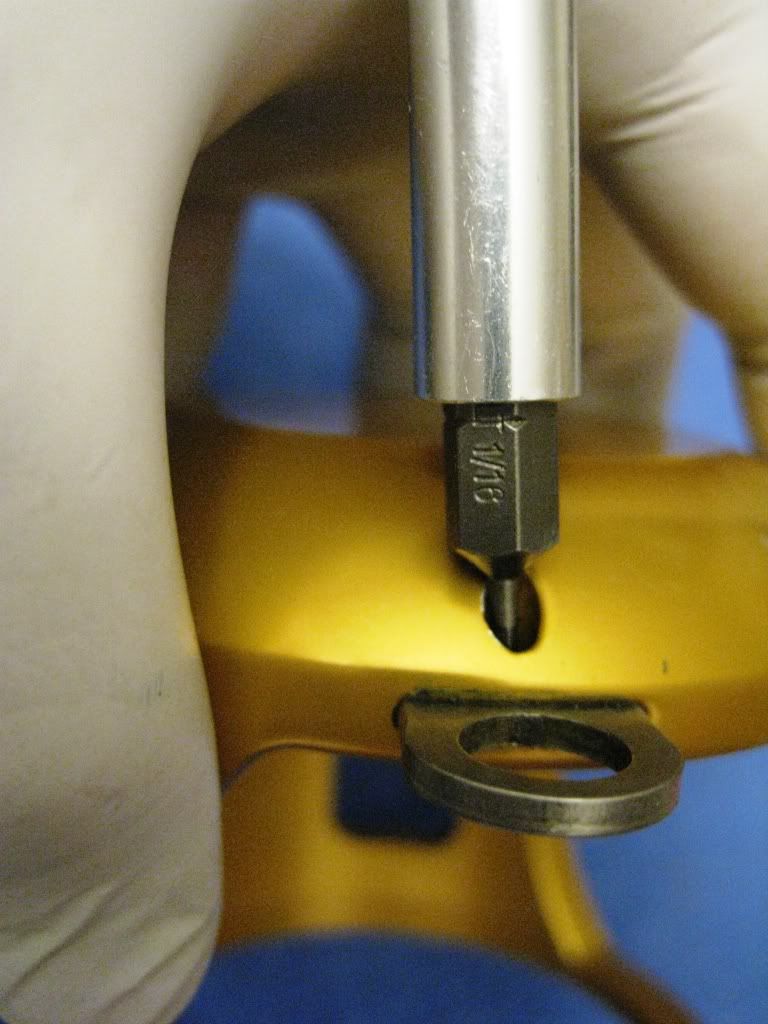
Remove lug, and clean.
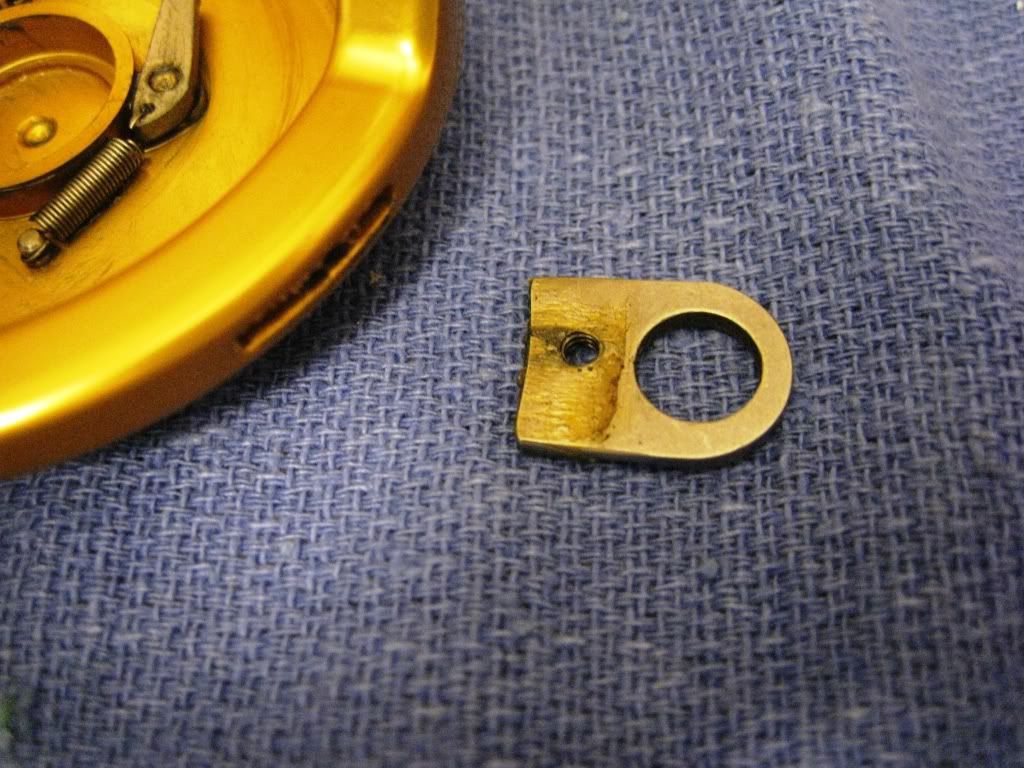
Apply a light coat of grease in the lug slot.
Apply grease to the screw hole.
And reinstall lug.
Now you can put the frame aside for now.
Okay, the left side plate.
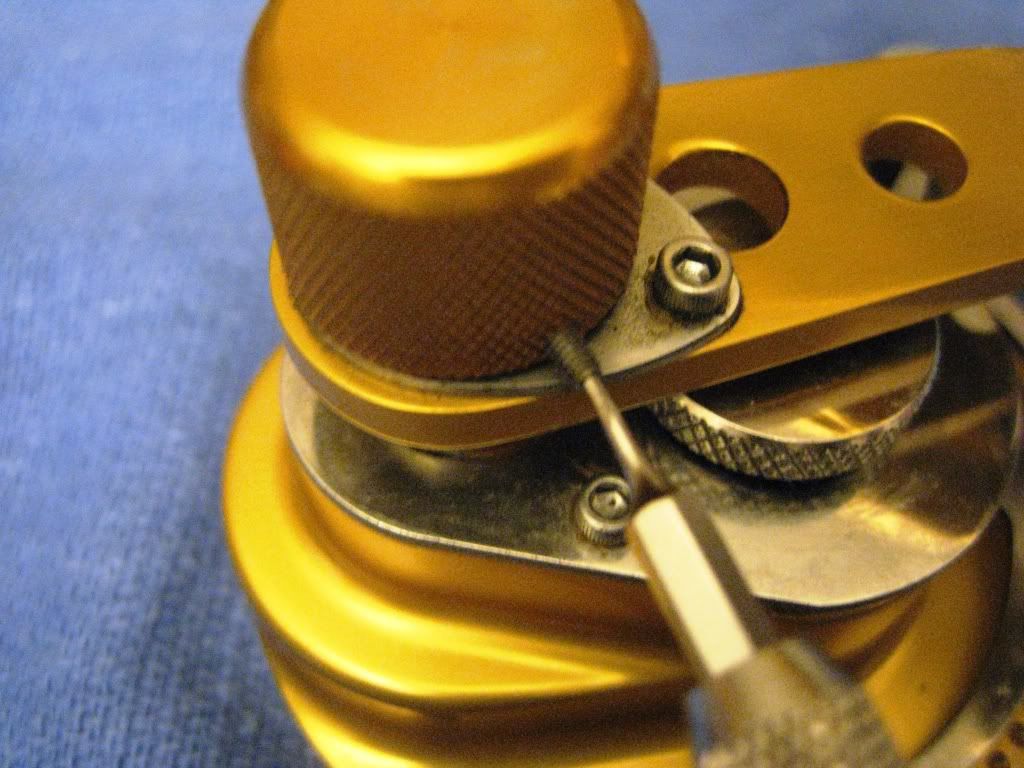
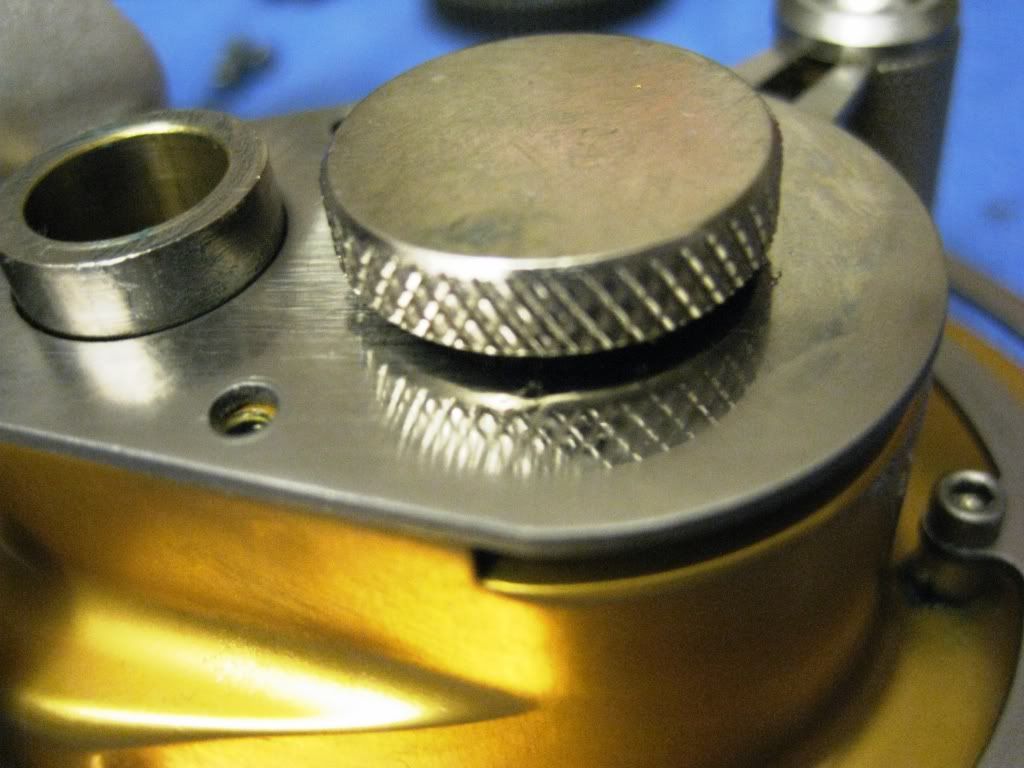
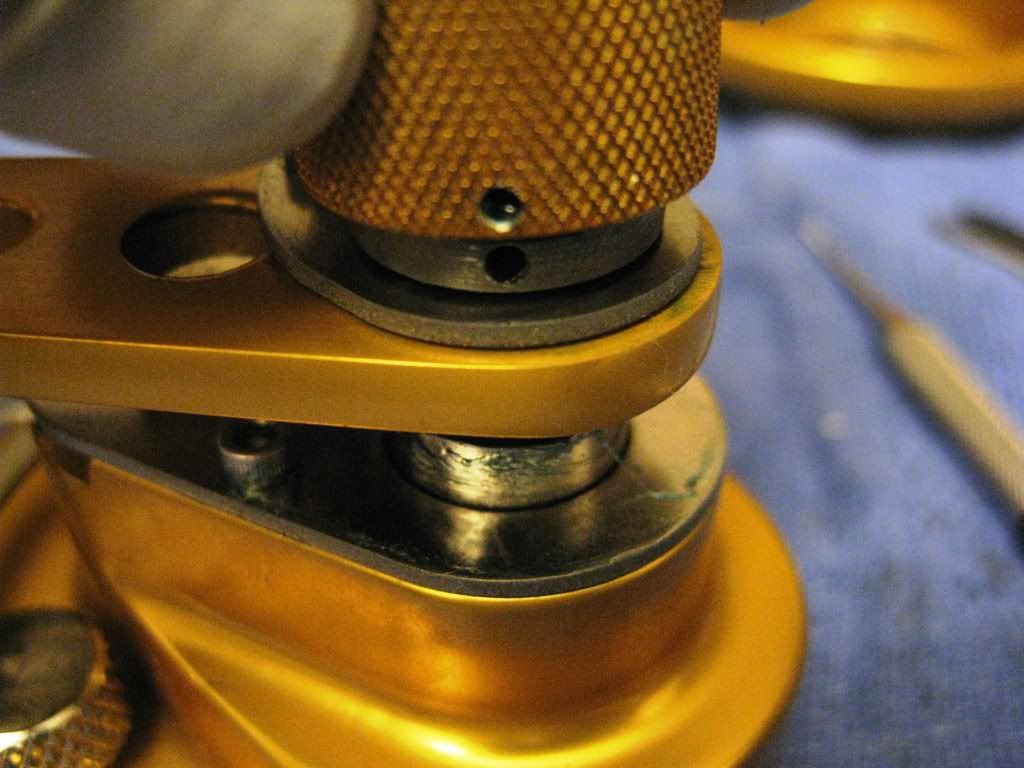
How do you get the shift knob off?
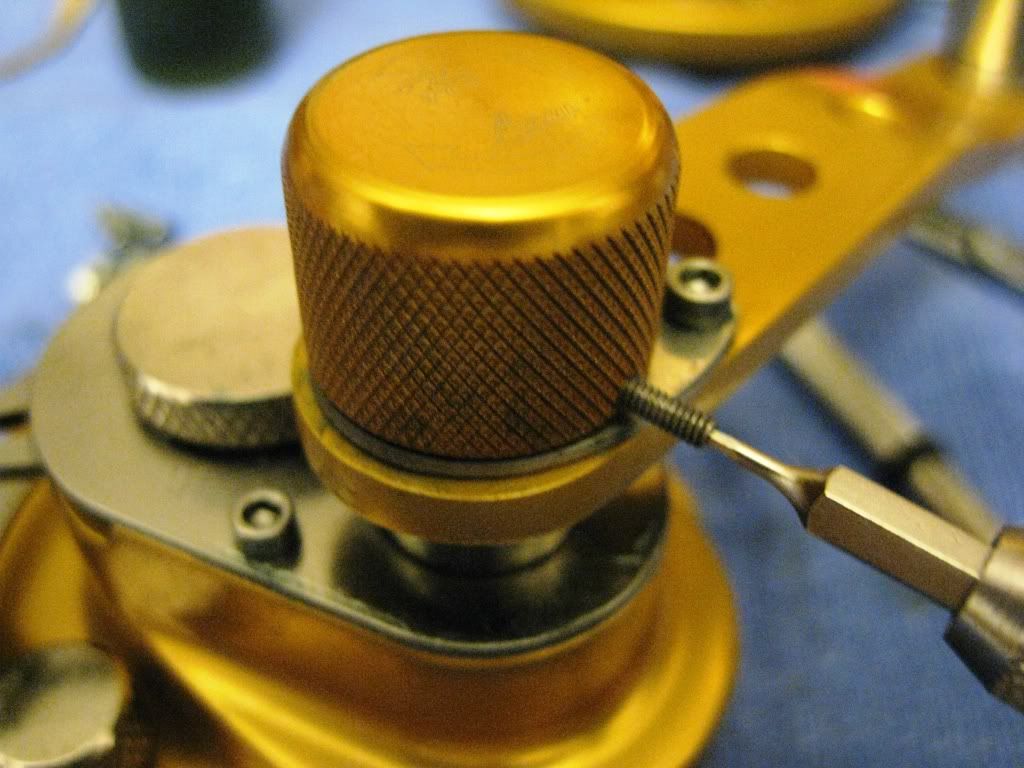
There are 2 fine screw that holds on the shift knob.
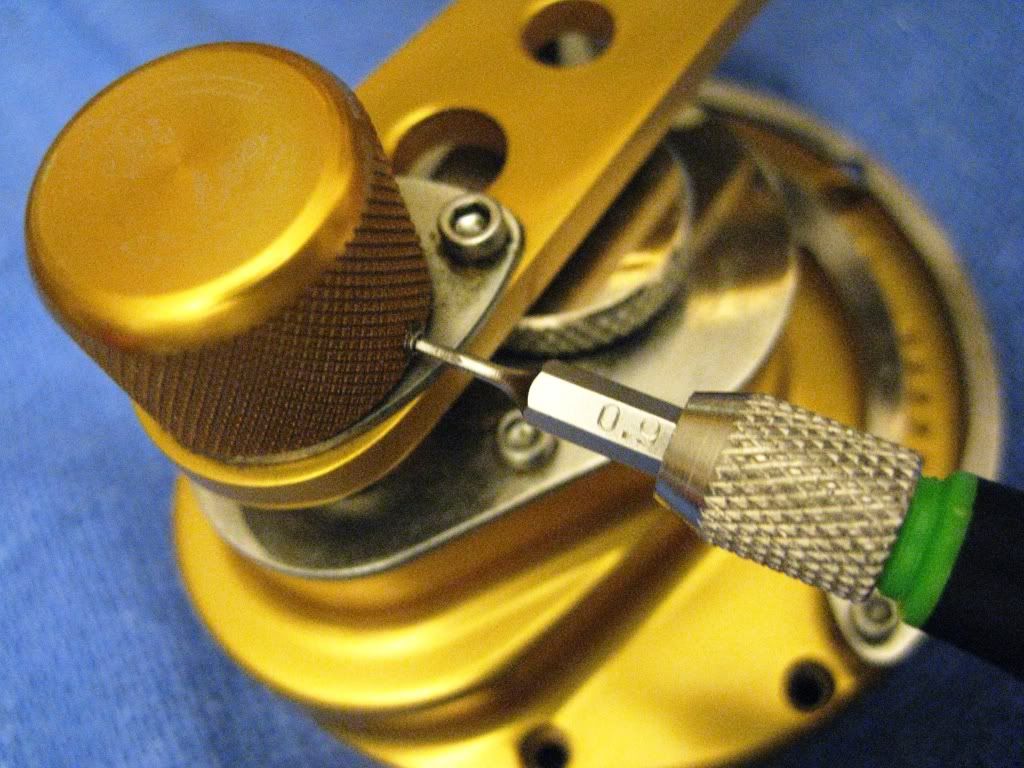
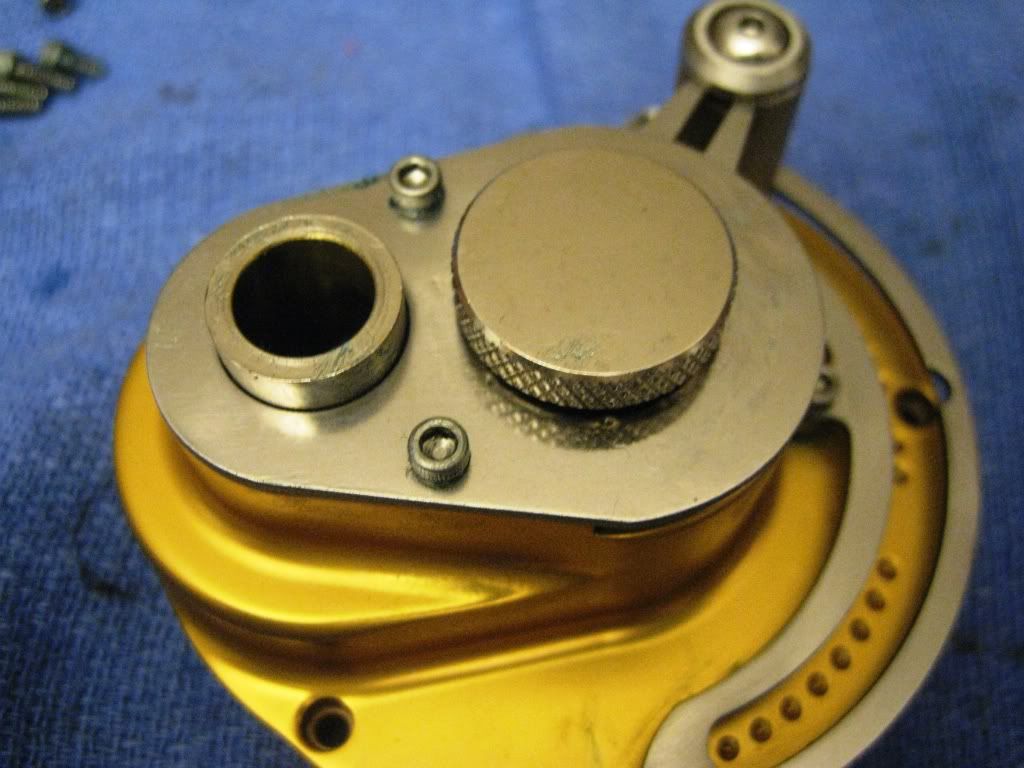
You will need a 0.9 mm allen wrench to remove the two screws.
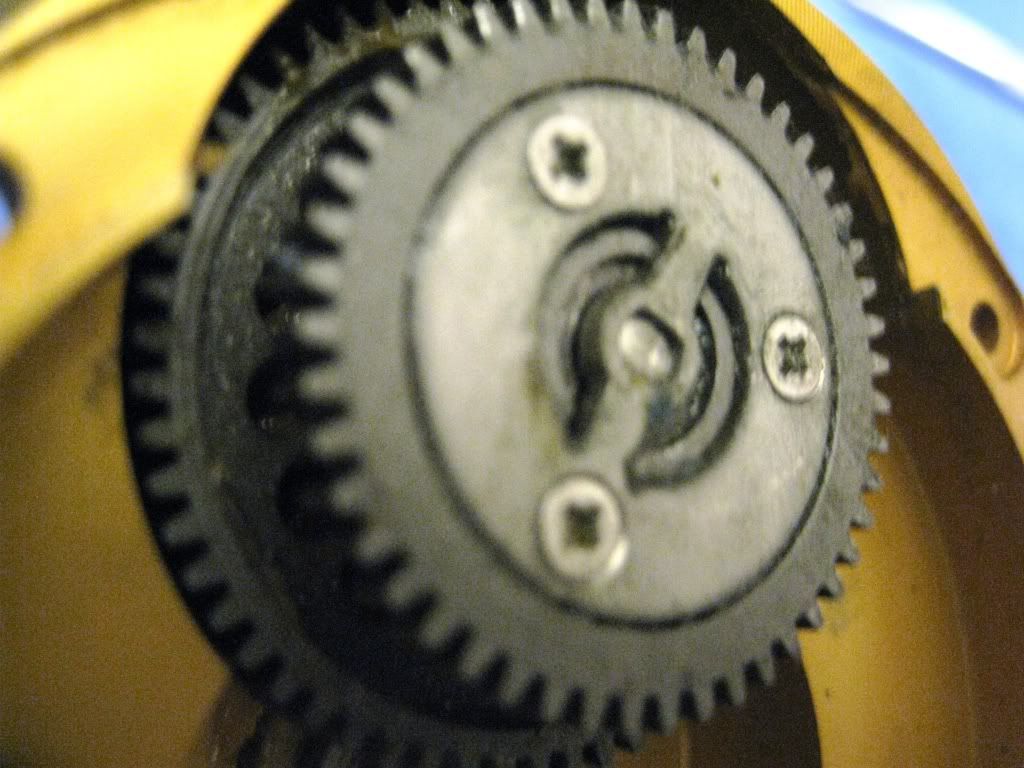
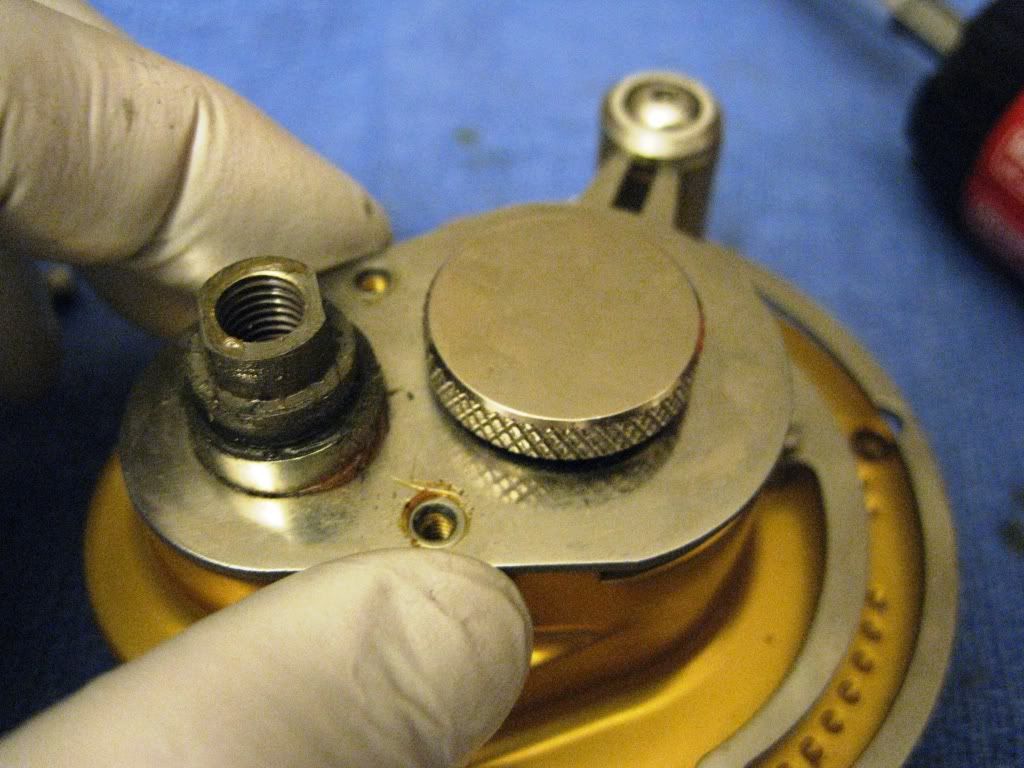
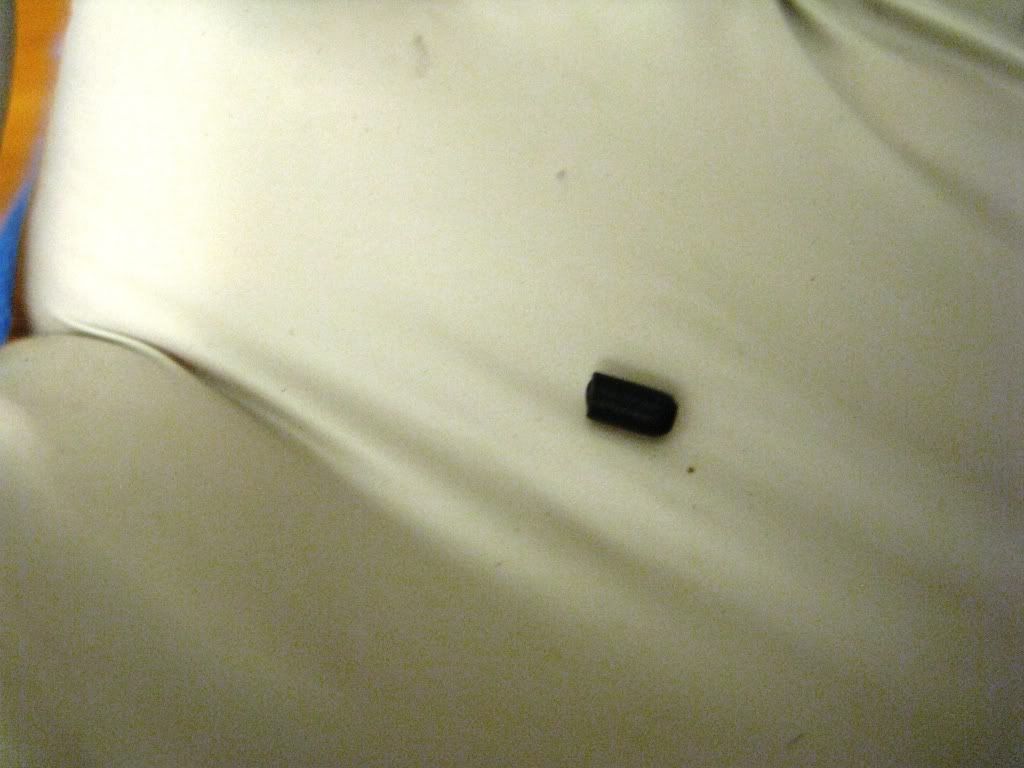
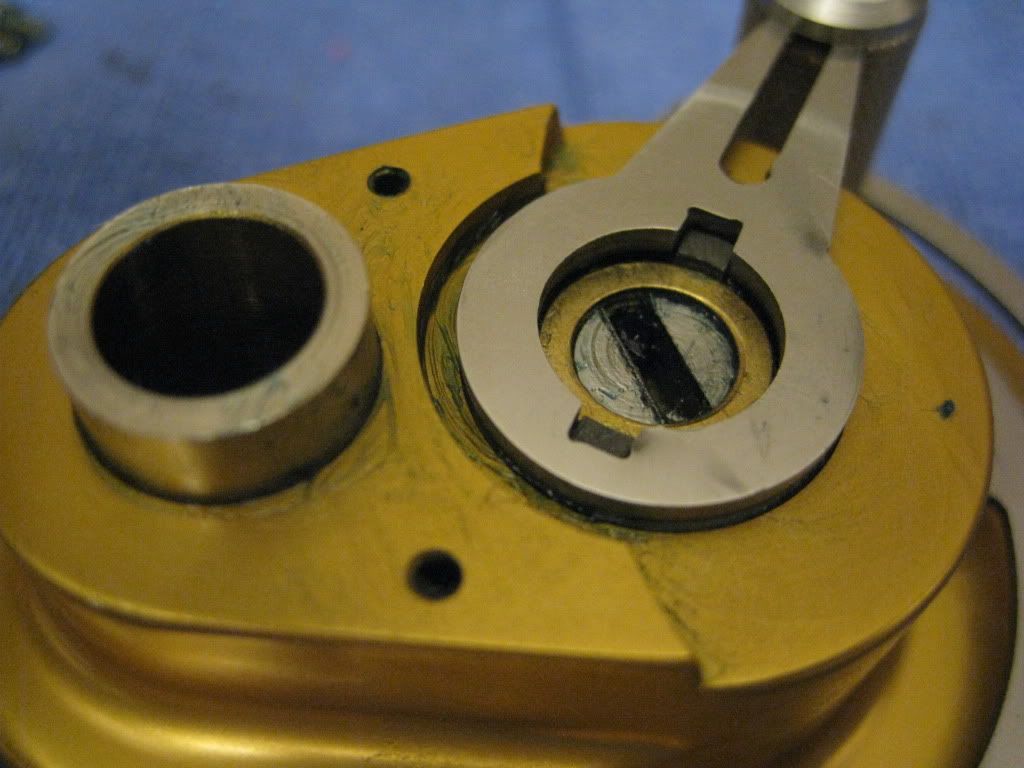
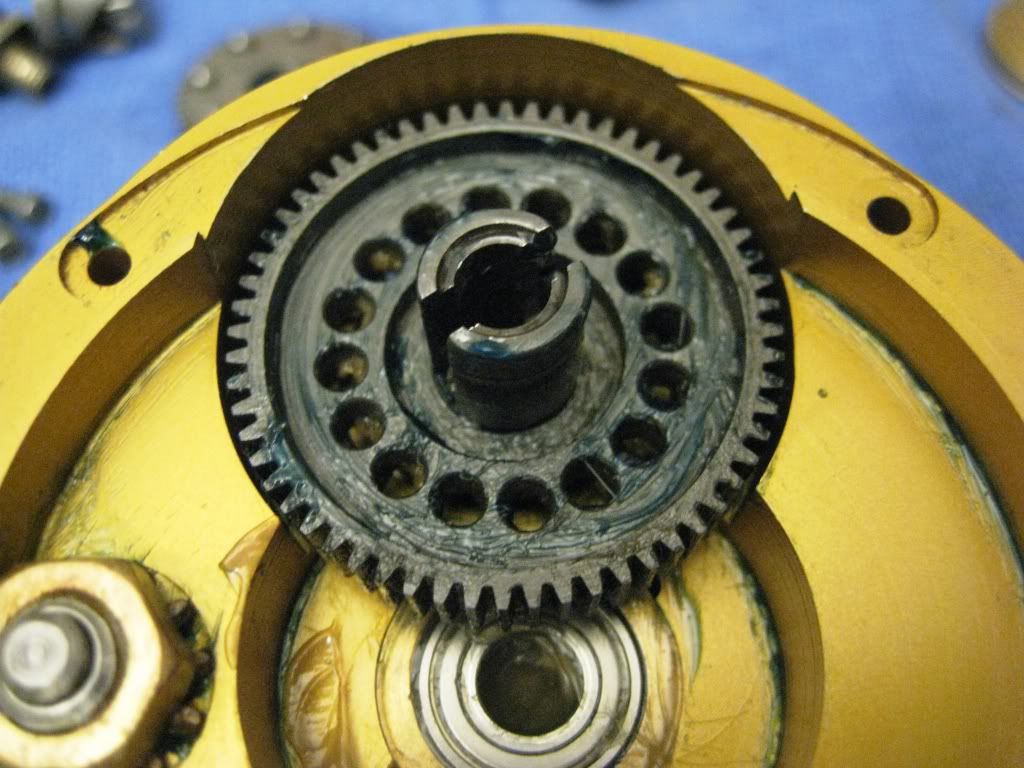
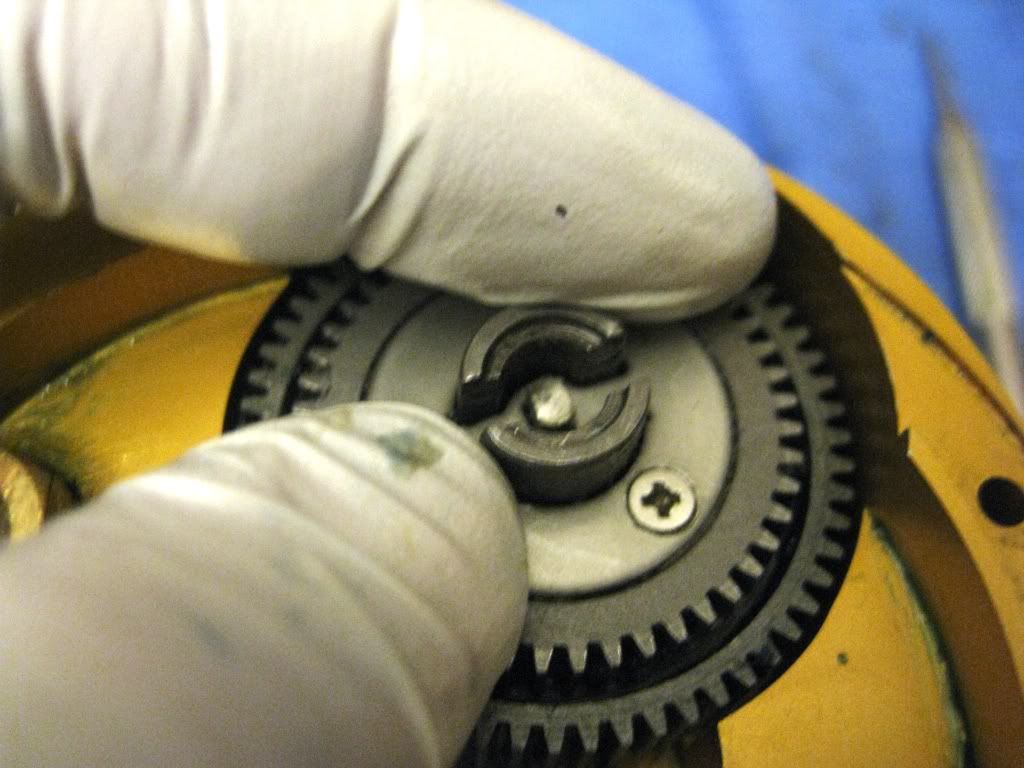
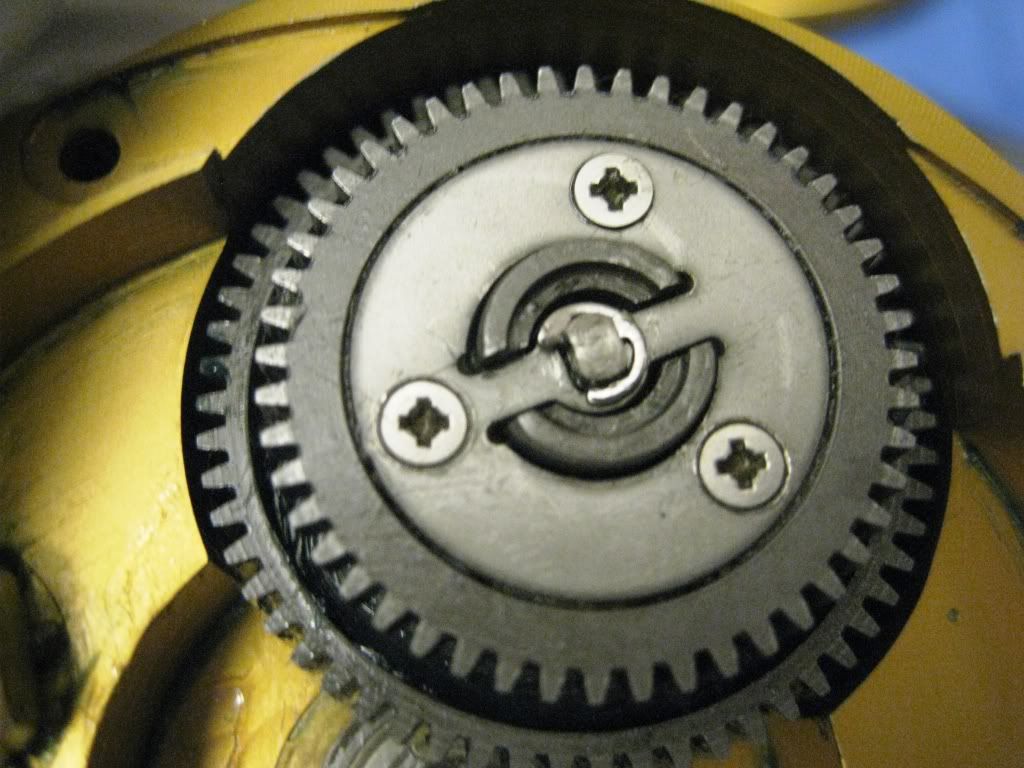
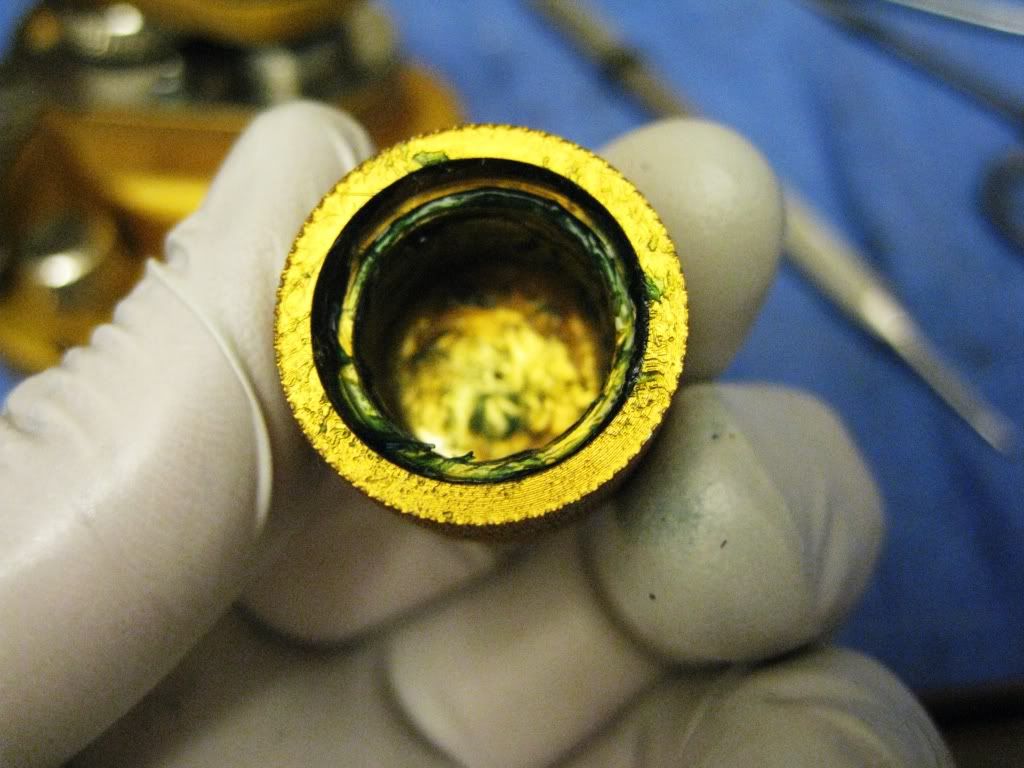
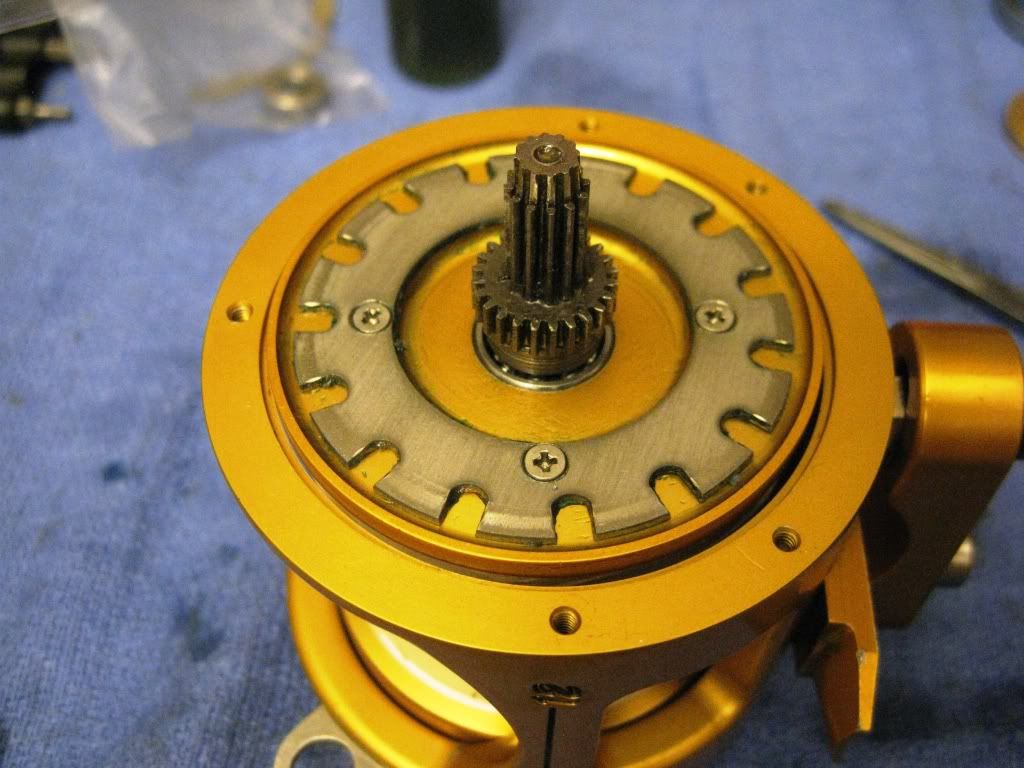
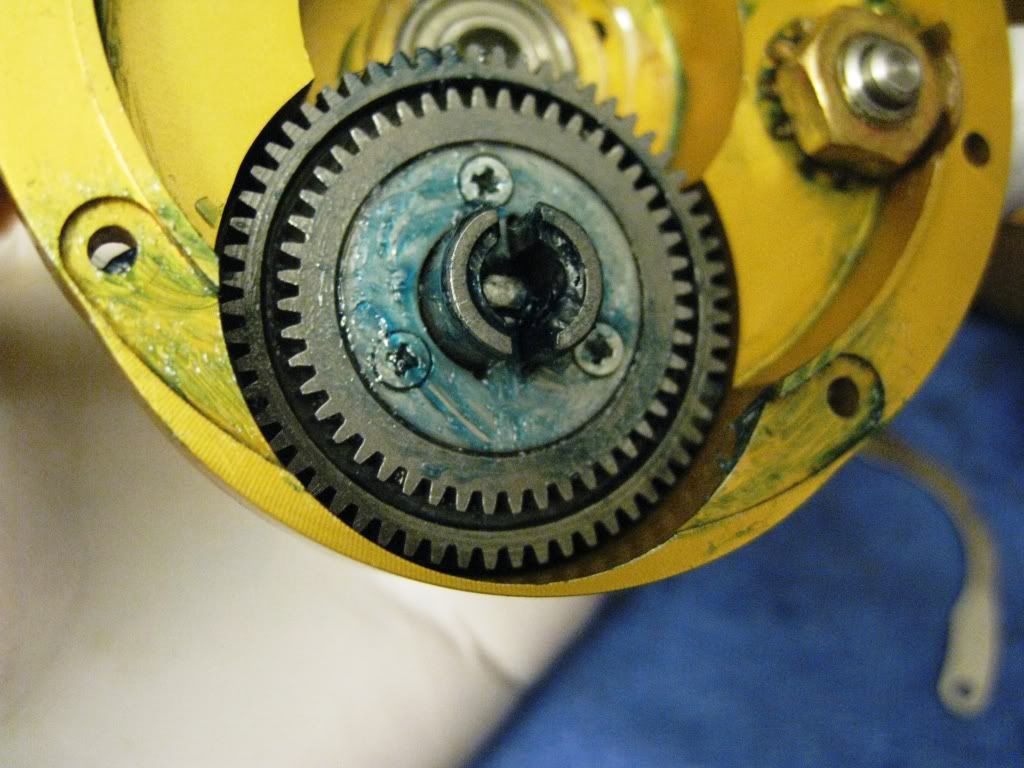
Once the shift know is remove, you will see the shift mechanism.
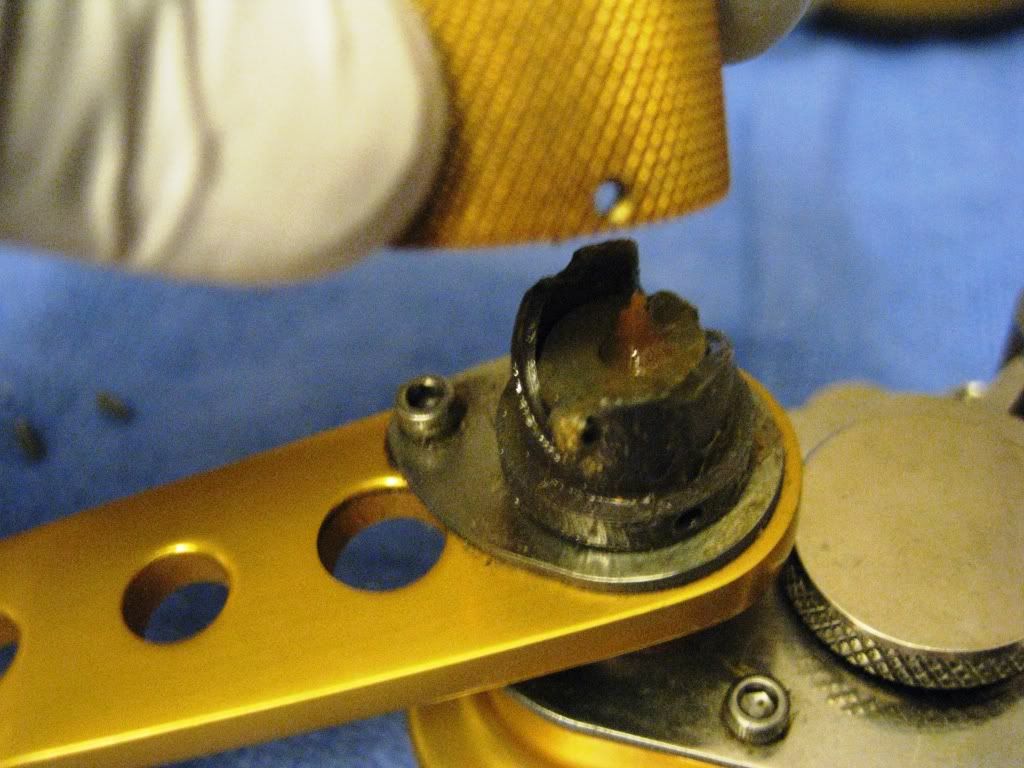
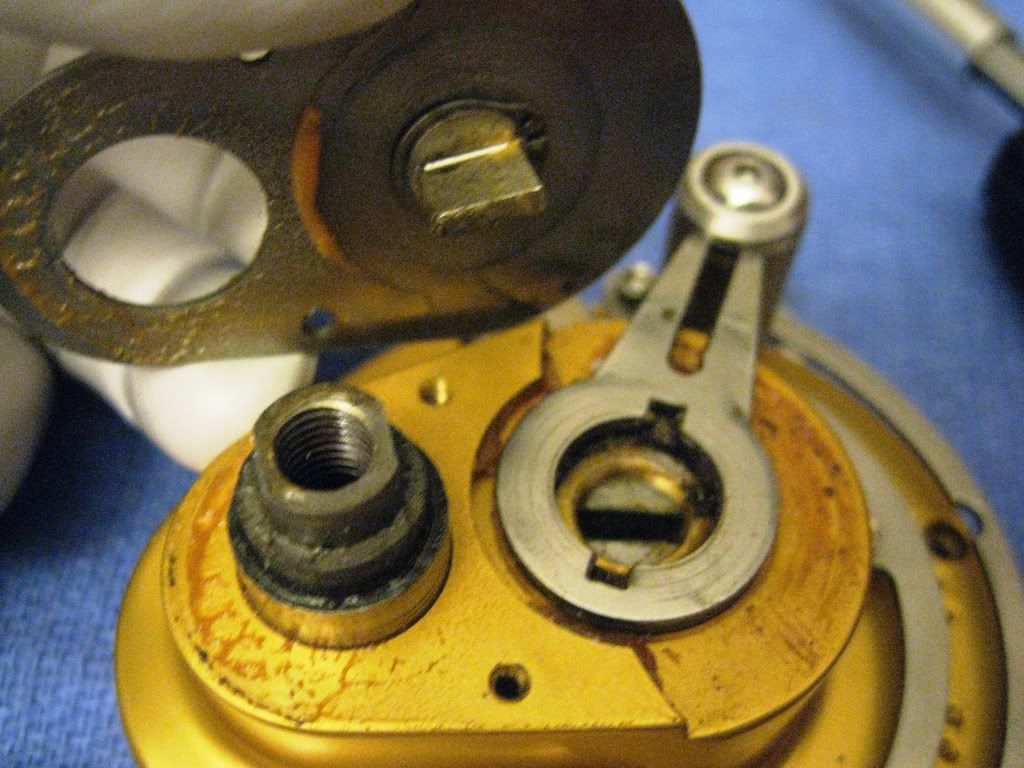
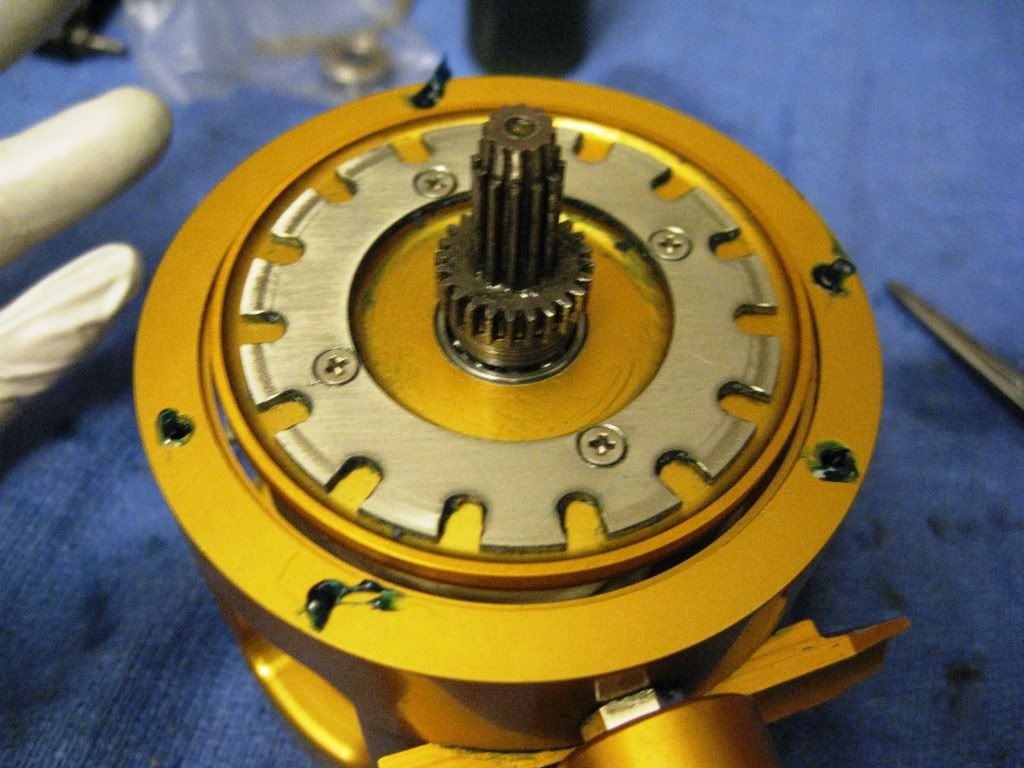
Well, the gears just don't drop out like most lever drag reels. So I flipped the left side plate to study the reel a little more. Do you see what I didn't see?

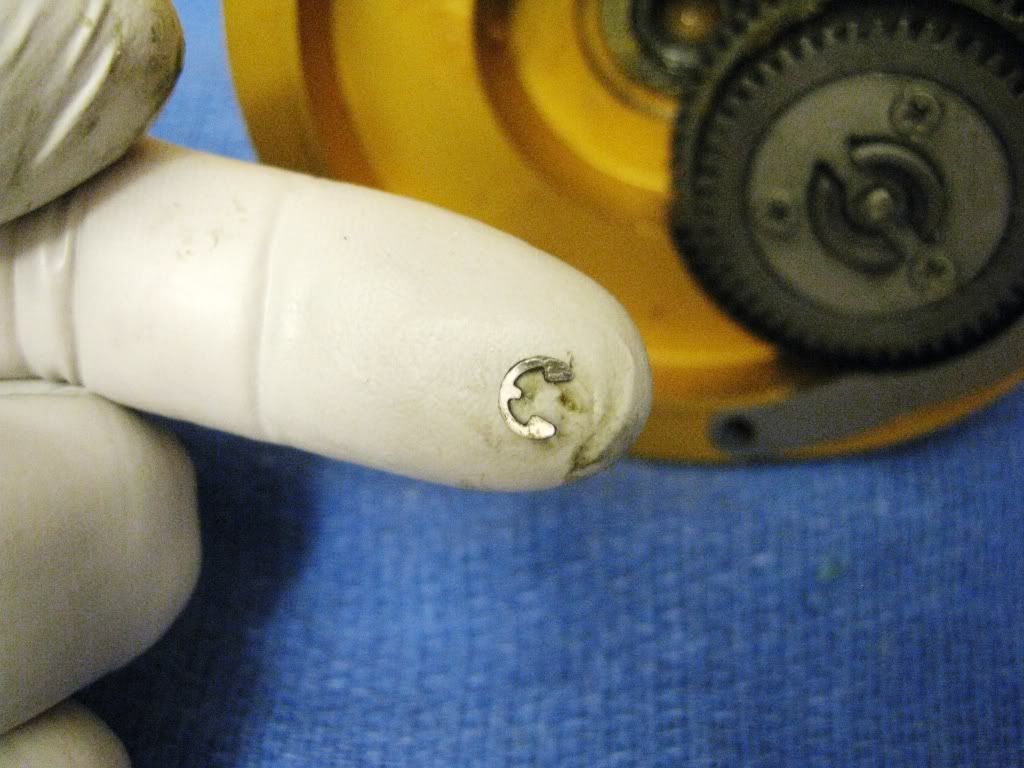
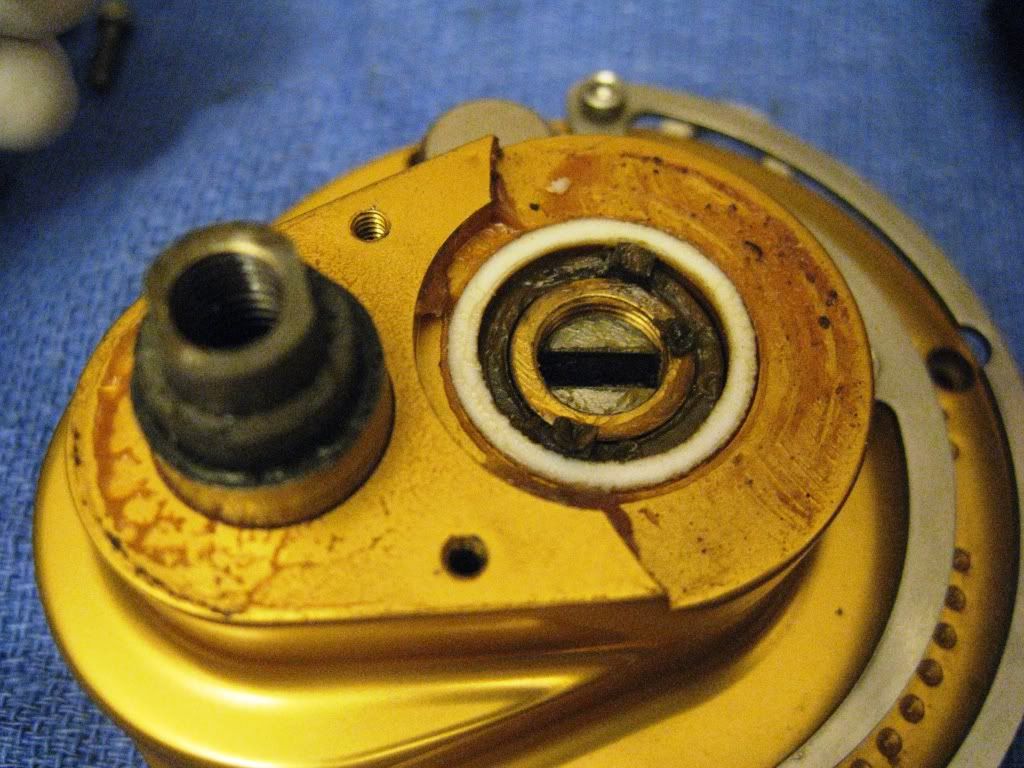
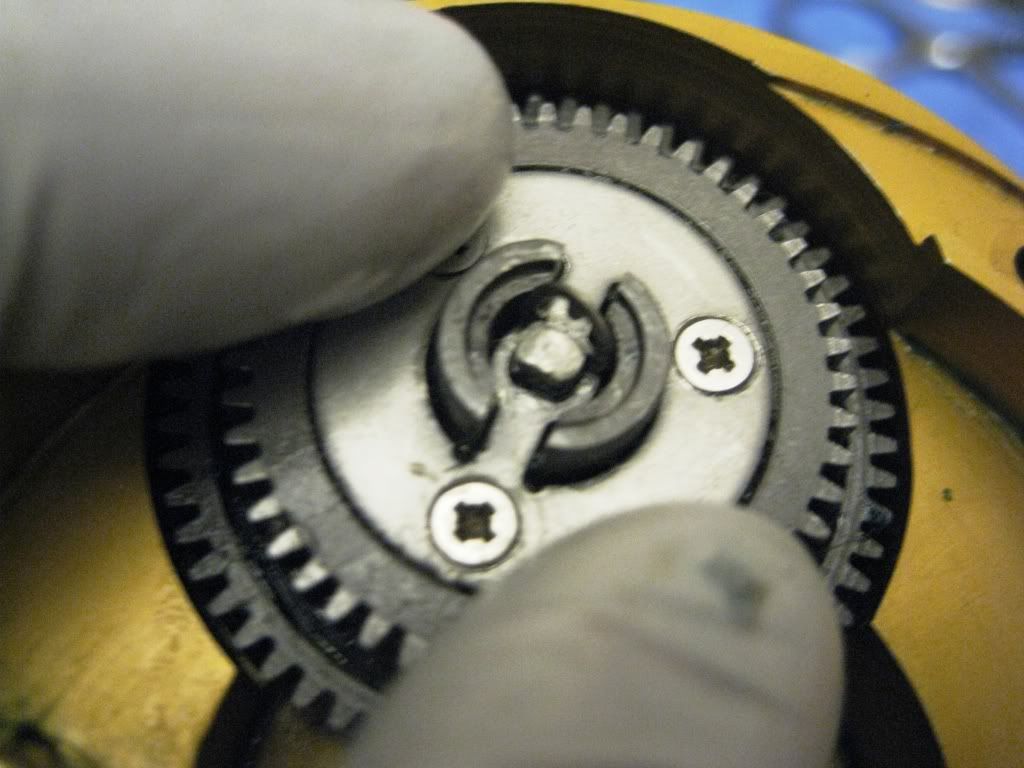
Here, let me clean off some of the grease. Yes, an E-clip. It's tiny and tight. A little difficult to get out.

Finally...
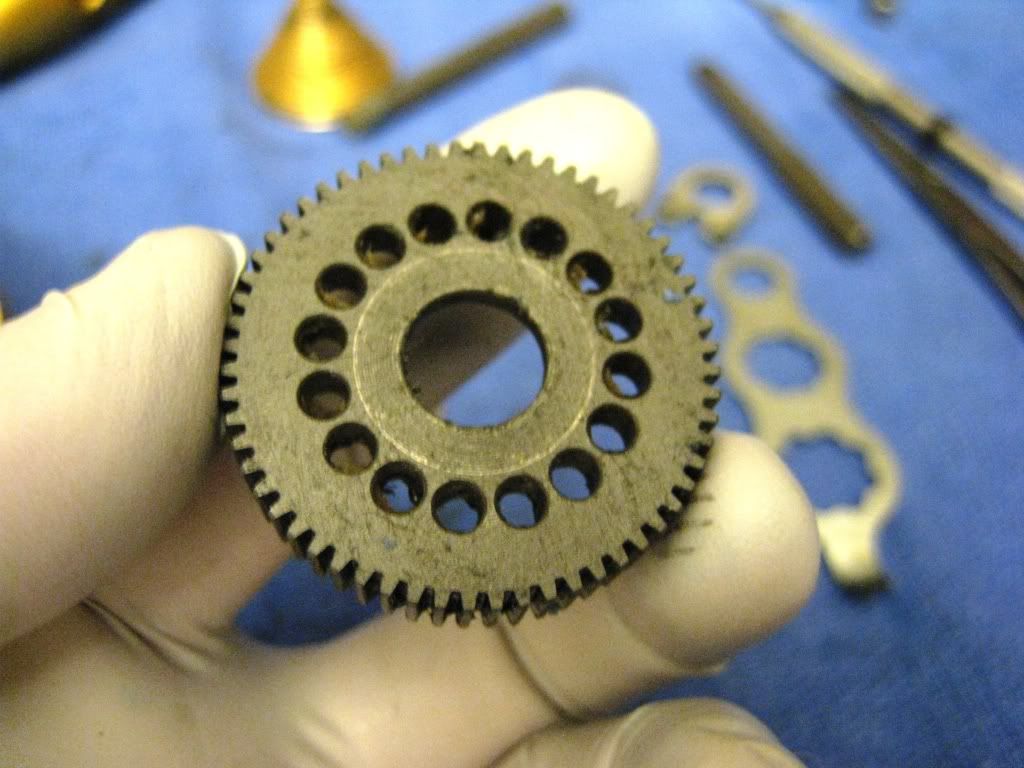
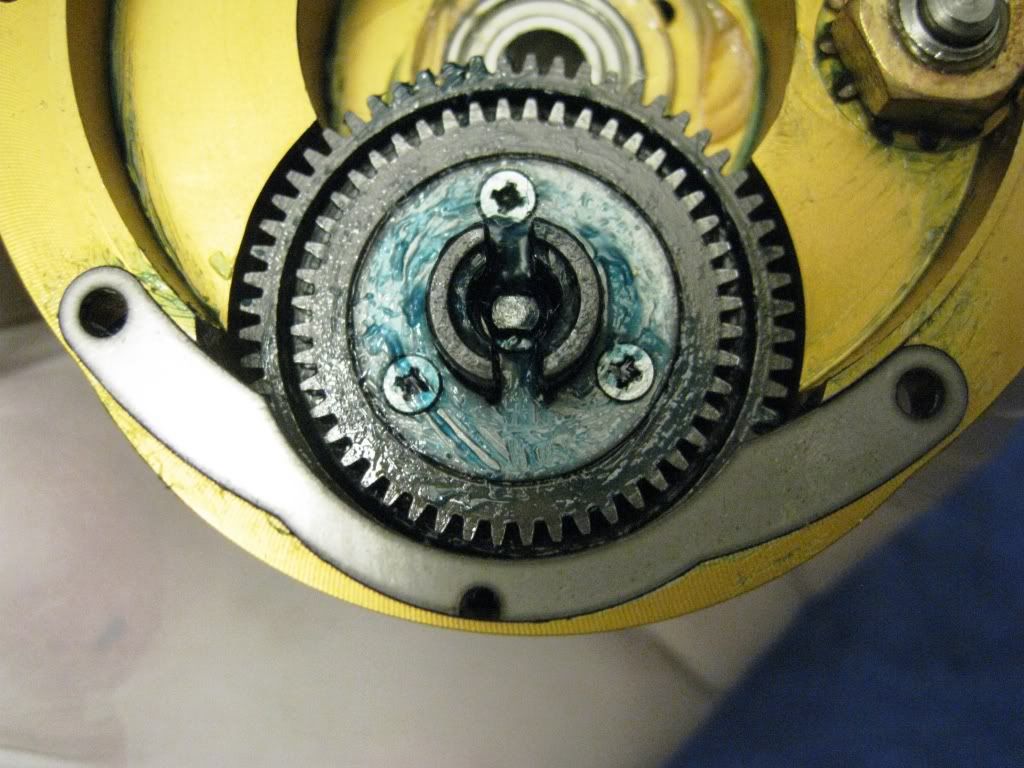
But the low speed gear just didn't drop out when the E-clip was removed. It has to be wiggled and waddled out.
Now, removed.
Whew, now can I get the shift mechanism out? Yes.
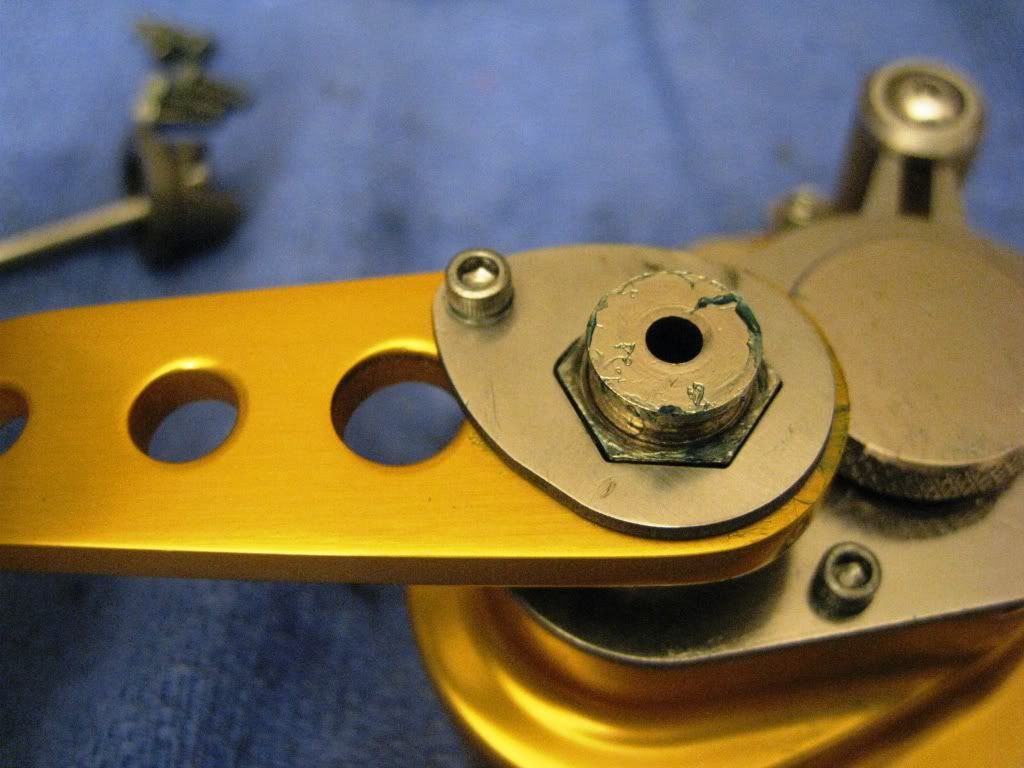
Now the handle can be removed.
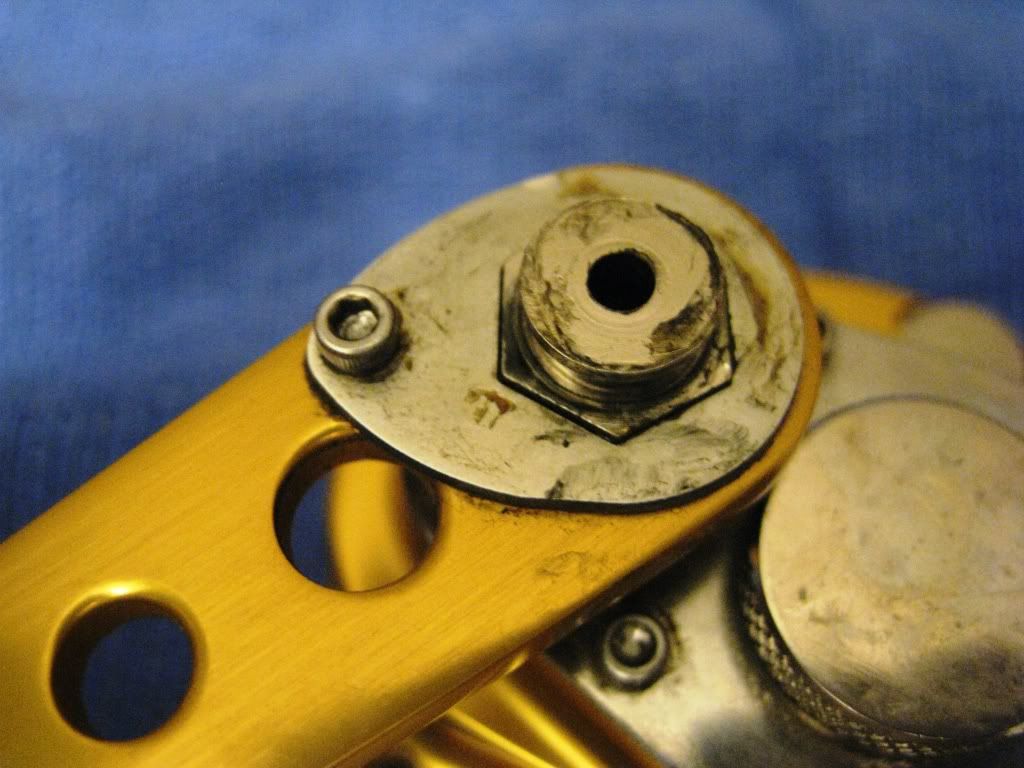
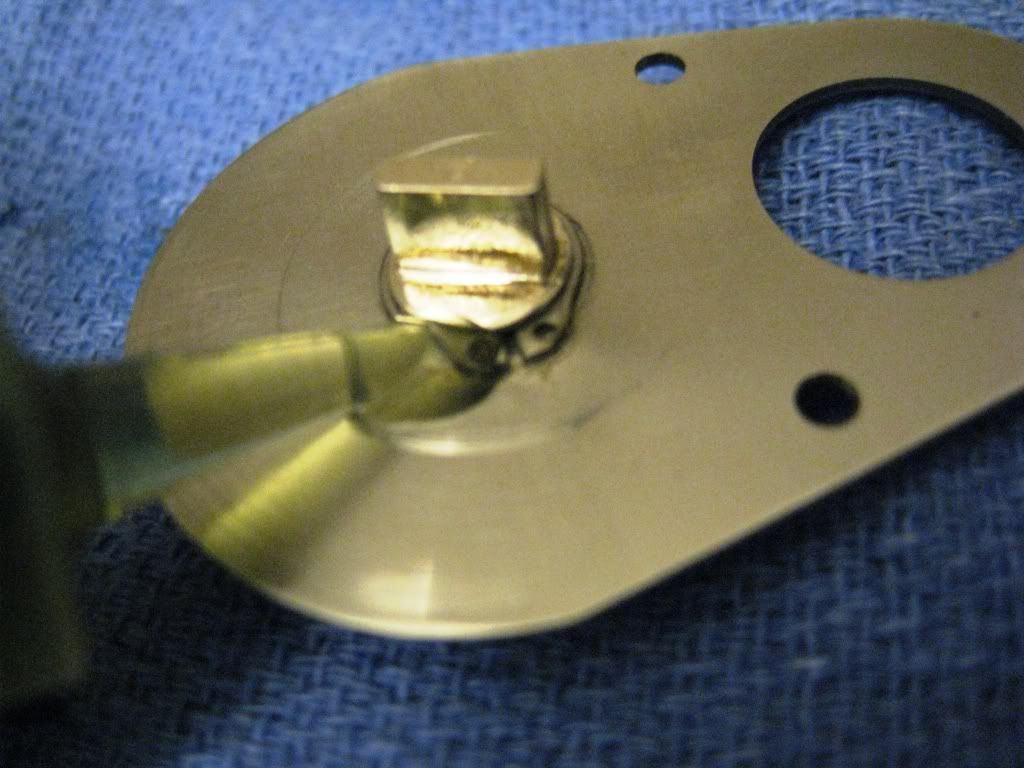
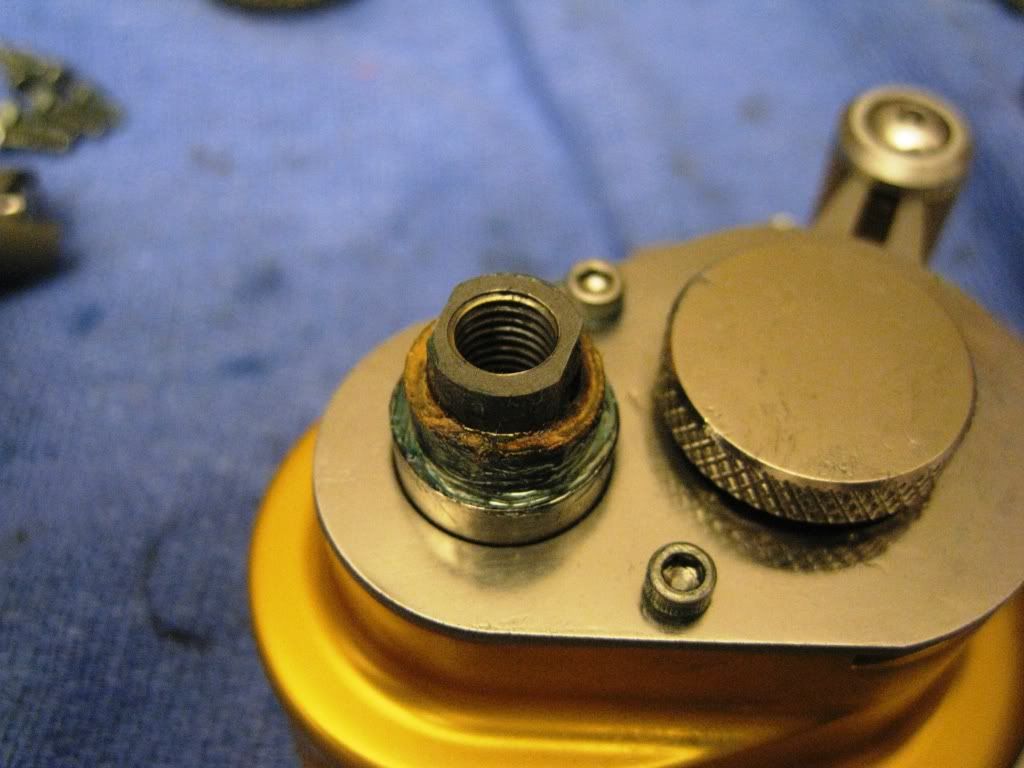
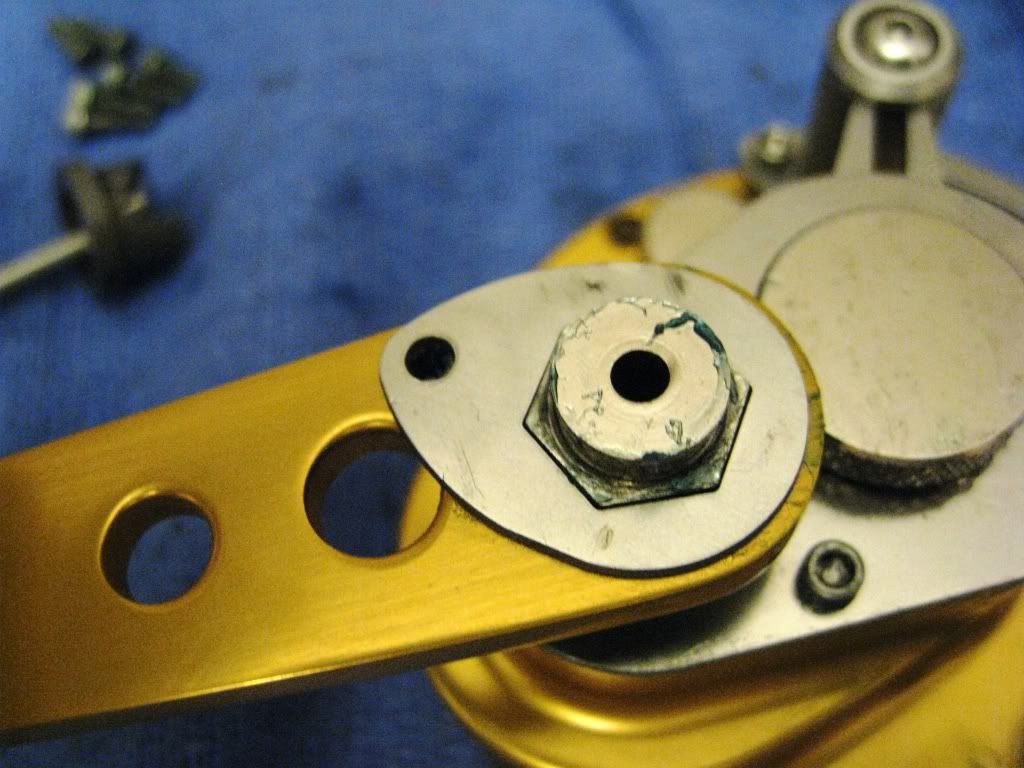
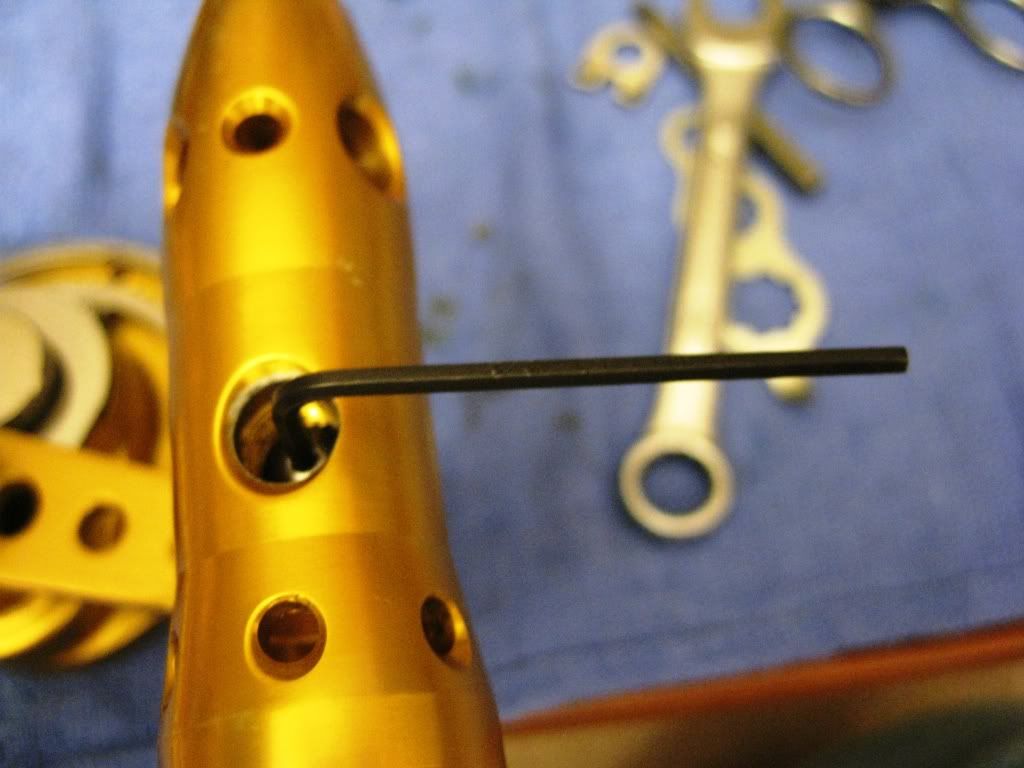
Remove the locking plate screw with a 3/32" allen wrench.

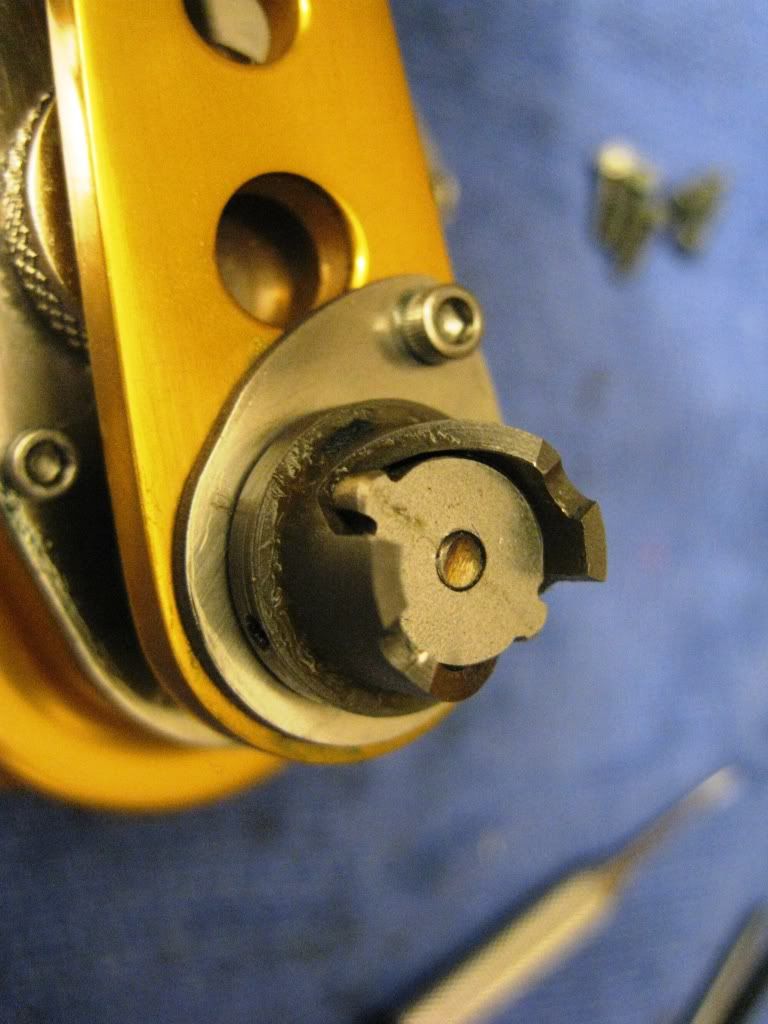
This exposes the handle nut.
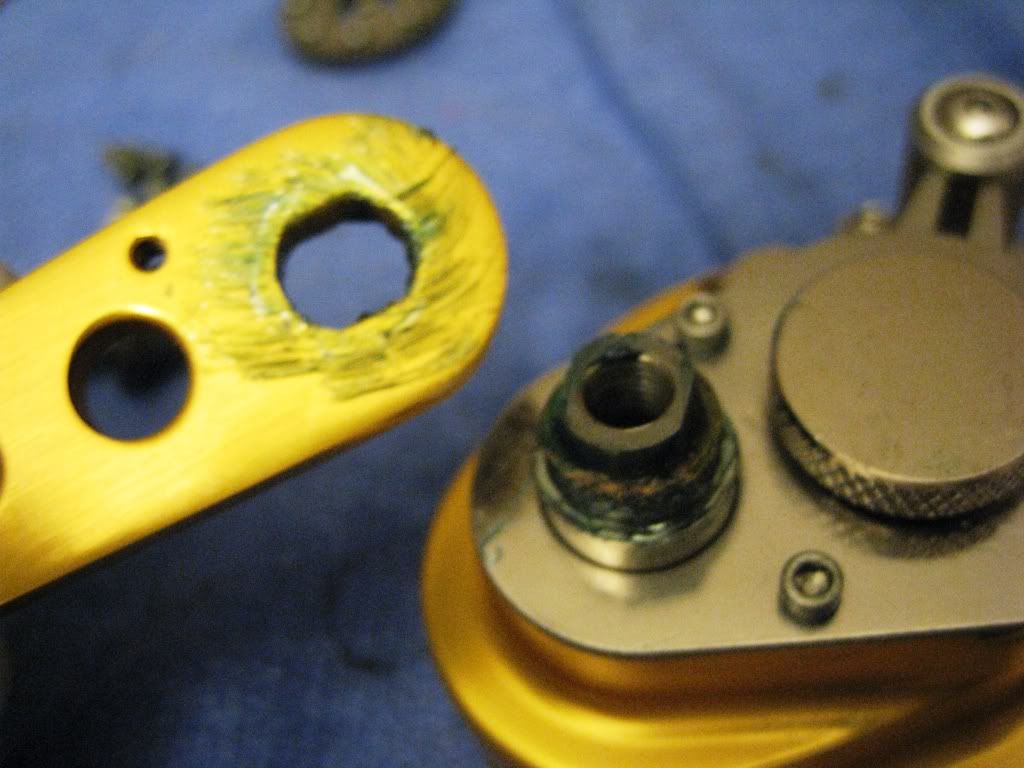
The handle can now be removed with a 13 mm wrench. I think it's a standard size, but I didn't have one available.
Handle removed.
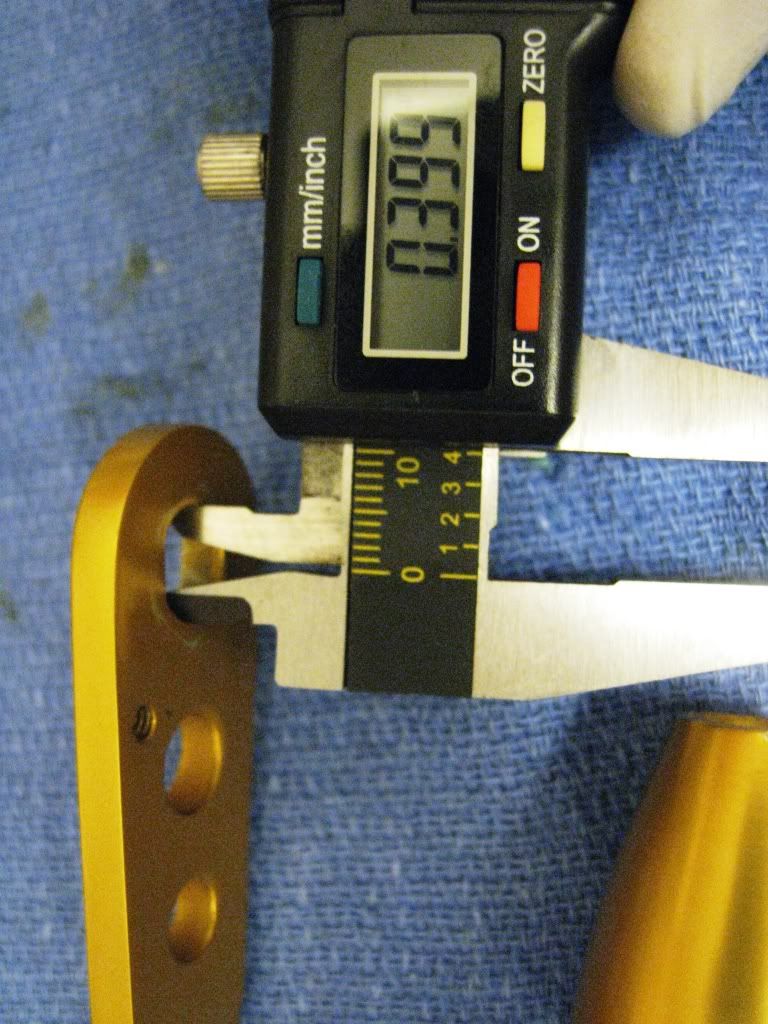
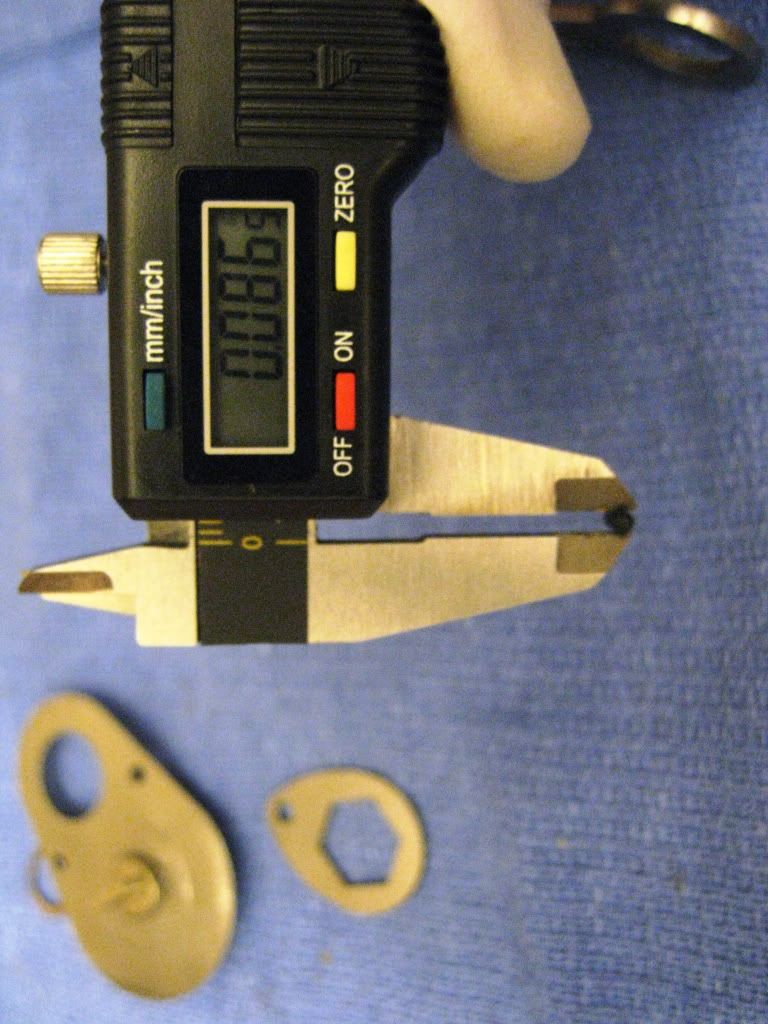
Provided with a thrust washer, 0.39 X 0.52 X 0.03 in..
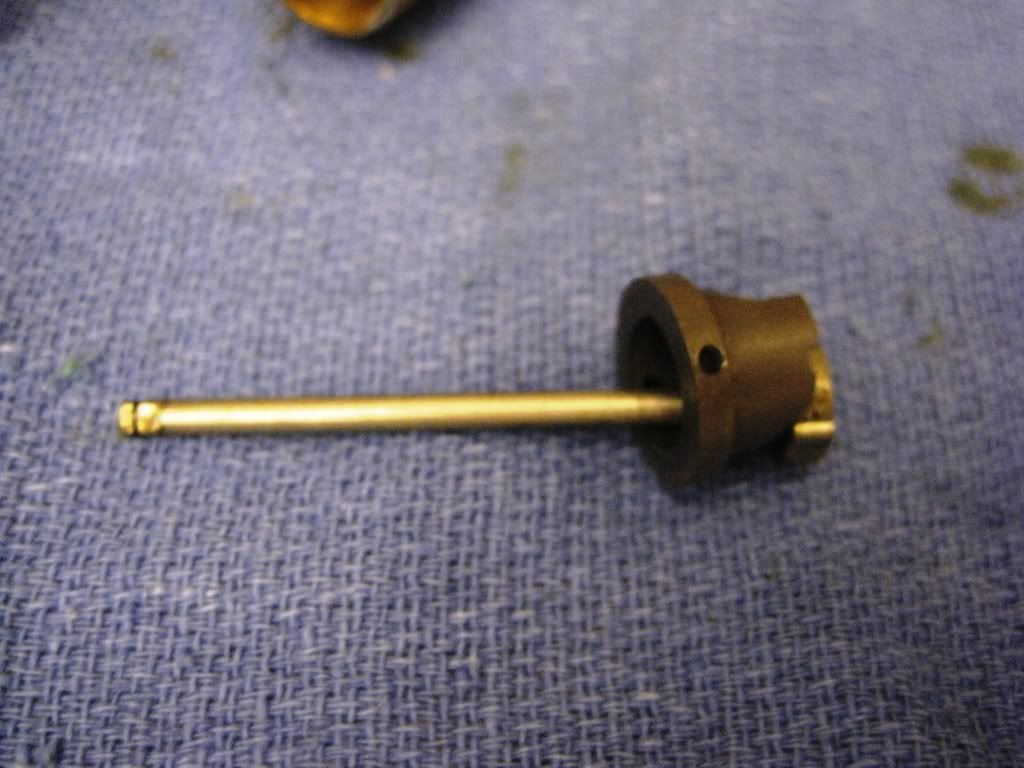
The handle is provided with a double D shaped opening.
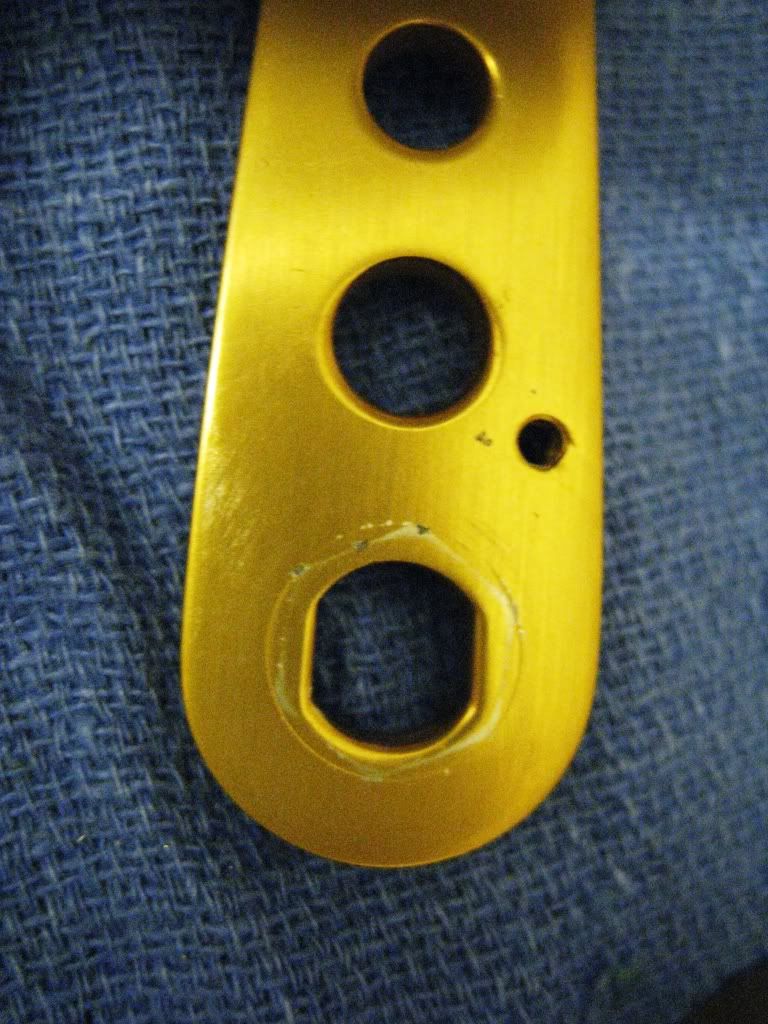
The handle shaft is

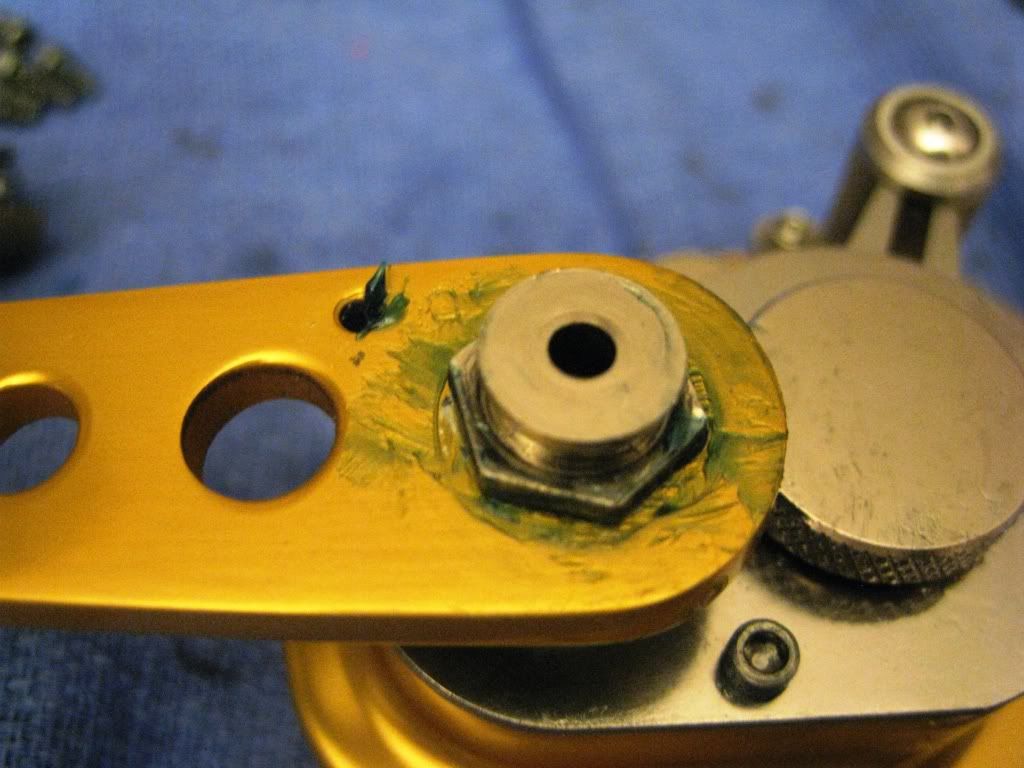
Remove the two 3/32" allen wrench screws to remove the drag preset plate.
Remove the lever exposes the cam assembly.
Lube lever ratchet with CorrosionX. Don't loose the spring loaded ratchet pin. And place a side.
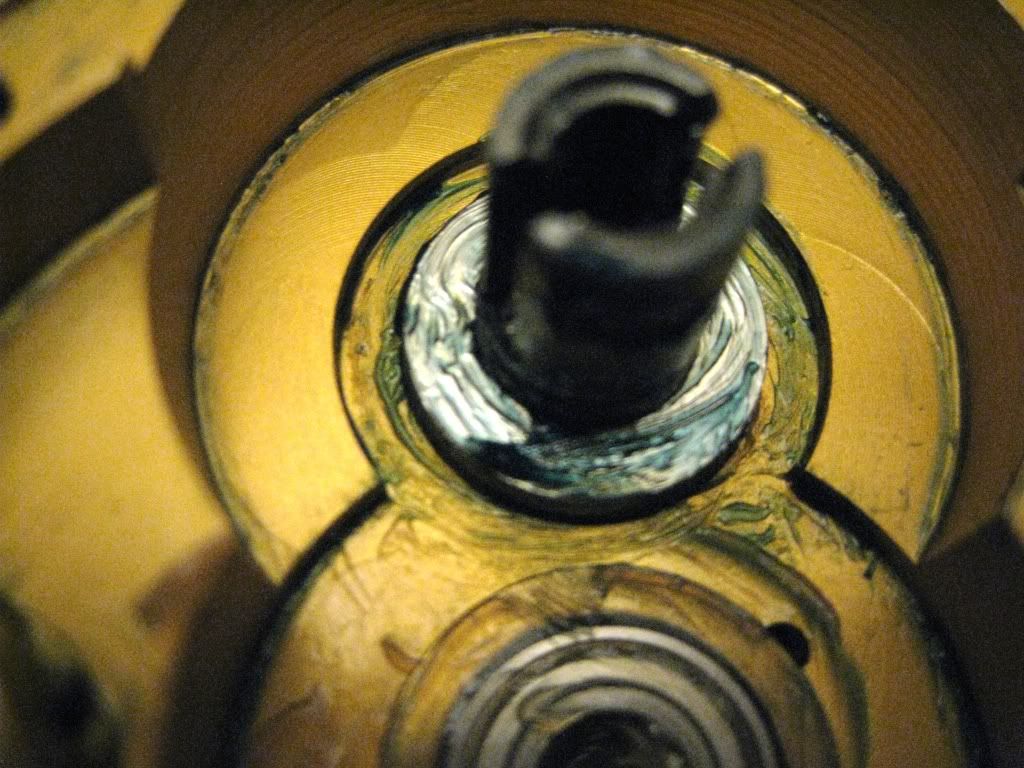
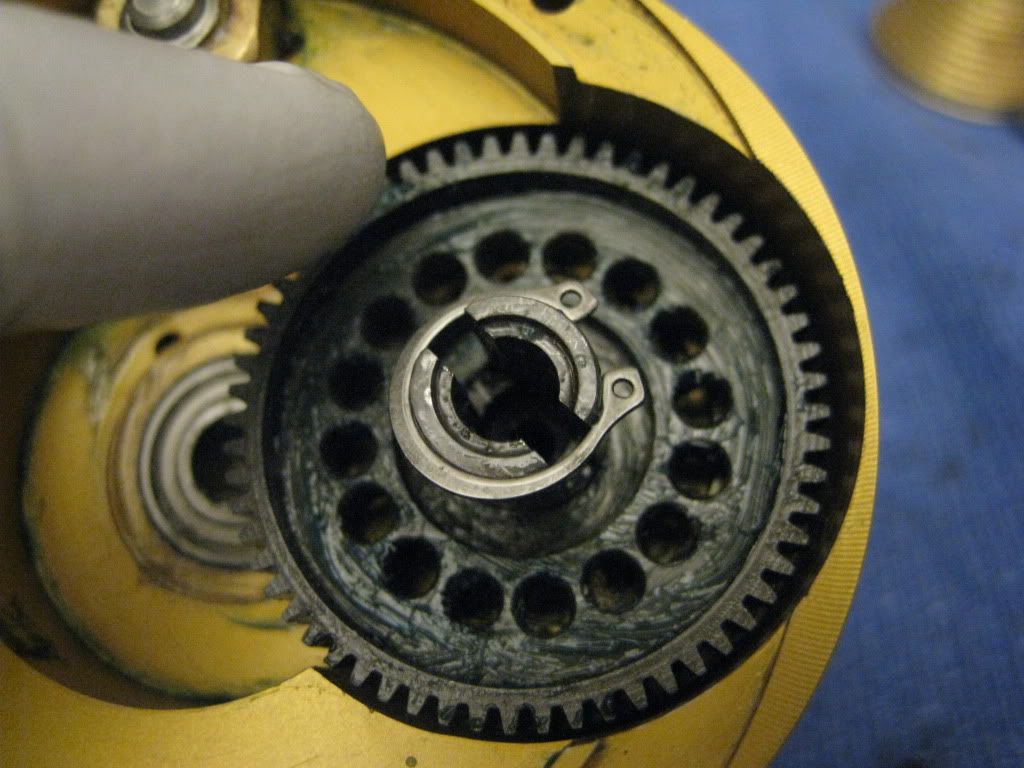
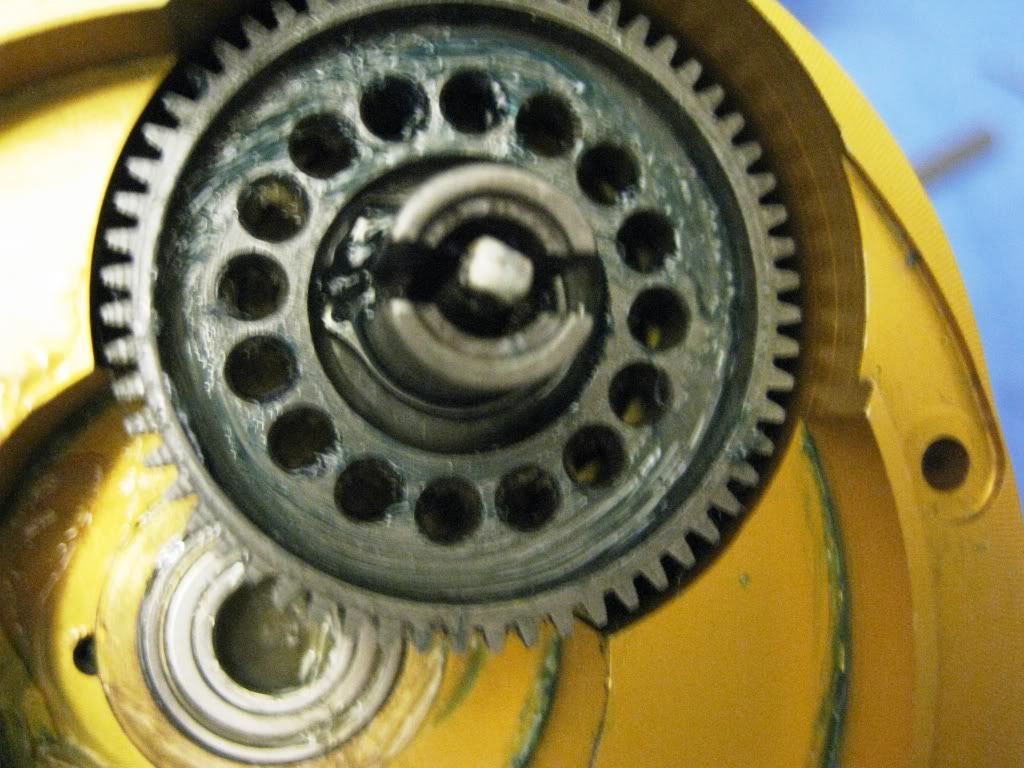
Now how to get the lower gear out to get to the left side plate bearing? Can you see the problem I am facing?
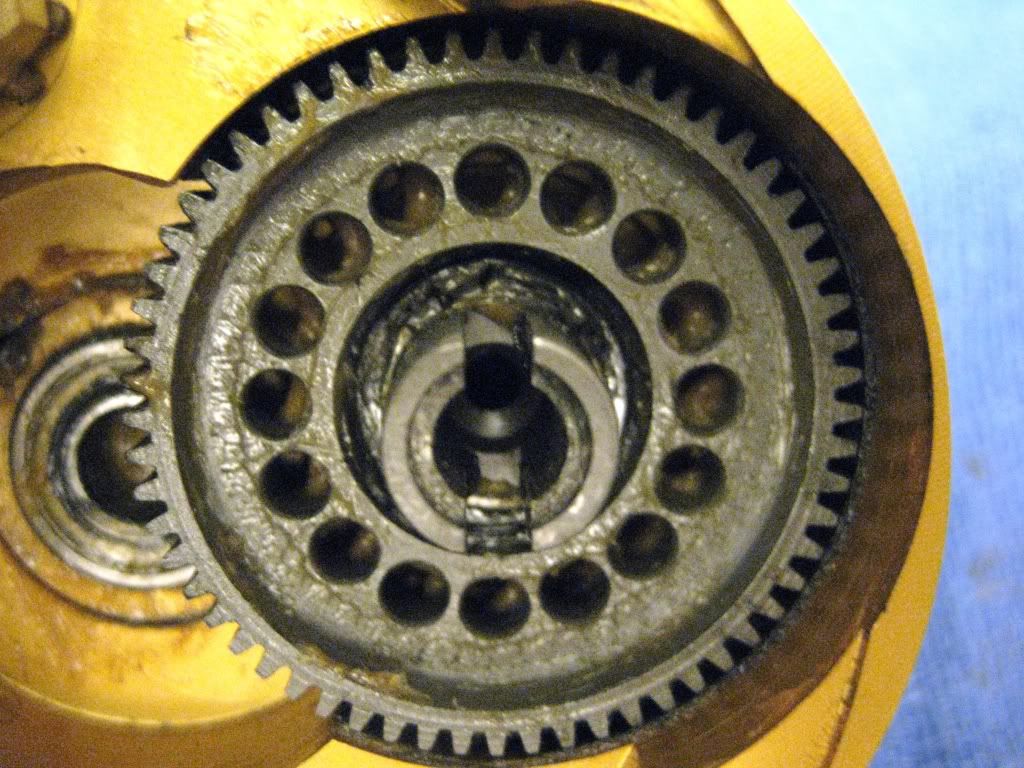
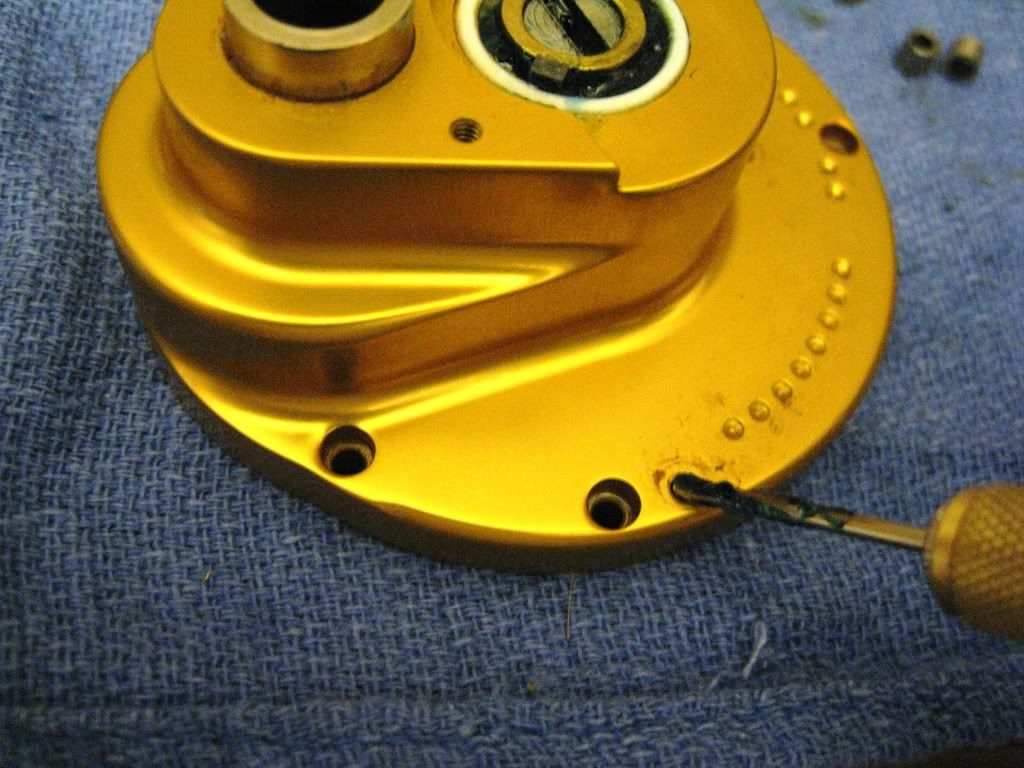
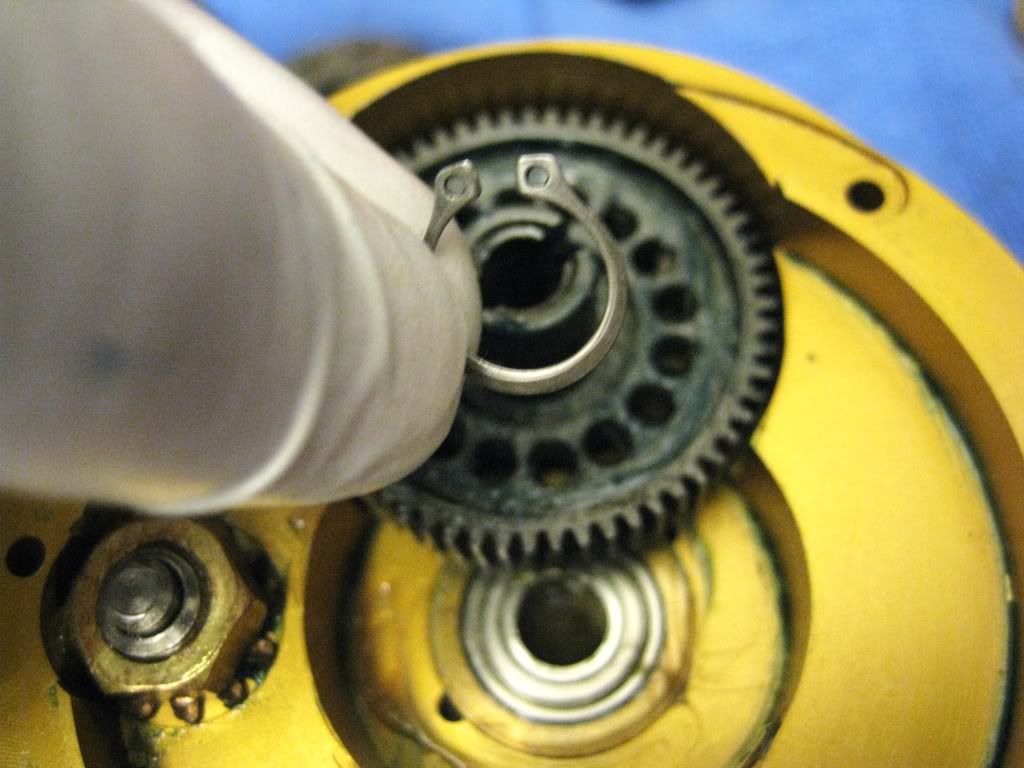
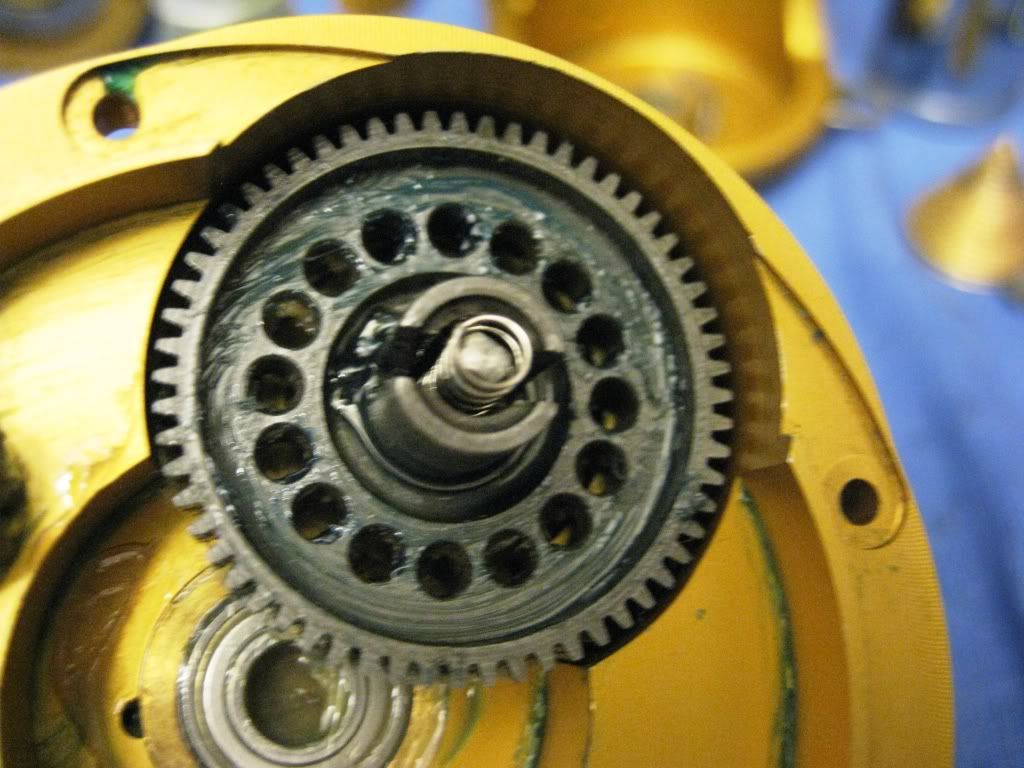
Try this angle. Arg, another spring clip.
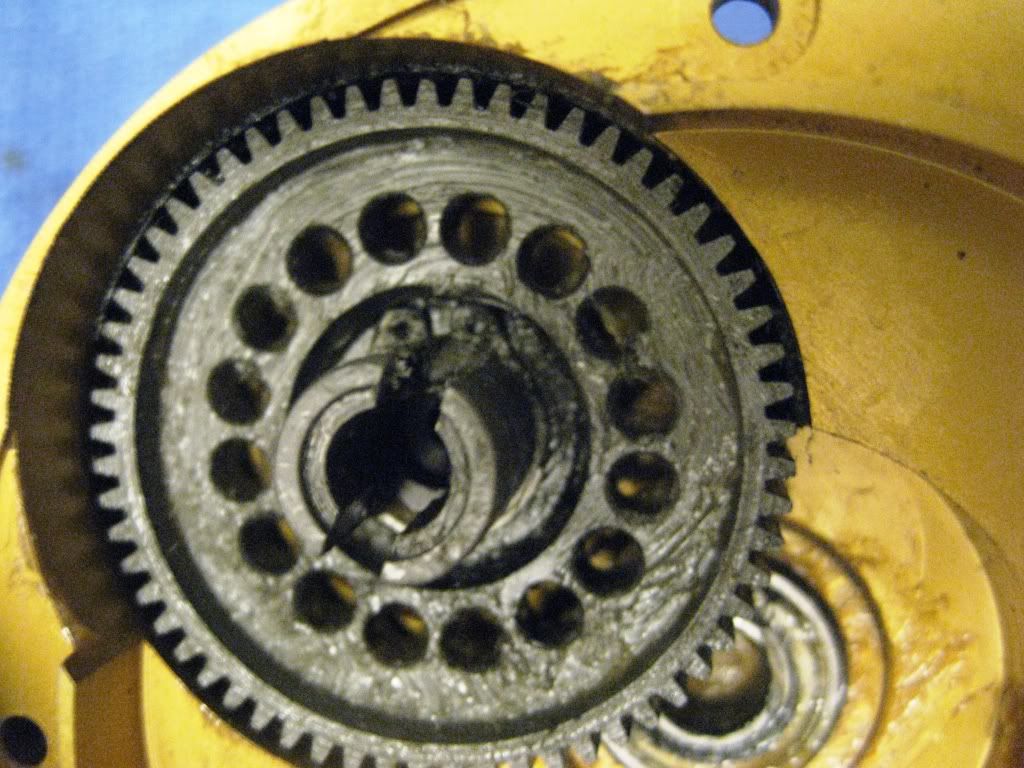
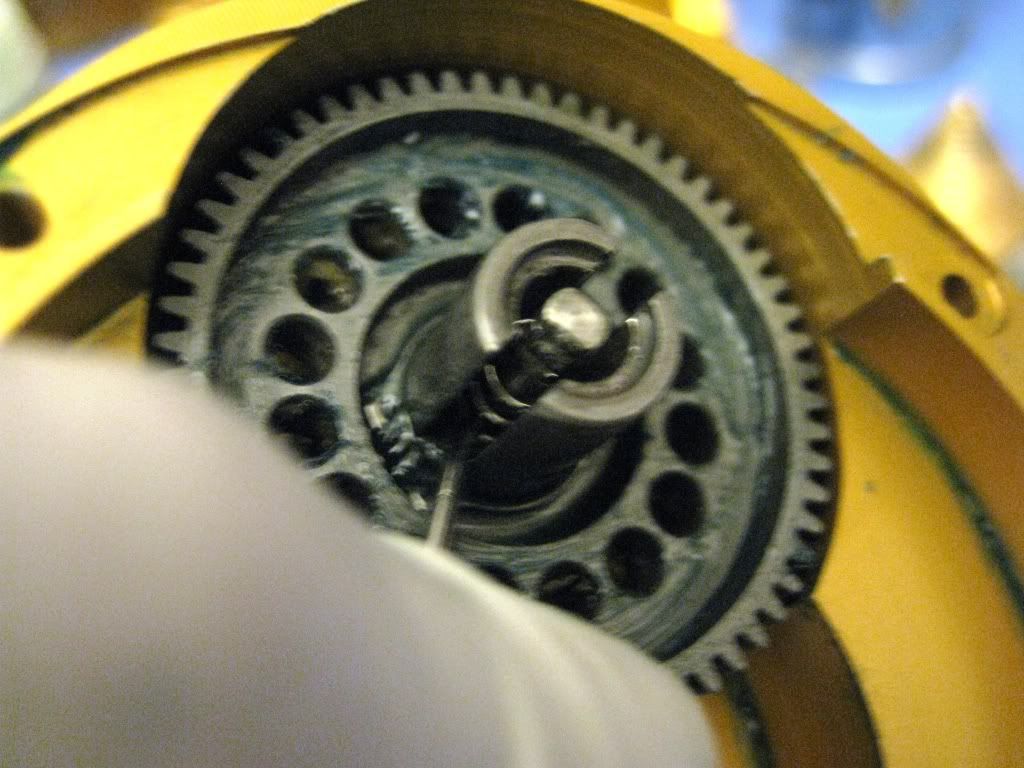
Remove the spring clip, and this is no easy task with the limited space.
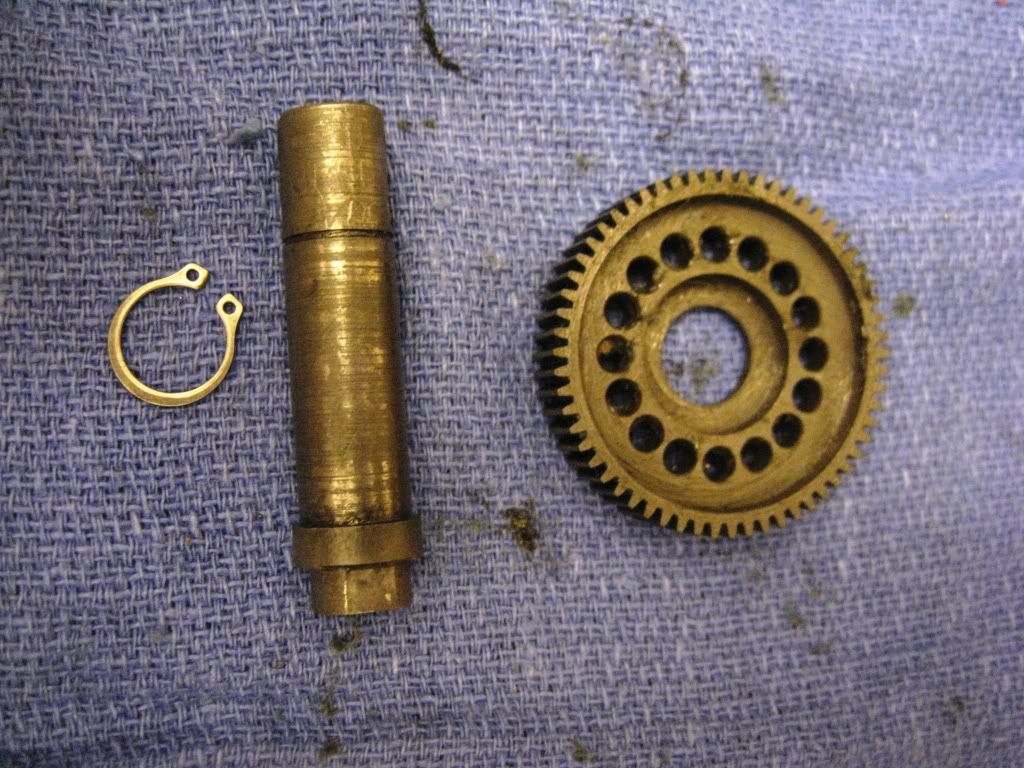
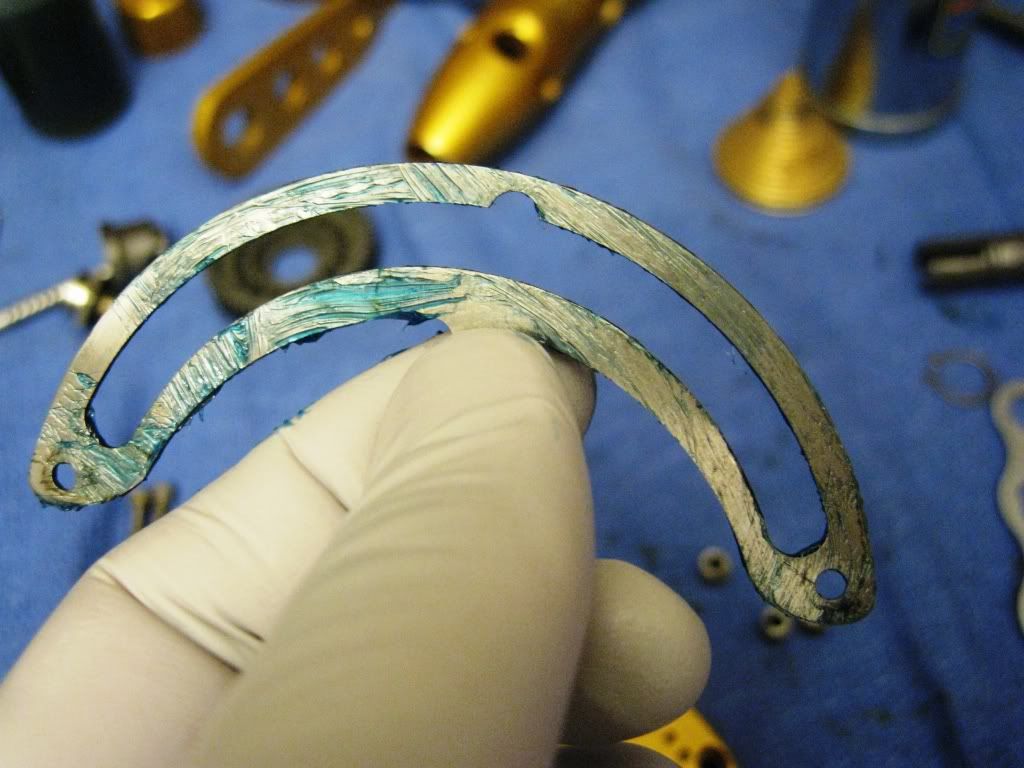
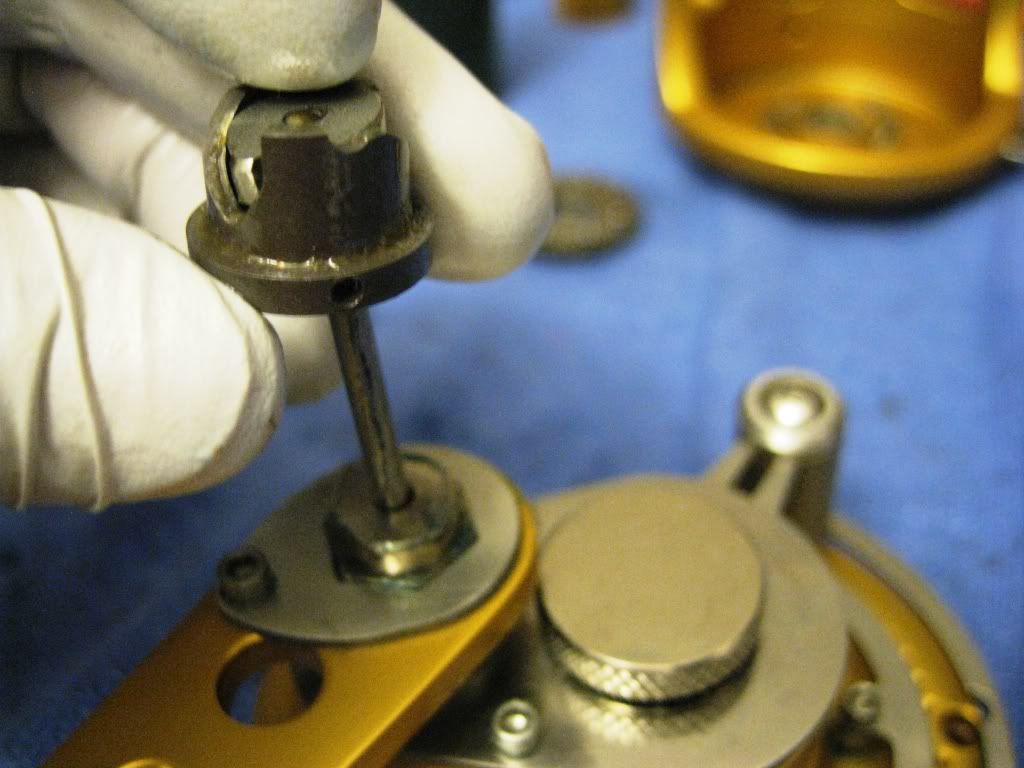
Whew, finaly got the spring clip off and here is the high speed gear, crank shaft and spring clip.
Remove the left side bearing and cam assembly.
Now clean the left side plate.
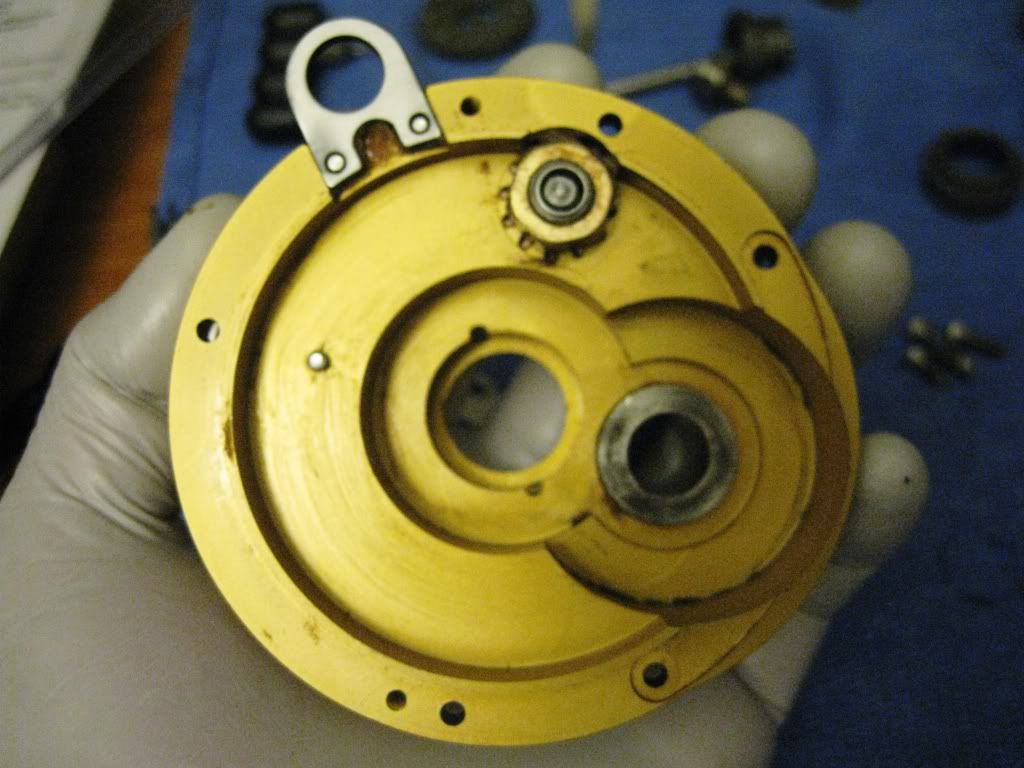
Apply marine grease, move and grease left side harness lug and apply CorrosionX to clicker assembly, and place aside.
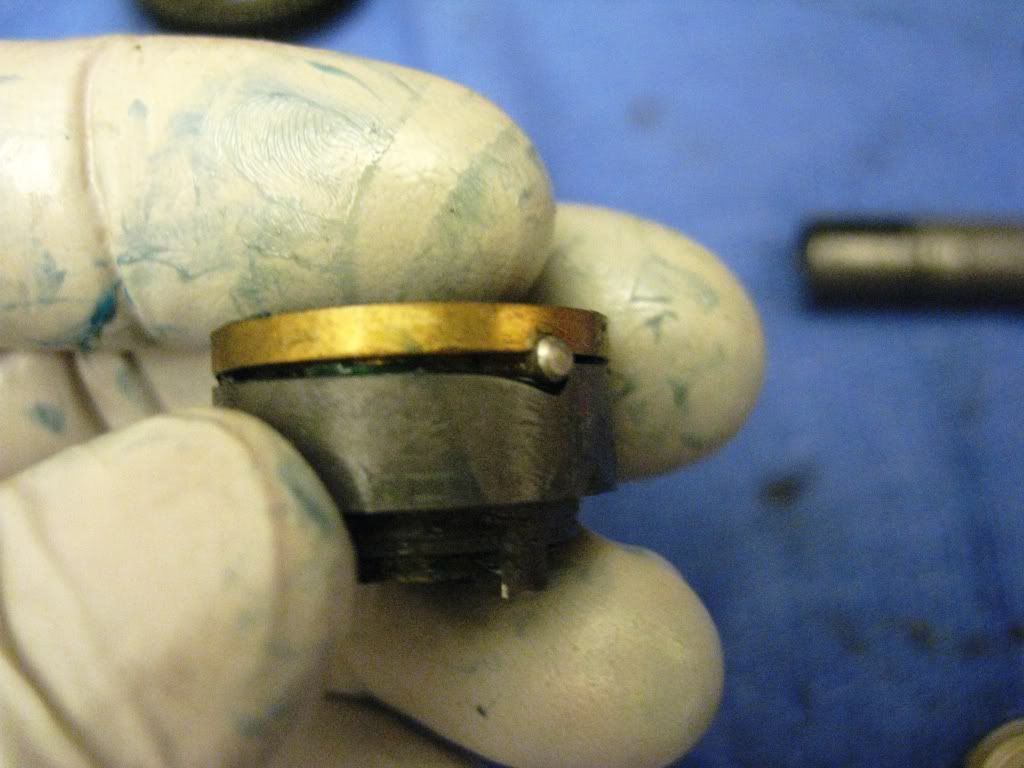
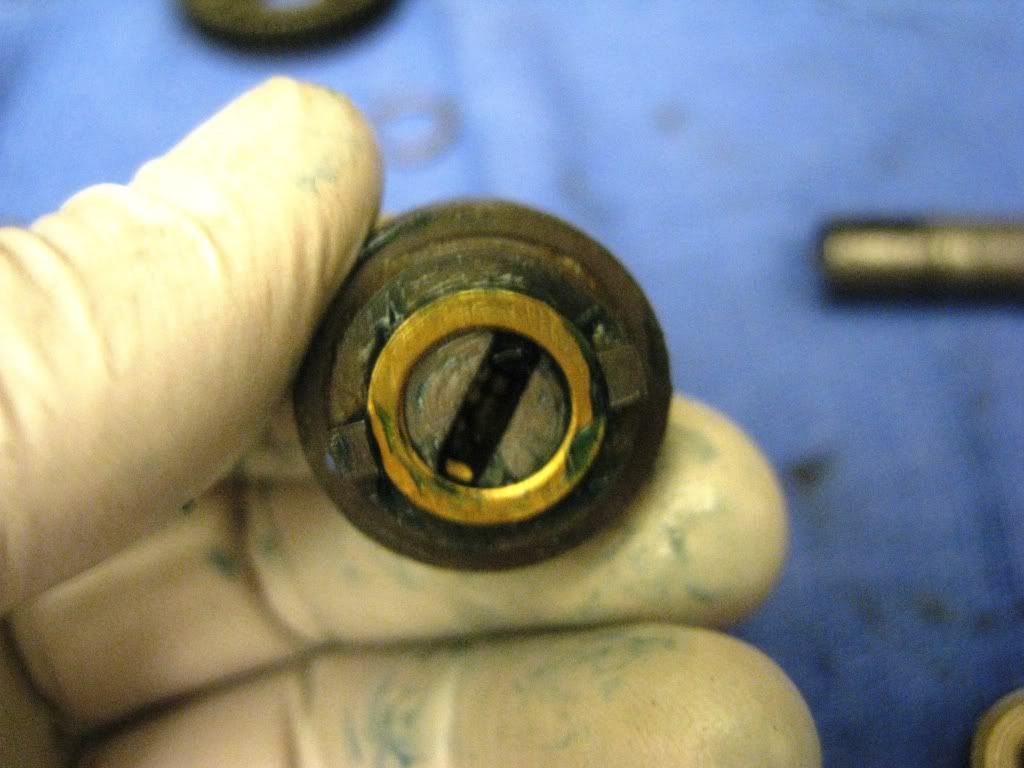
Remove the bearing from the bearing cup of the cam assembly.
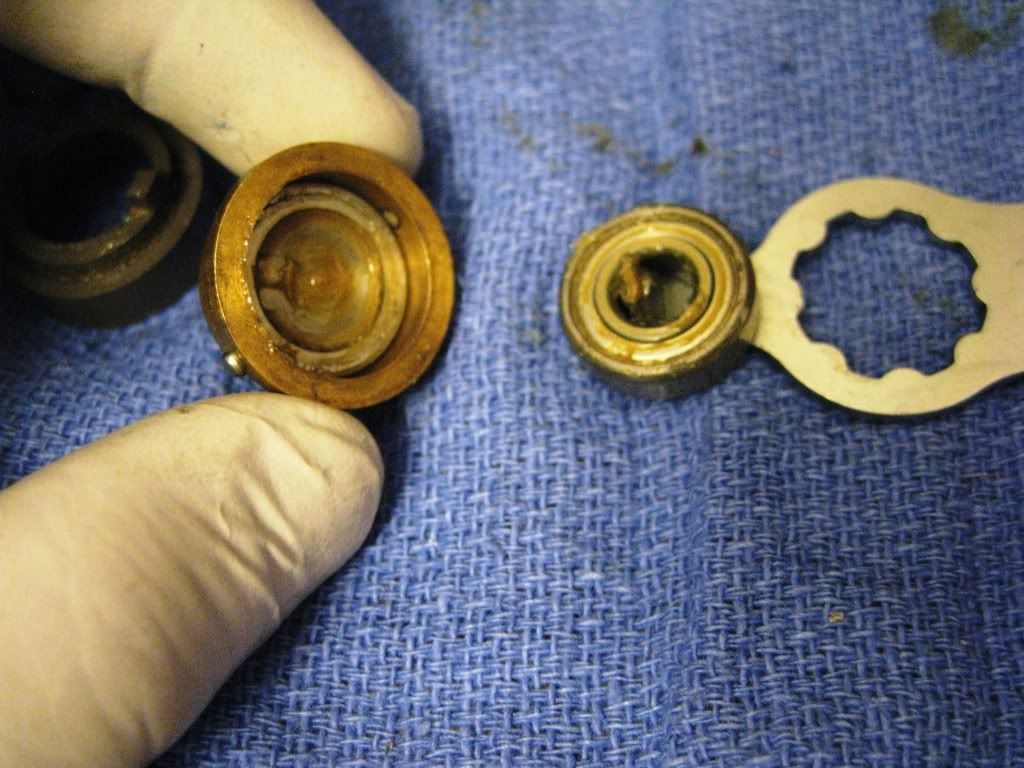
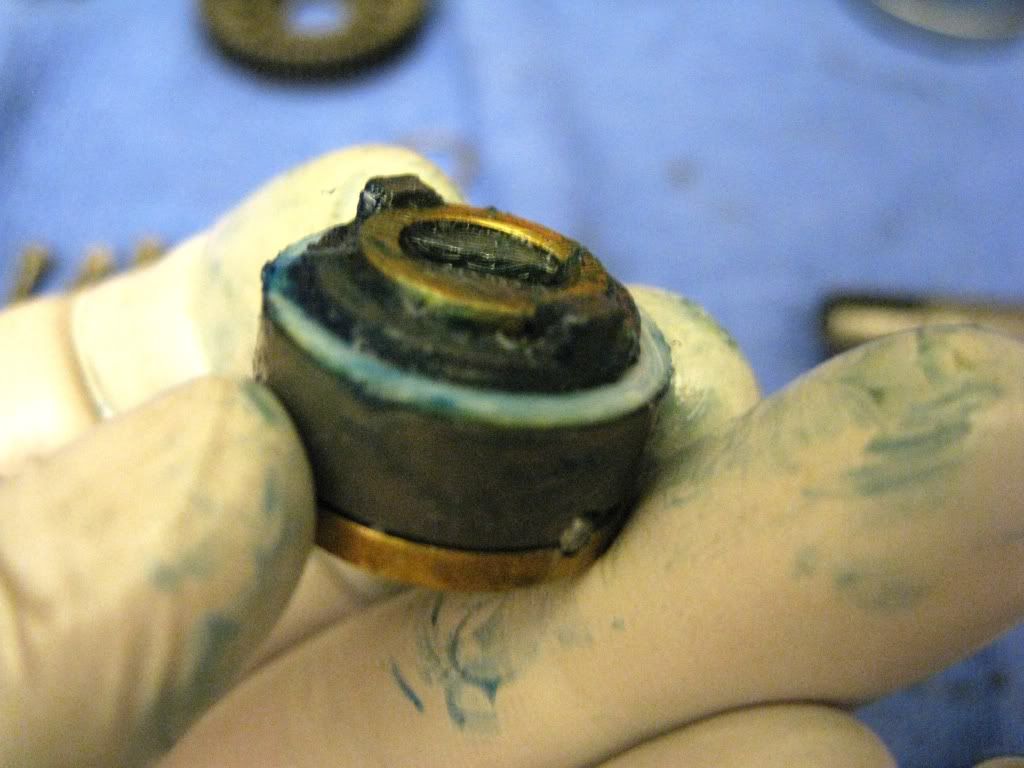
Disassembly the cam assembly and clean.
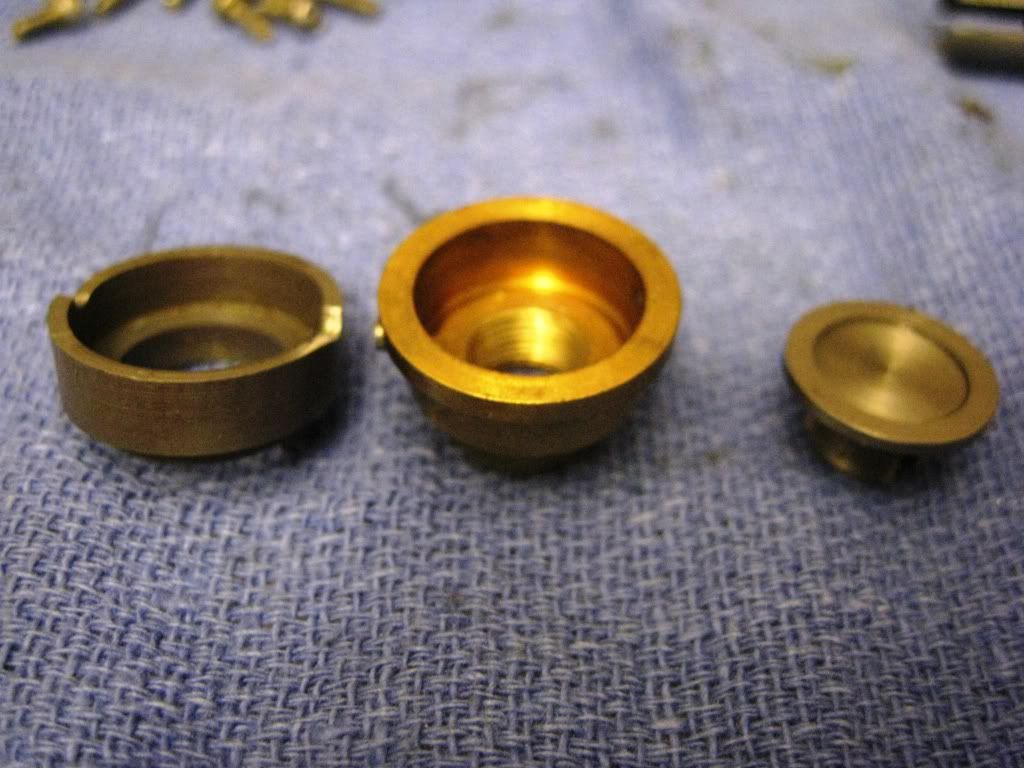
Grease with marine grease and reassemble.
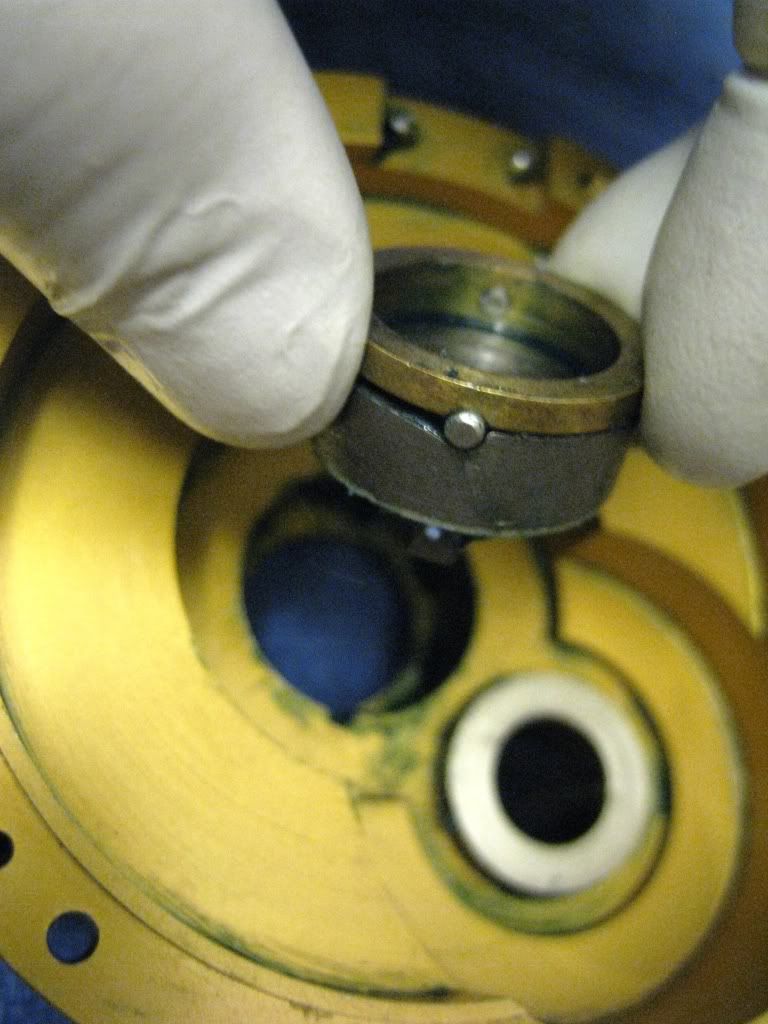
Grease left side frame where cam that holds the cam assembly.

Install cam assembly.
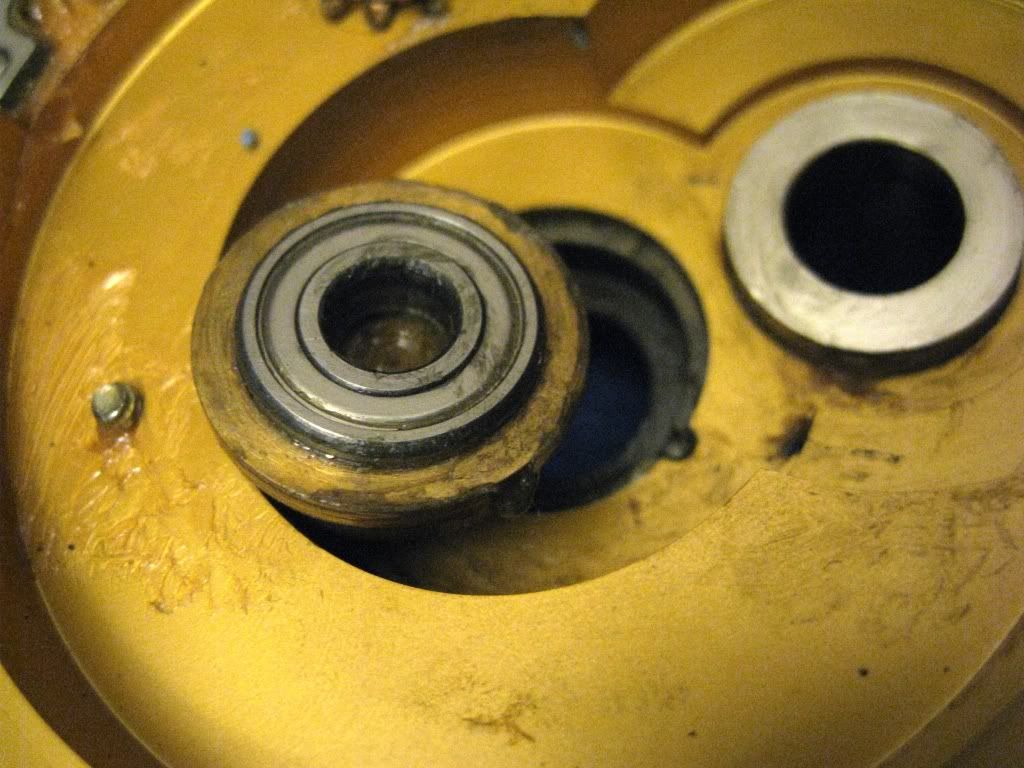
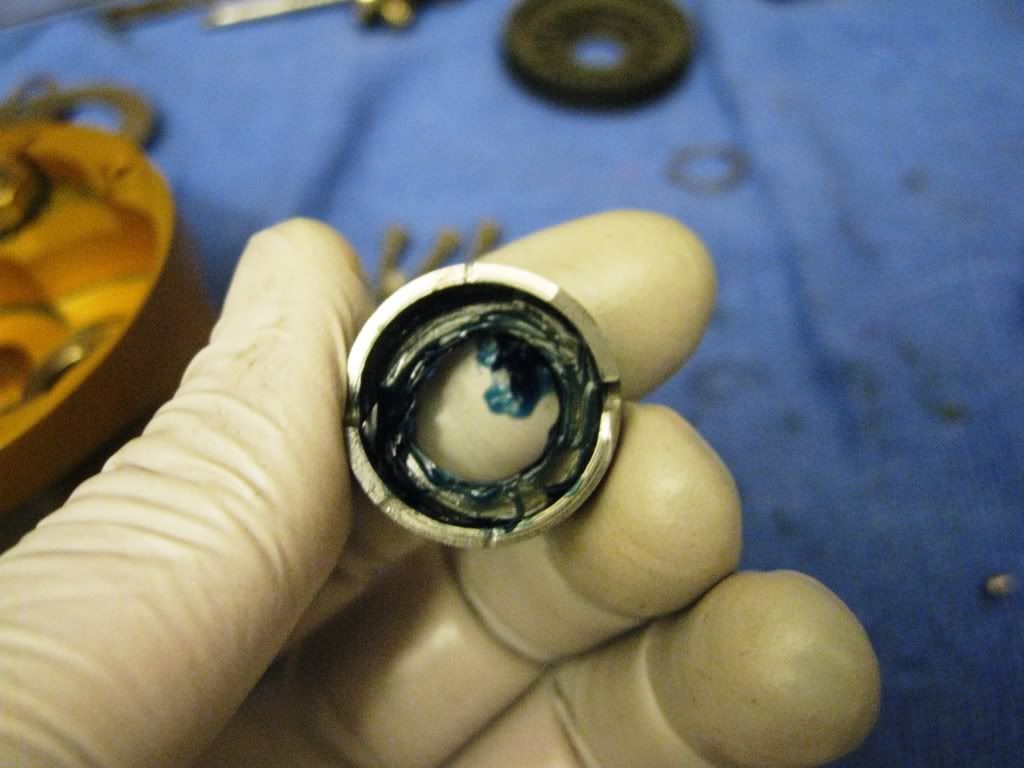
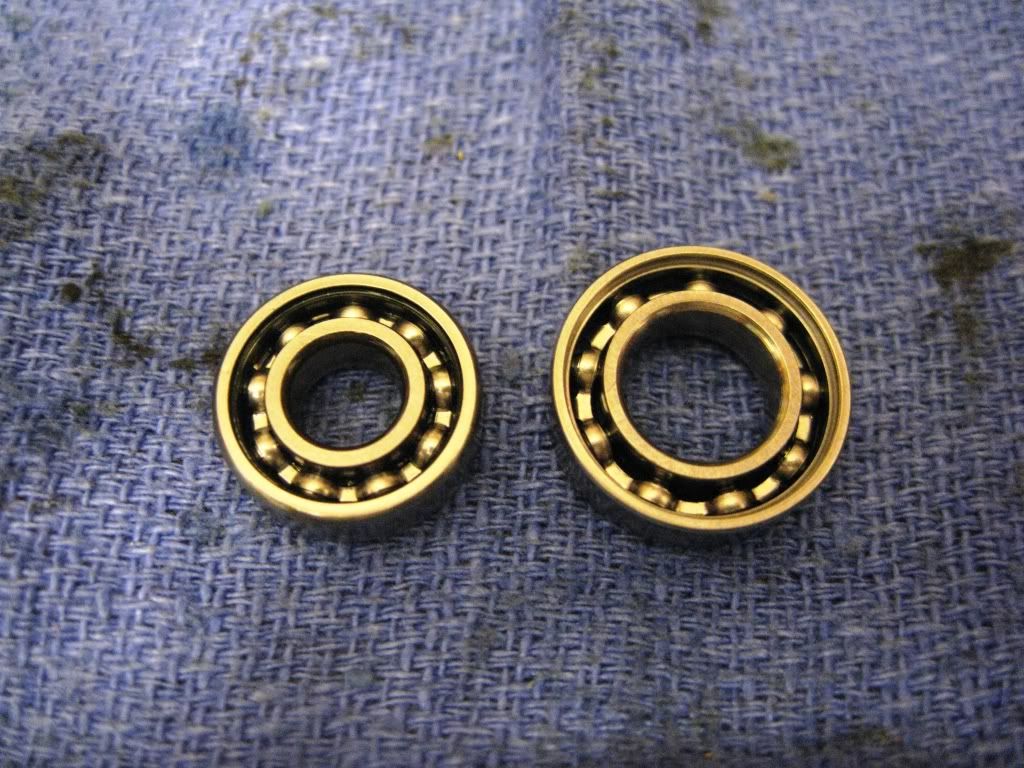
This is where I grease both left and right side bearings. 10 X 17 X 5 mm and 7 X 17 X 5 mm, respectively. You will notice that the grease is not blue. It's because I'm using CorrosionX grease from Germany. When I spoke with representatives from CorrosionX, they had indicated that the mixing of these greases will not harden when mixed together.

And Install greased bearings
One last thing that needs to be disassembled is the lever guide, grease, wipe, and reassemble.
Lube preset knob with CorrosionX
Install Lever.
And install preset plate. Note that the preset know has a blade that is supposed to slot into the cam assembly. Please make sure that these are aligned.
Grease screw holes and install plate screws.
Now the handle arm shaft. Clean and grease with marine grease.
And install
Clean high speed gear
Lightly grease and install on shaft.
Reinstall spring clip over shaft and slide down.
I then lube with CorrosionX

Reinstall the thrust washer and handle.
Clean the shift shaft and shift cam and lube with CorrosionX.
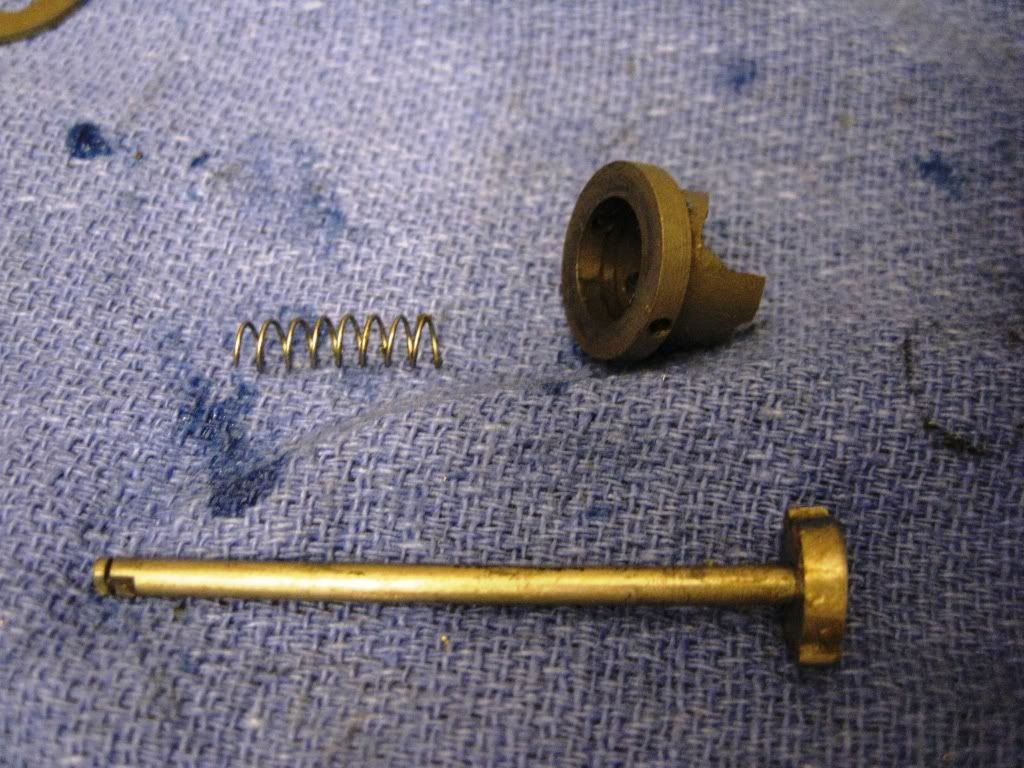
Install shift assembly.
Install shift spring.
Hold the spring down the install the low gear. If you don't hold the spring down, you could damage the spring and the lower gear may bind with the spring.
Keep pressure on the lower gear and install the E-clip.
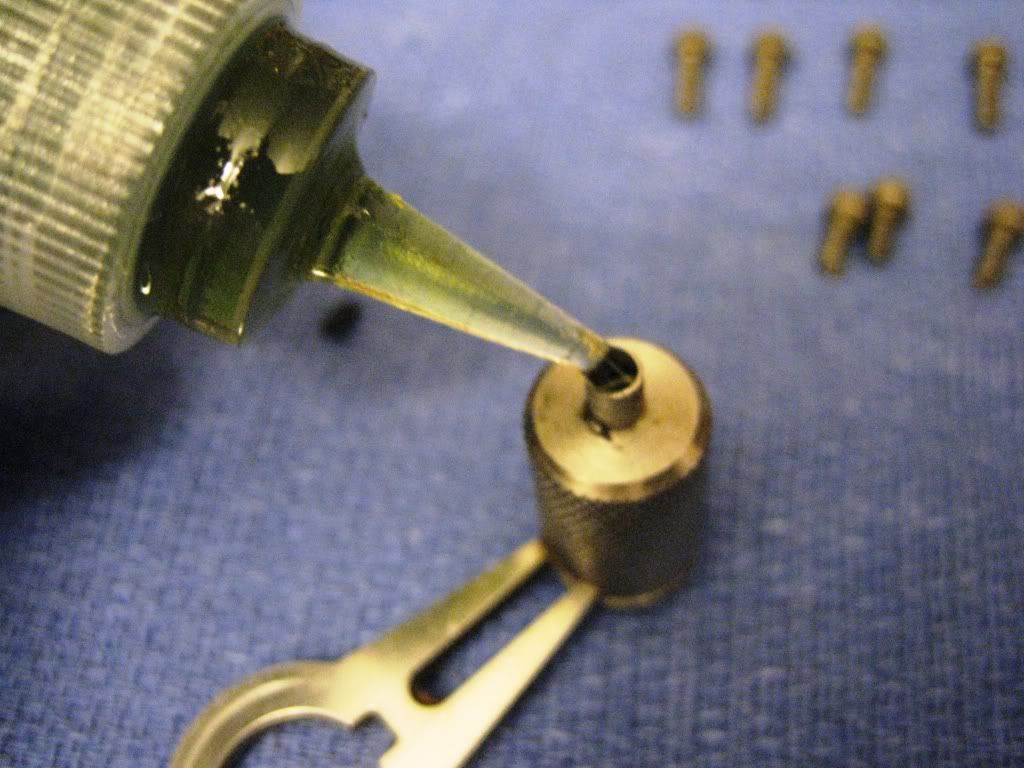
Now, you can install the shift know. But before you do, be sure you heavily grease the shift assembly. I tried lubing it with TSI301, and CorrosionX and it always bind. Grease was the solution for a smooth shift.
Now the handle. Disassemble with a 1/16" allen wrench, clean, grease, and reassemble.
The reel and frame are now done. Whew. Take a break, have a drink and something to eat. Are we done yet???
NO, we still have the spool to do.
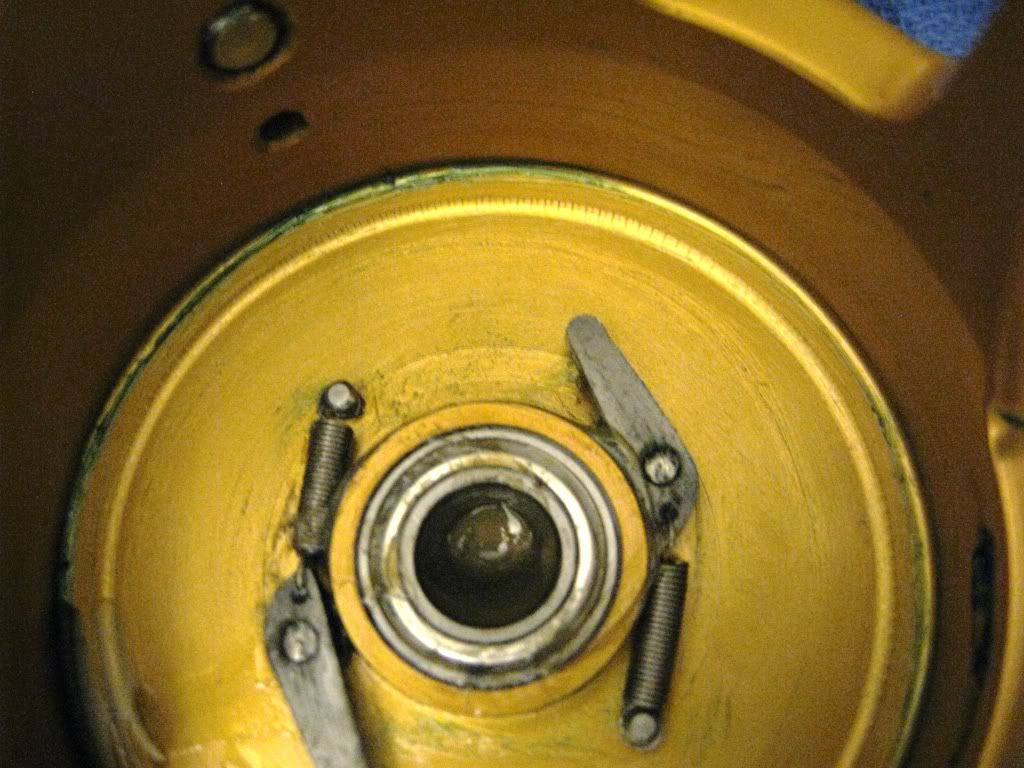
Remove the shaft from the clicker plate side.
Remove the clicker plate, clean, apply a light grease, and reinstall the clicker plate.
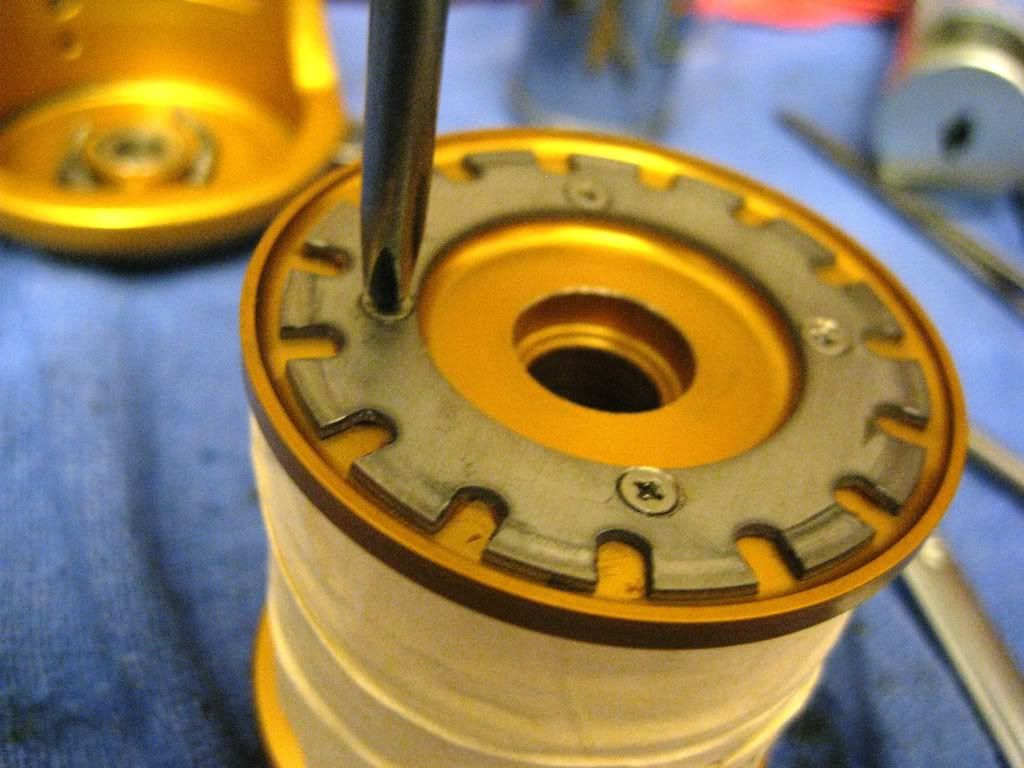
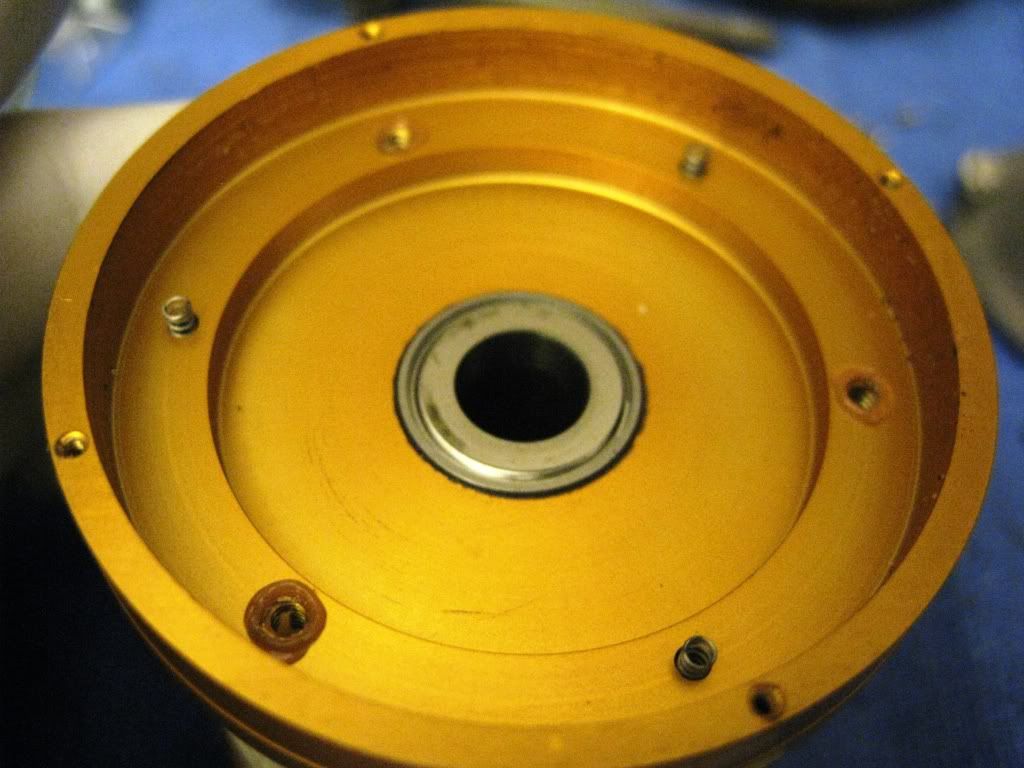
Now the drag side.
Remove Drag retaining ring.
This will expose the pressure plate.
Remove the pressure plate and the second drag washer will appear.
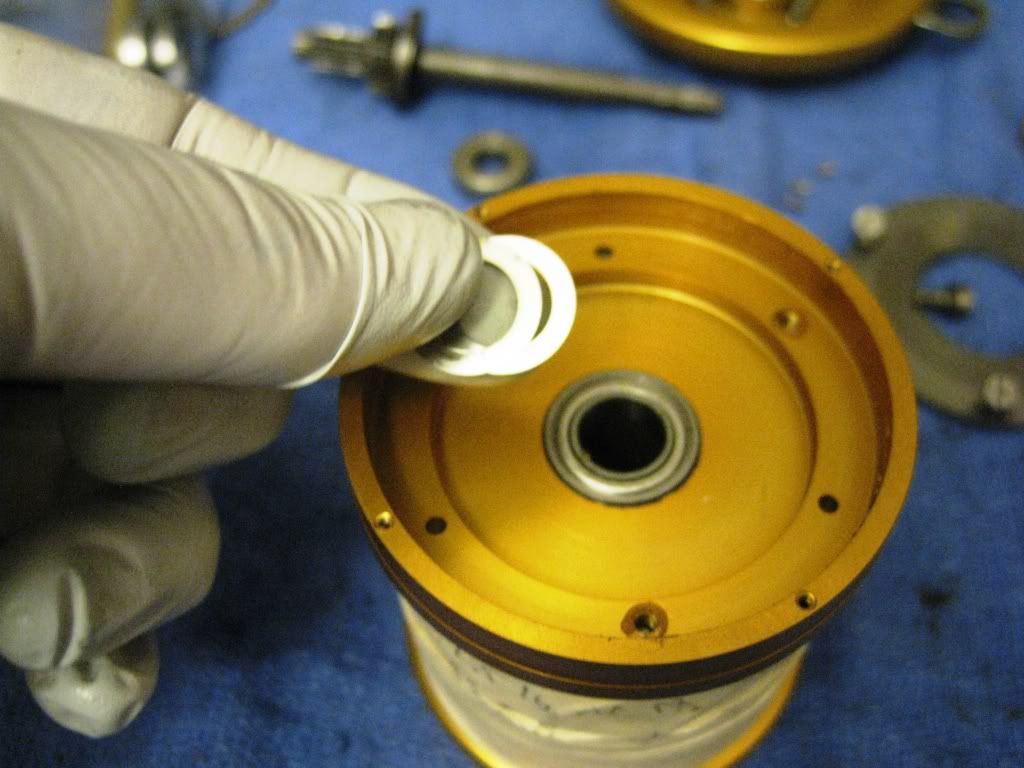
Remove the drag washer. Be careful not to lose the pressure plate springs.
Remove the pressure plate springs and put in a safe place. Then remove thrust washers.
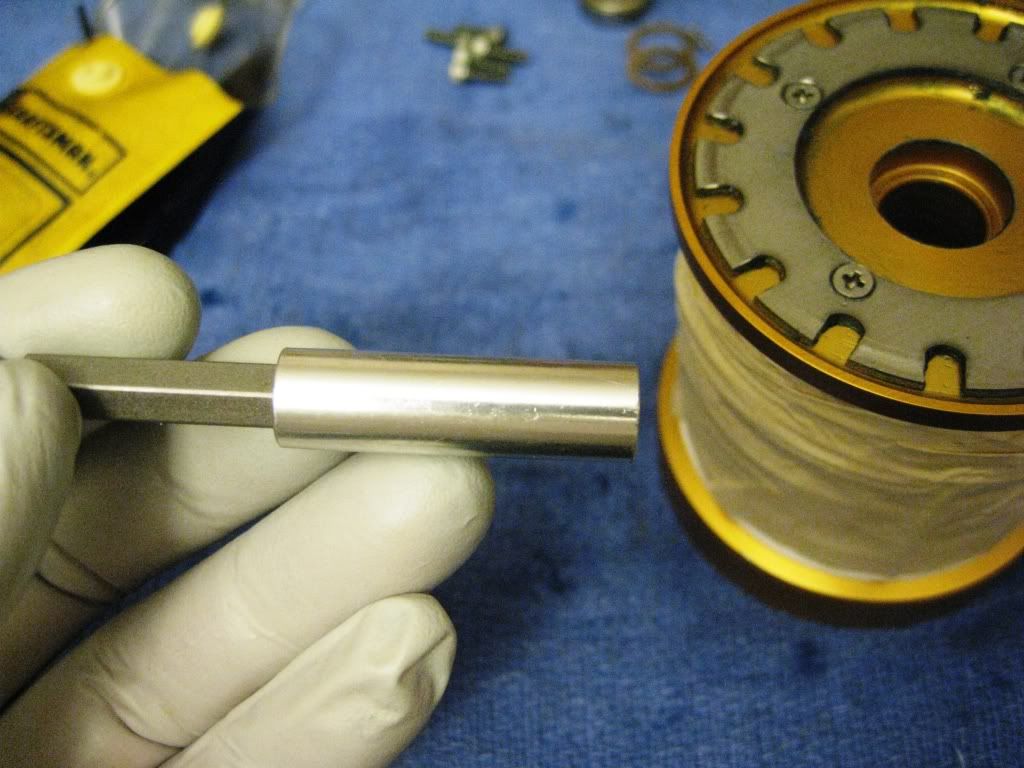
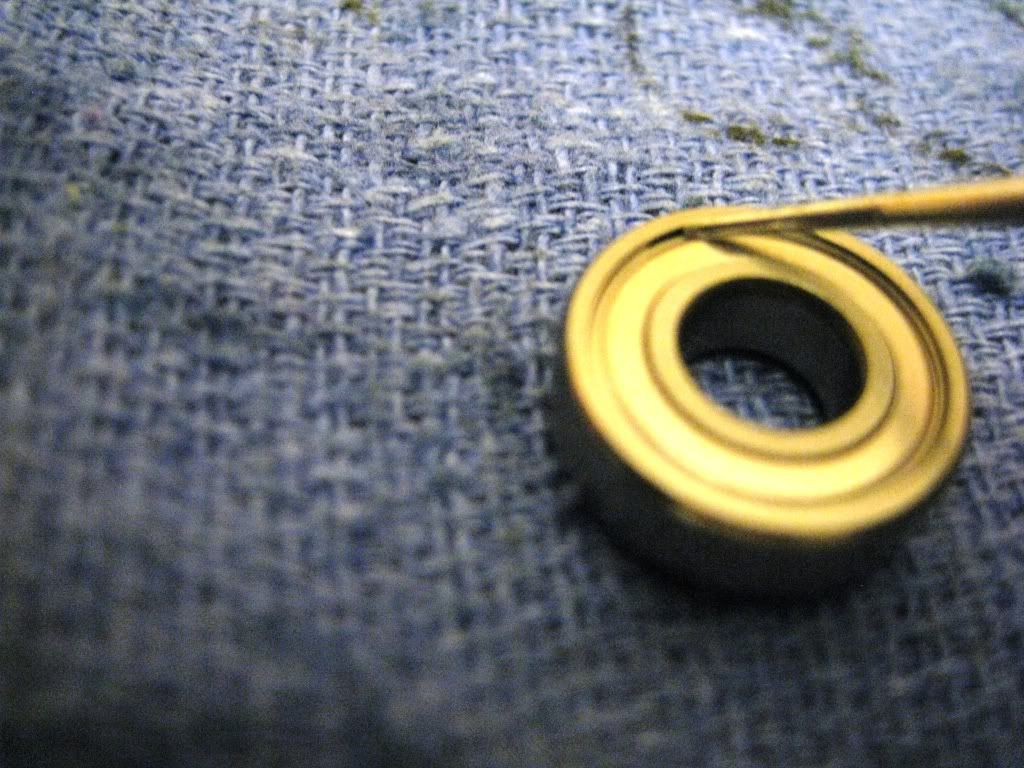
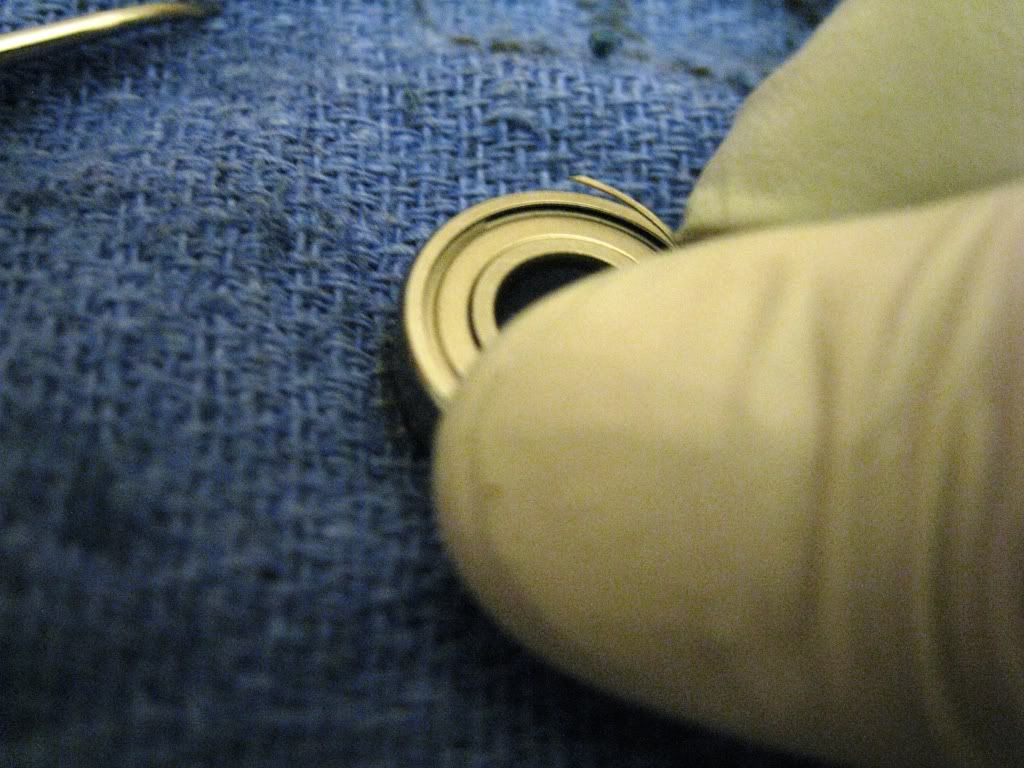
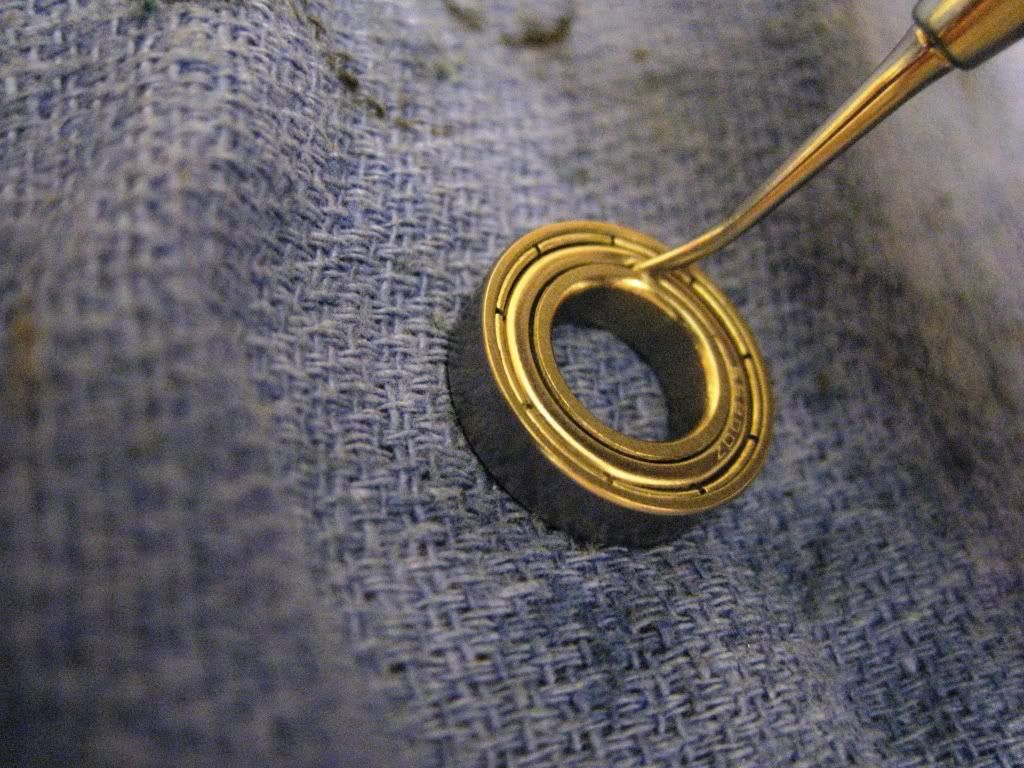
Tried pulling spool bearing and it would not come out, so I went in from the clicker plate side and use a 1/4" extension to push out the bearing.
Right and left side bearing measures 7 X 17 X 5 mm and 10 X 17 X 5 mm, respectively.
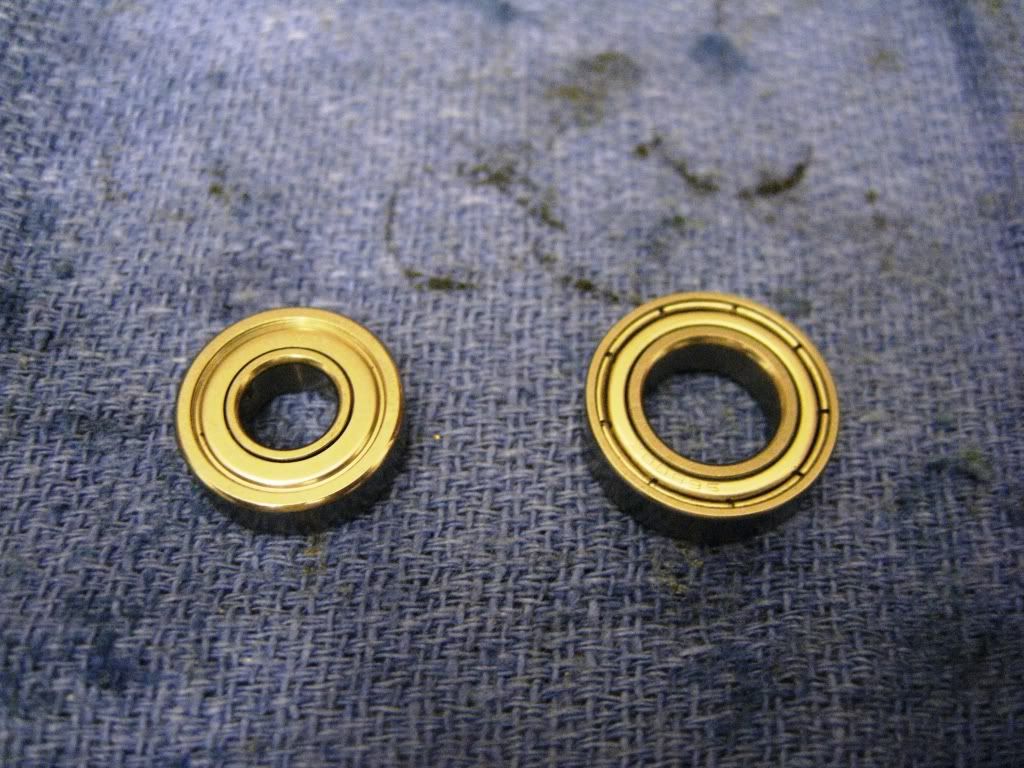
Bearings are opened, cleaned and lubed with TSI301, and placed aside.
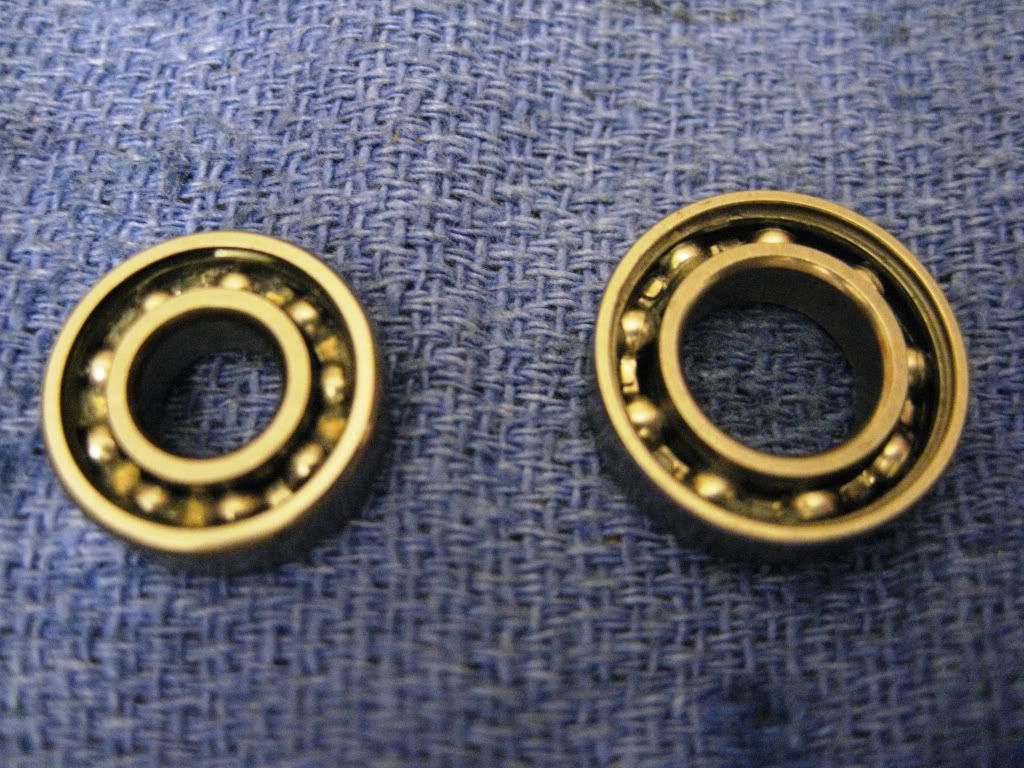
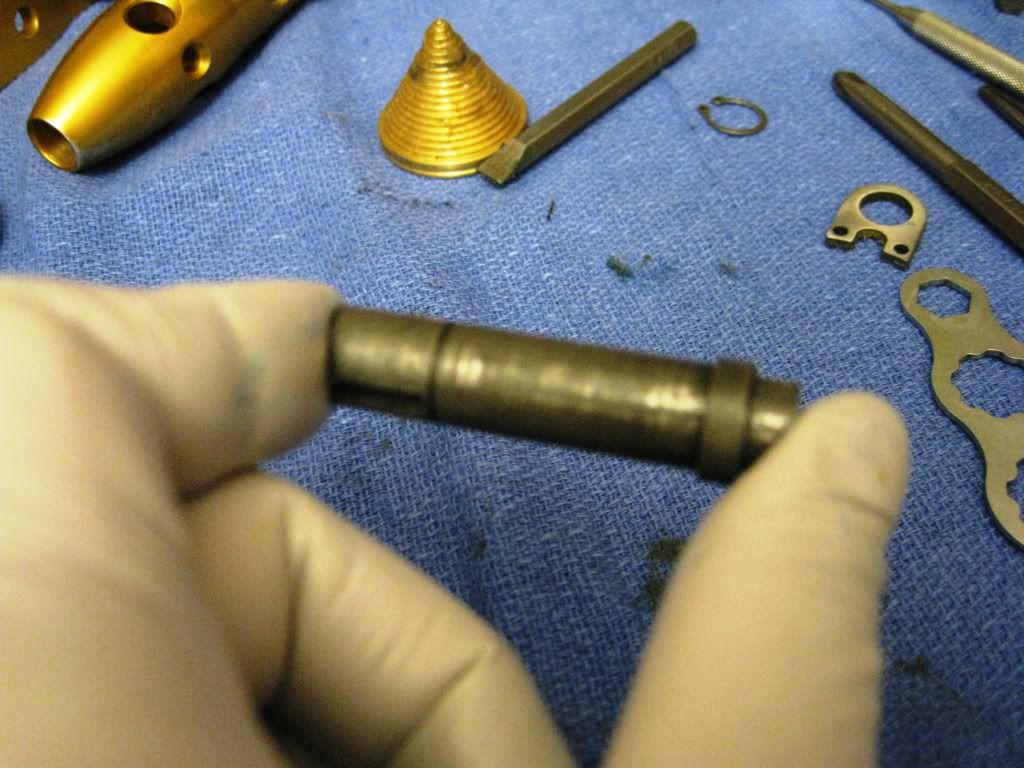
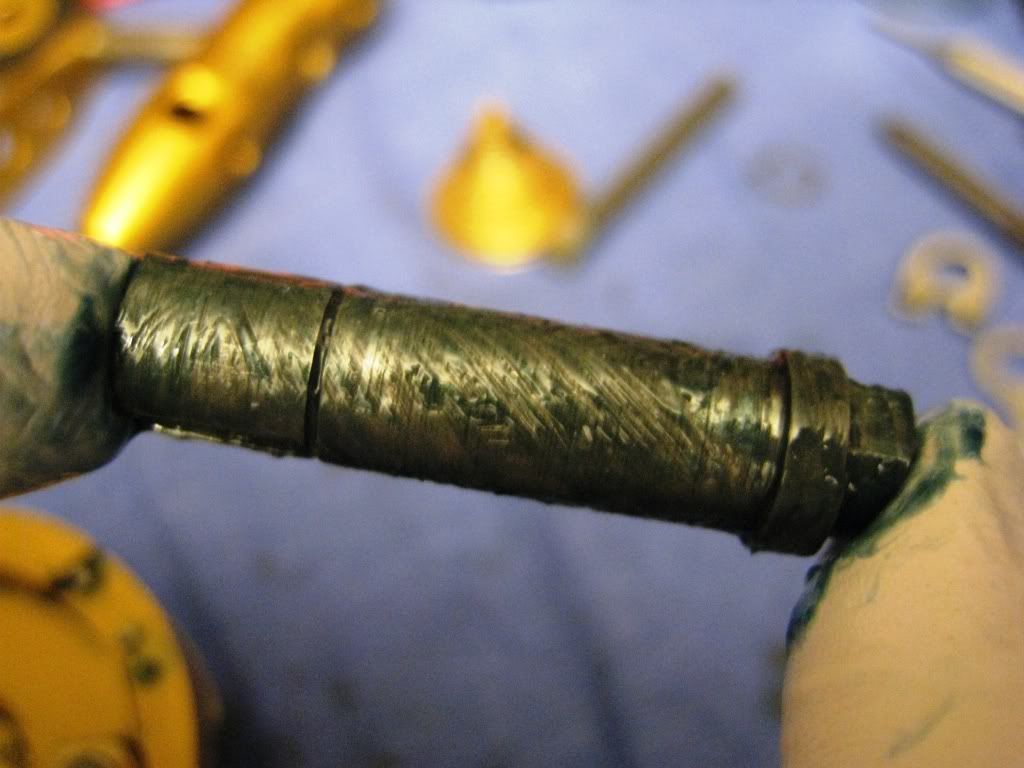
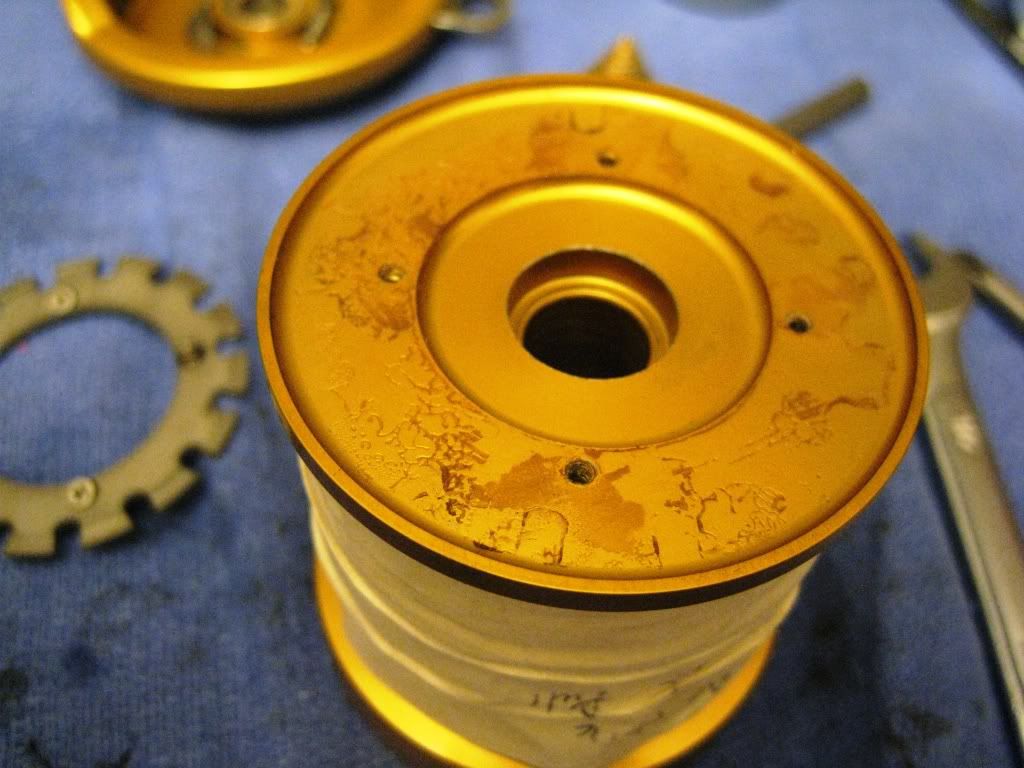
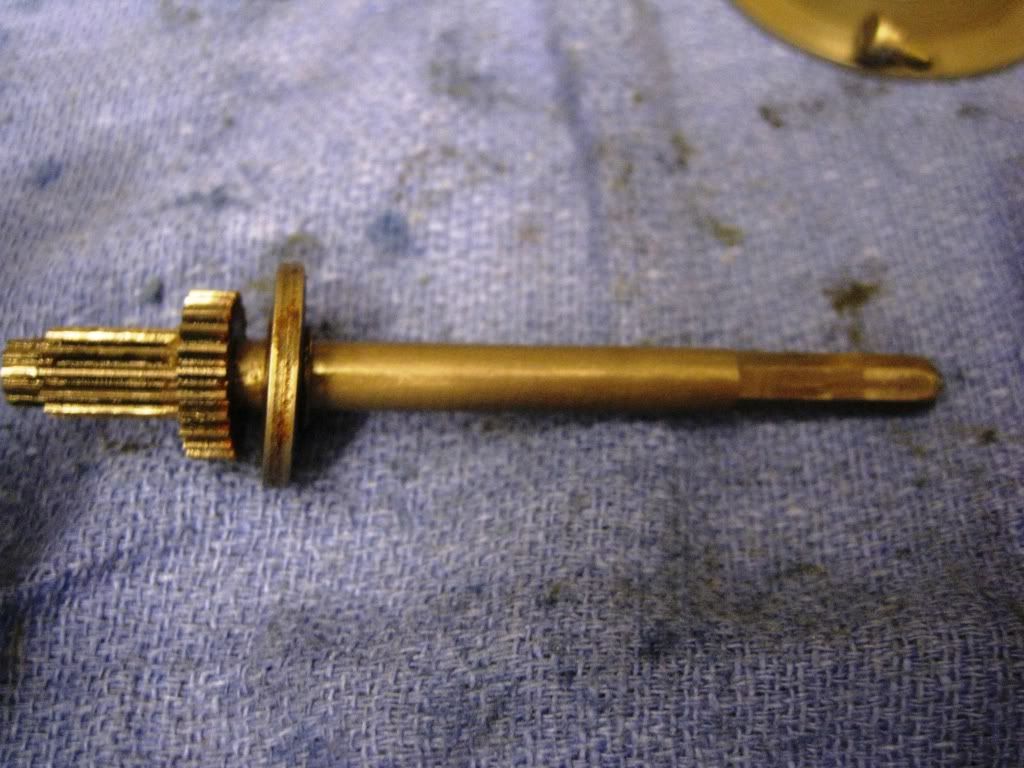
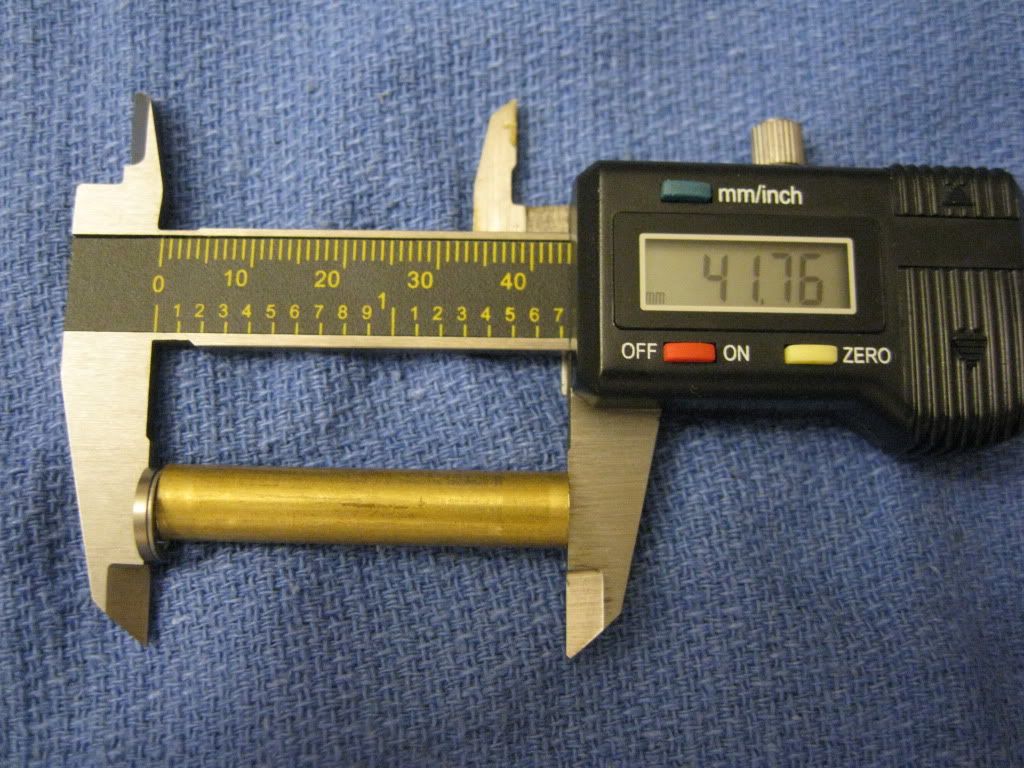
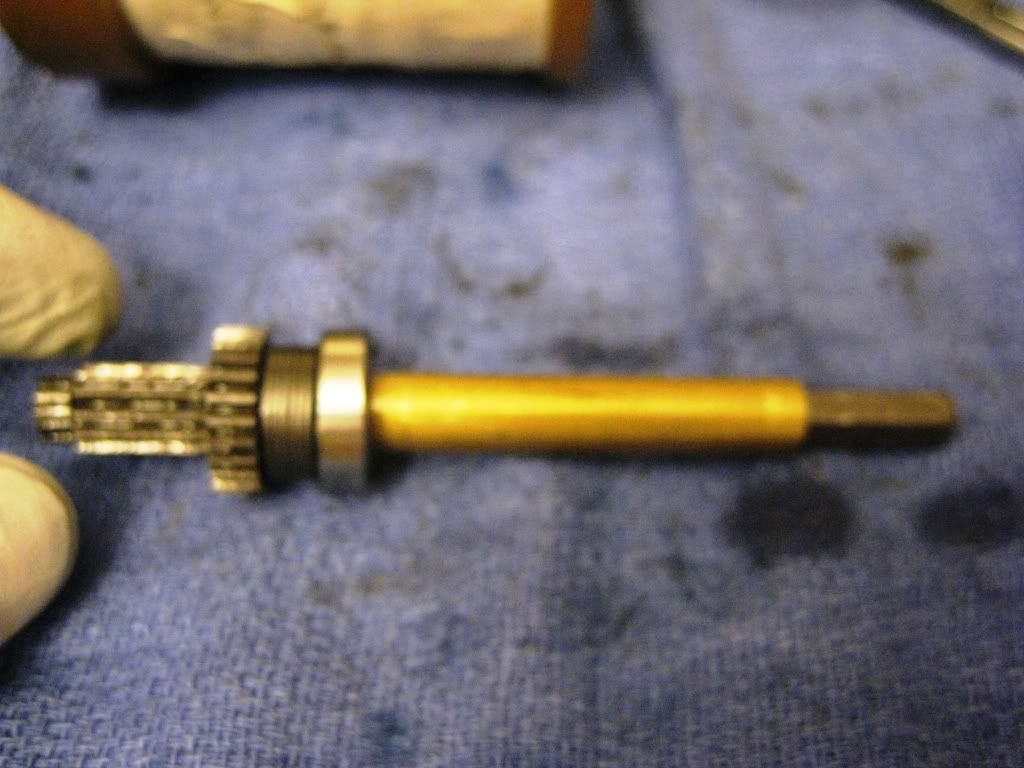
Now the spool shaft. If you noticed, the bevels are rusty. Adjacent to the bevels is the right side spool bearing. I would recommend lubing this bearing on a regular basis because of the water intrusion on the right side.
The bevel stack () was 4.32 mm in height, including the thrust washer. It was replaced with 4 Shimano bevels (((( was 4.31 mm. It was slightly lower but it did not make affect spool alignment. The bevels were changed from () to (((( since the reel was spooled with 80# JB hollow. The current drag set-up probably did not provide sufficient stopping power. The bevels also faced toward the gears.

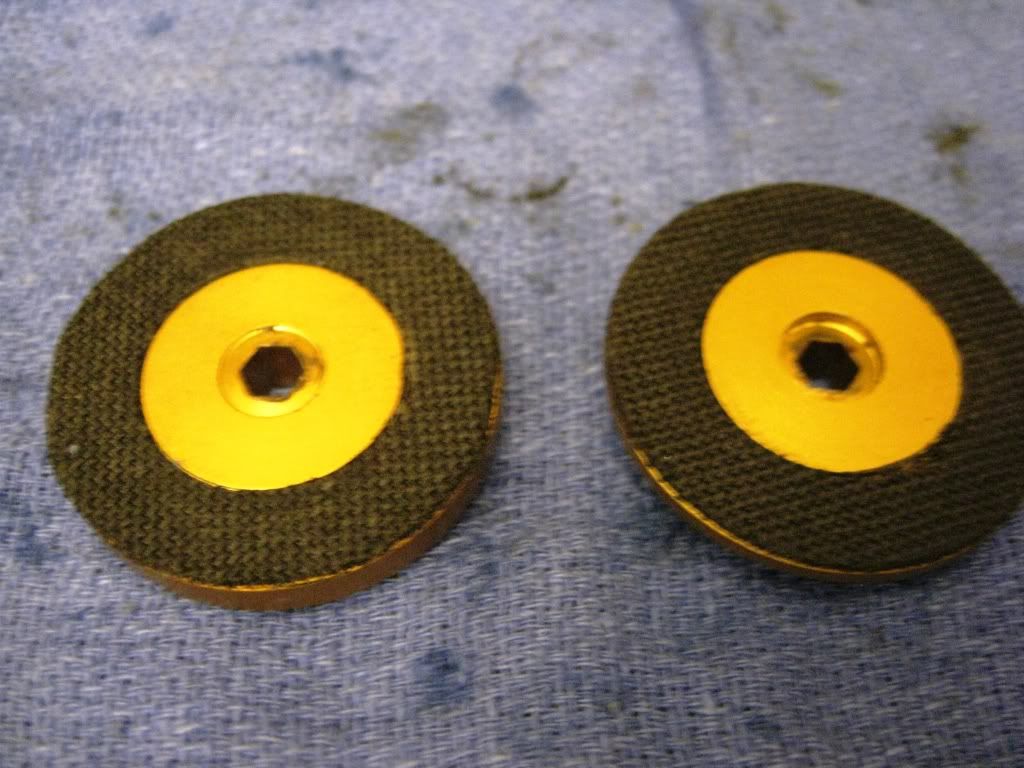
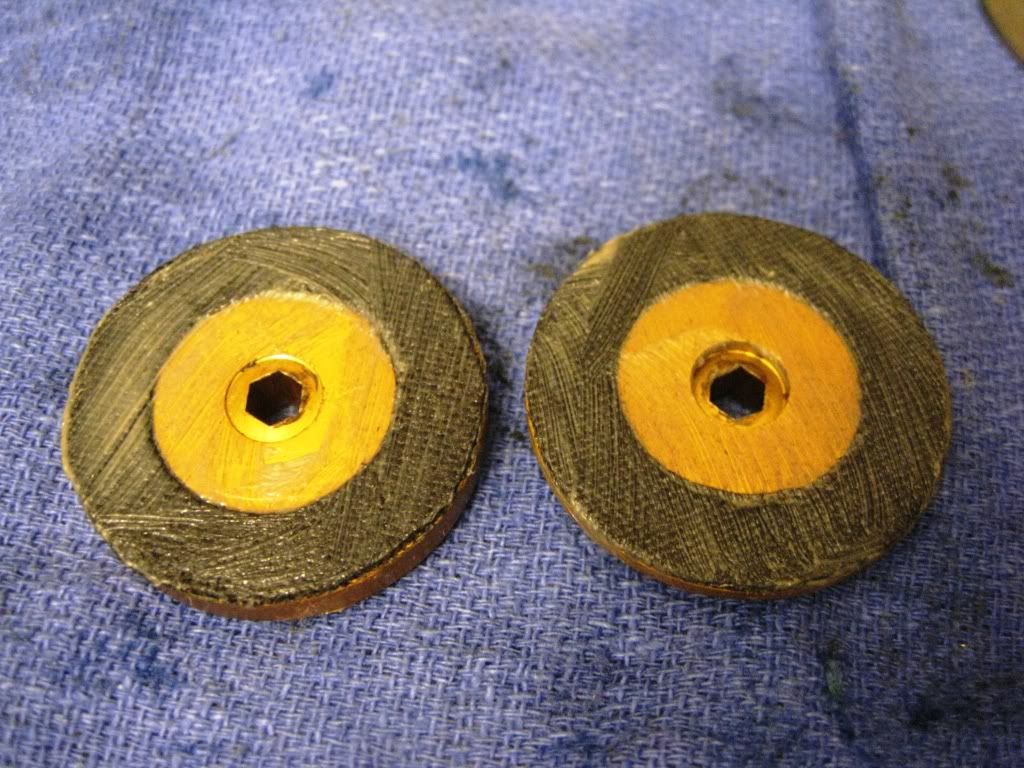
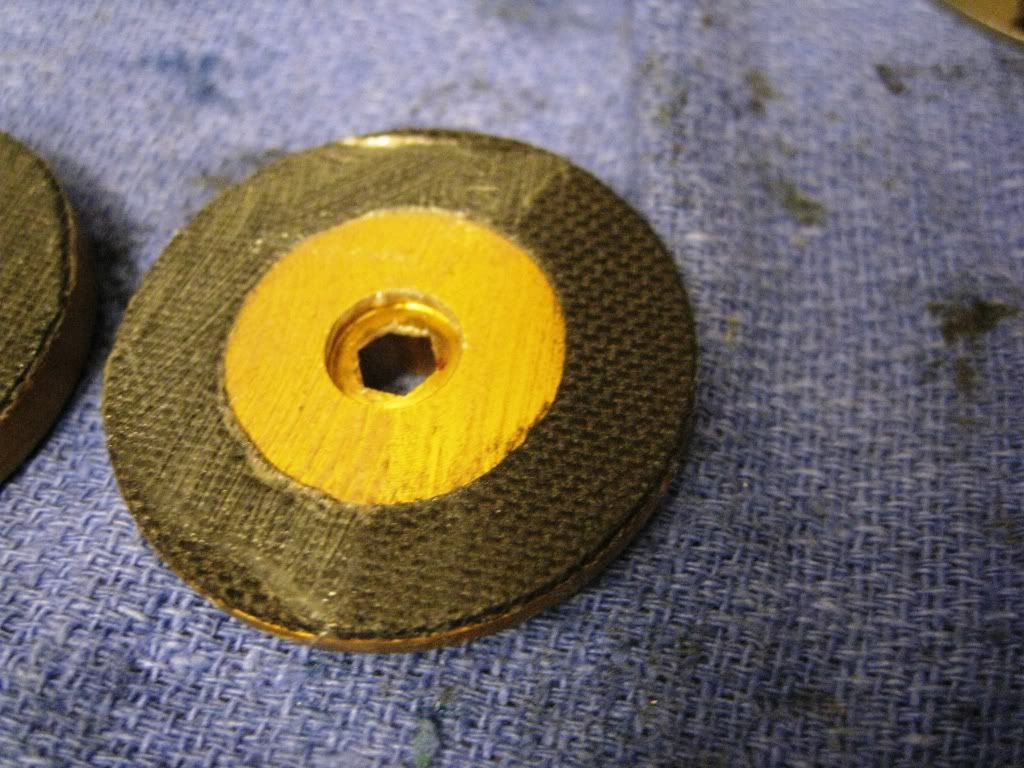
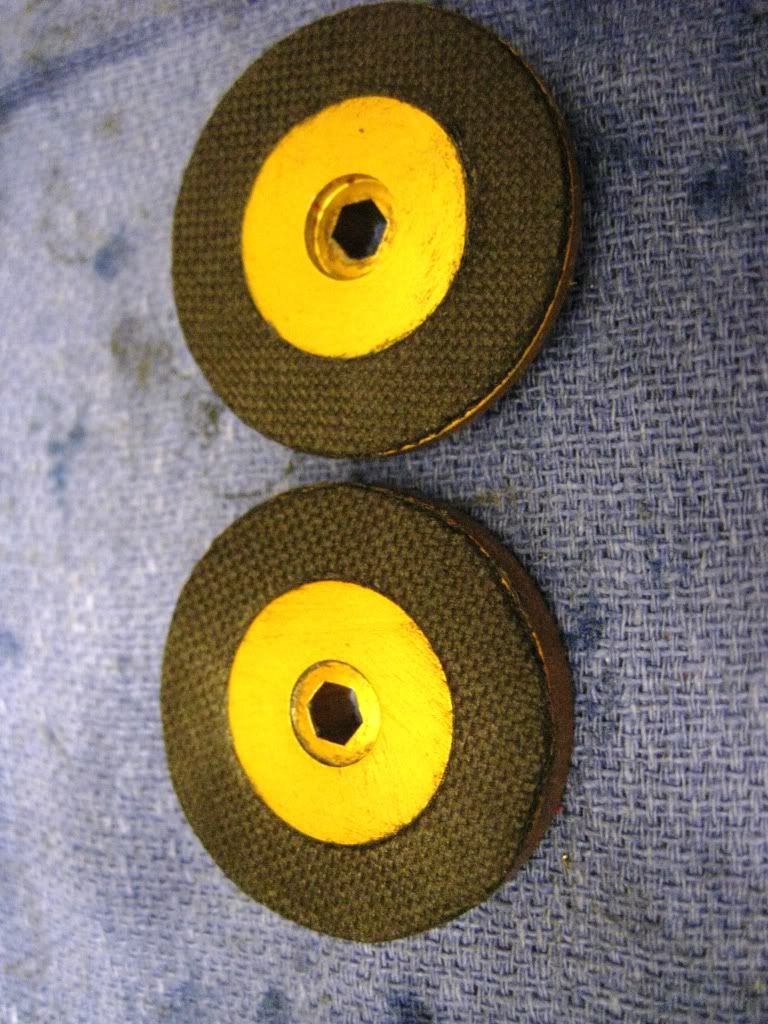
The drags were cleaned, coated with Cal's Universal and Drag Grease, and whipped down.
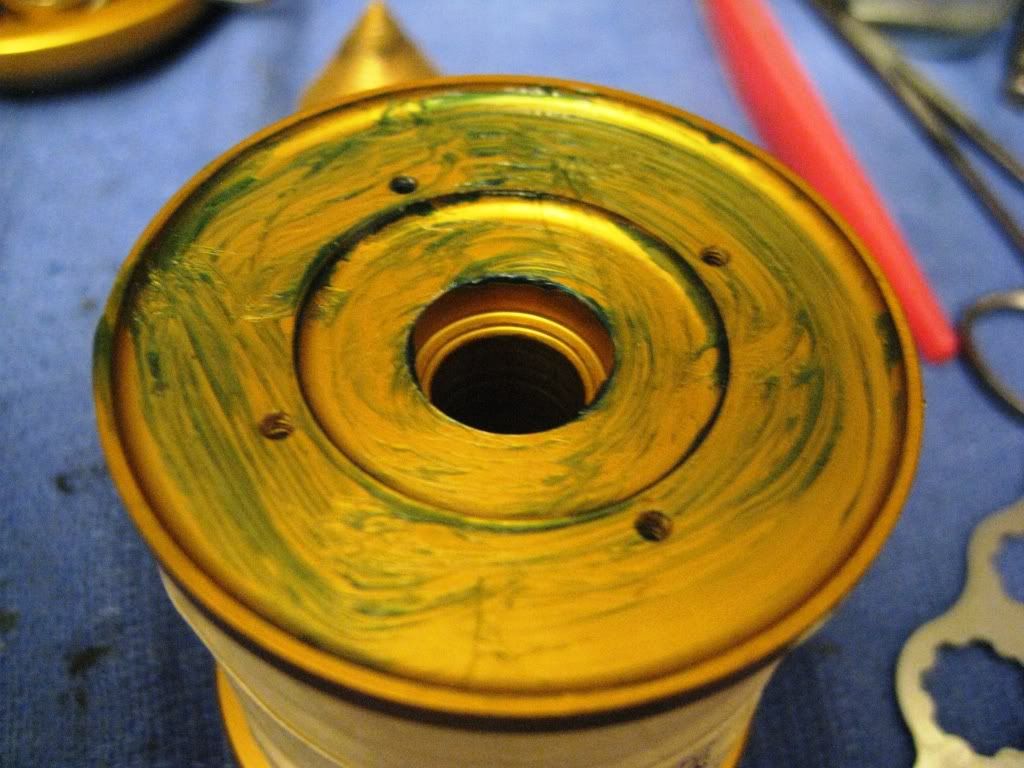
Reassembly of the left side of the spool. Marine grease was brushed in, and wiped so that a thin layer of marine grease remained. Marnine grease was also inserted into the screw and spring holes, and springs reinstalled.

The thrust washers were also reinstalled.
Then the drag was installed. The back side of the drag is an aluminum plate and was greased with Cal's and wiped down. The drag looks strange in the picture because the drag was spinning while I took the picture.
The pressure plate and retaining ring were installed. Note that the retaining ring, screws and screw holes were grease prior to installation.
 .
.
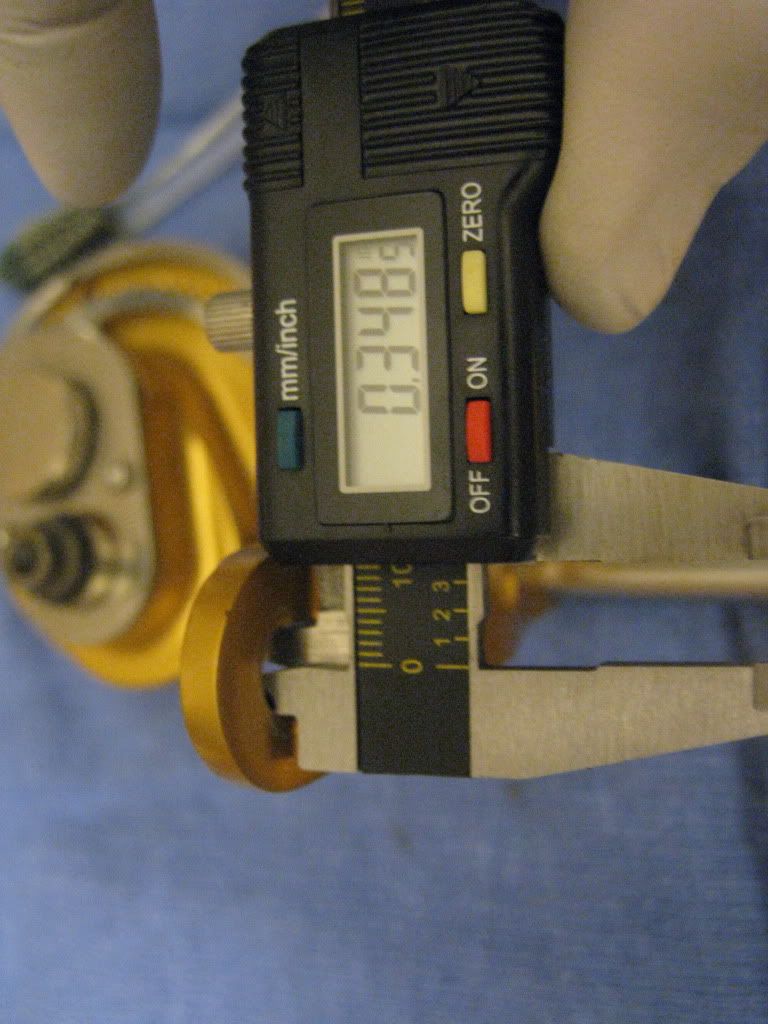
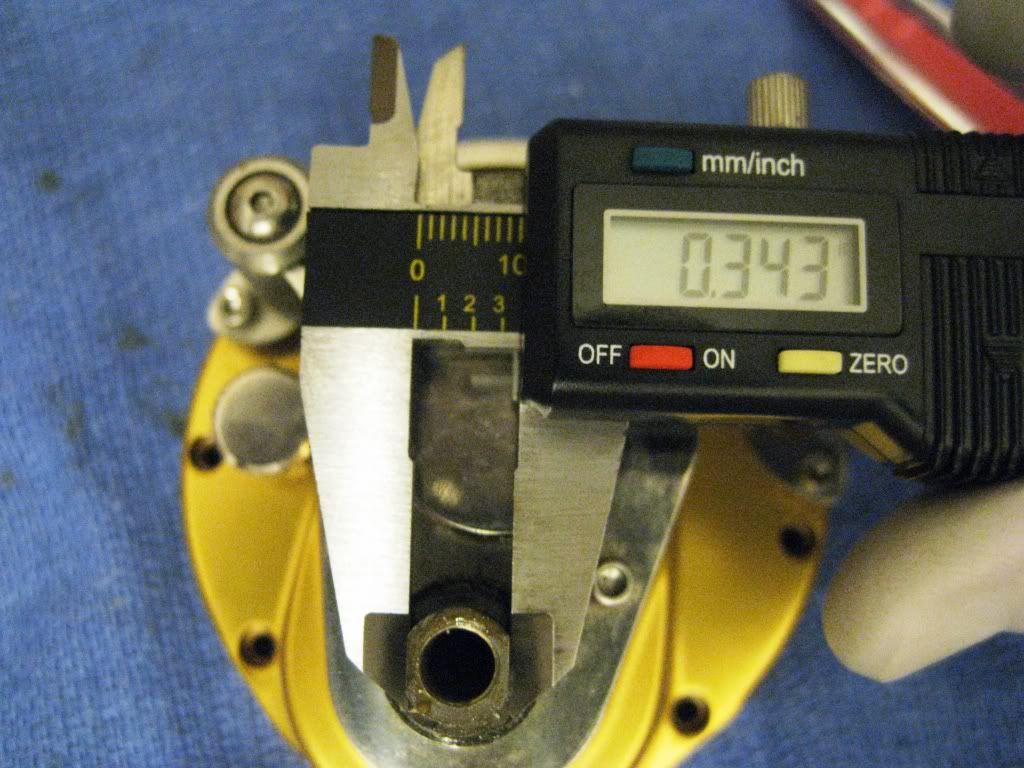
The gear sleeve was measured and cut, and then adjusted with shim washers. Completed was spool sleeve is as shown.
The sleeve and shims were dunked in TSI301 and installed.
The spool shaft assembly was installed in the spool.
The spring was installed. This is to ensure separation of the drag washers from the pressure plate. Note that the original spring used was discarded. If you see in the previous picture, you would understand why. I found it binding half the time. It was replaced with a spring with flat ends to eliminate the binding.
The drag was installed in the frame.

And the spool assembly was installed in the frame.
The frame holes and screws were greased.
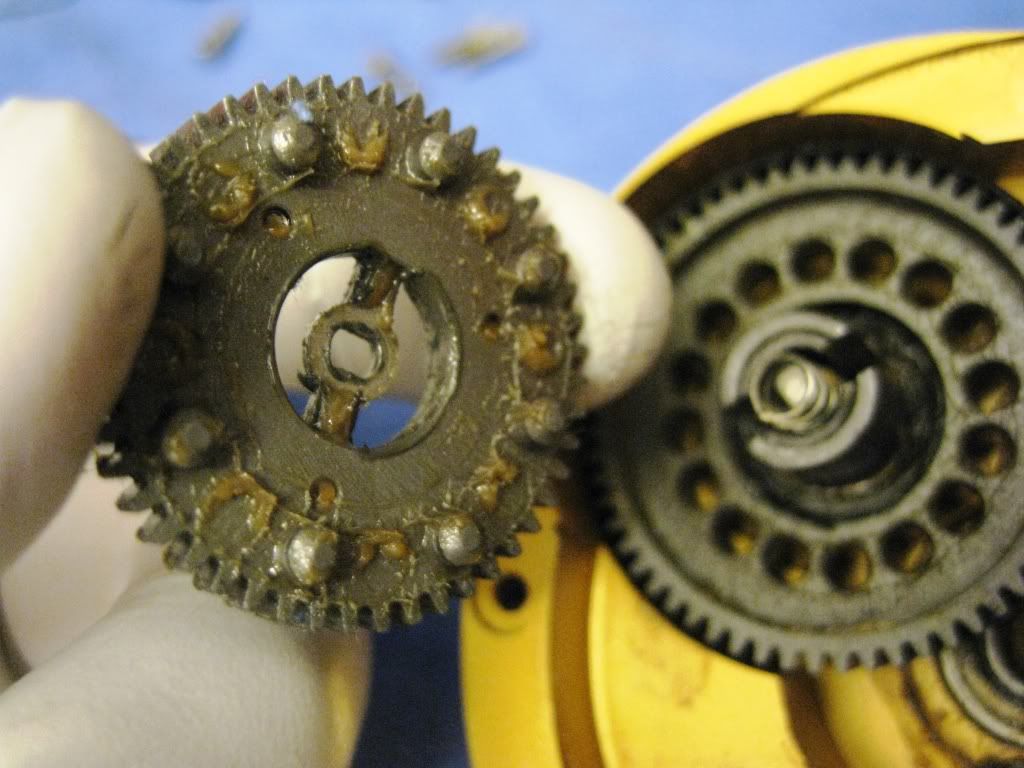
The low gear was lightly coated with grease.
And the sideplate insert was greased, whipped and installed.
The side plate was reinstalled, greased holes
And the reel was wiped down of all excess grease and here it is.
In conclusion,
1. this reel is not the easiest to service, but it should be easier since you will now know where those pesky hidden spring clips are.
2. one of the biggest issues that I have with this shifting mechanism is that it's not that simple to turn when you are excitedly hooked up as you have to take your hands off the cranking handle to shift, and some of the intricacies in servicing these reels completely.
3. There is handle wobble that cannot be avoided. It is due to the connection between the crank arm and the gears. It's just not a super tight fit.
4. the shifting mechanism under the shift know must be greased.
5. the service time of these reels are 100% to 150% longer than most lever drag reels. So be prepared when servicing the reel yourself, or expect to pay a little more if the reel is being serviced by someone else.
Hoped you enjoyed the tutorial.
Sorry, I could not locate any schematics, so this tutorial will be filled with tons of photos. You'd better get something to eat and drink. It's going to be a long one.
Here she is. The John Baker 12, 2-speed, Lever Drag reel. As you can see, it's a 2-piece frame and side plate set up
You will need a 3/32" allen wrench or bit to remove the side plate screws. The screws are of the same length, so not to worry about which screw goes where.
When you take off the side plate, you will see the clicker plate.
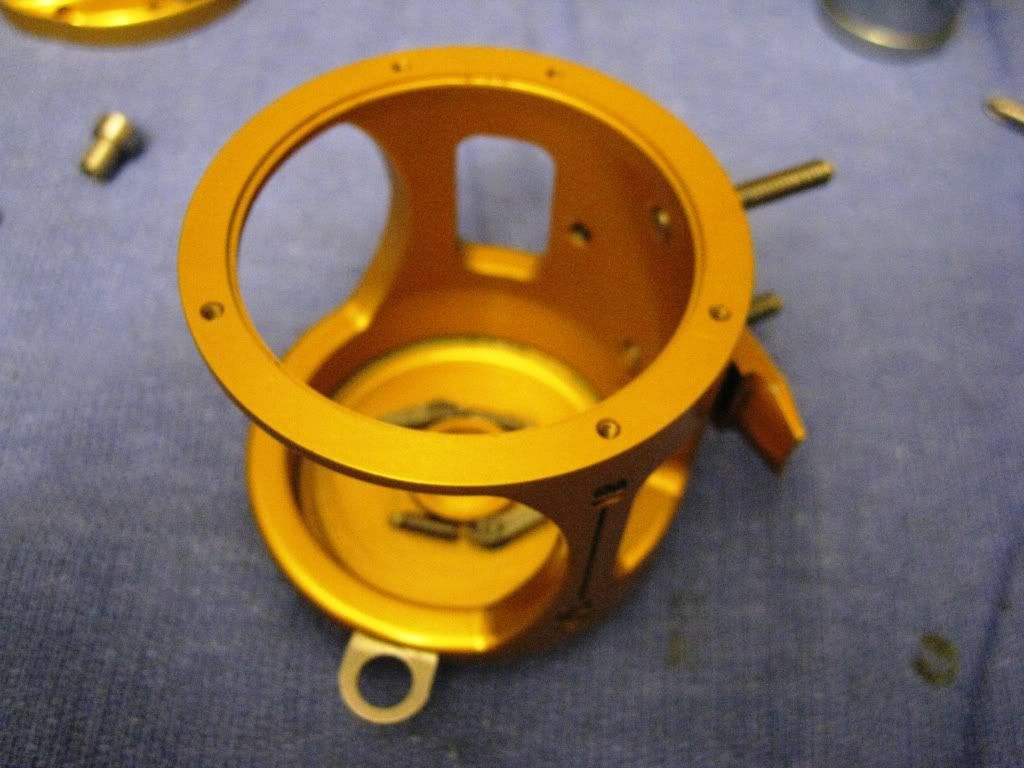
Pull out the spool to expose what is on the left side mounted on the frame.
Notice the drags? I used two puller, one on each side, to pull the one of drags. I learned that it's much easier to turn the frame over, tap the frame on your hand and the drag will simply fall out on to your hand.
Under the drag, there's the double dogs and left side shaft bearing measuring 10 X 19 X 5 mm (ID x OD x width).
Pull the left side bearing and place aside.
I then disassemble the rod clamp assembly. Check out the laser etching. Very nice.
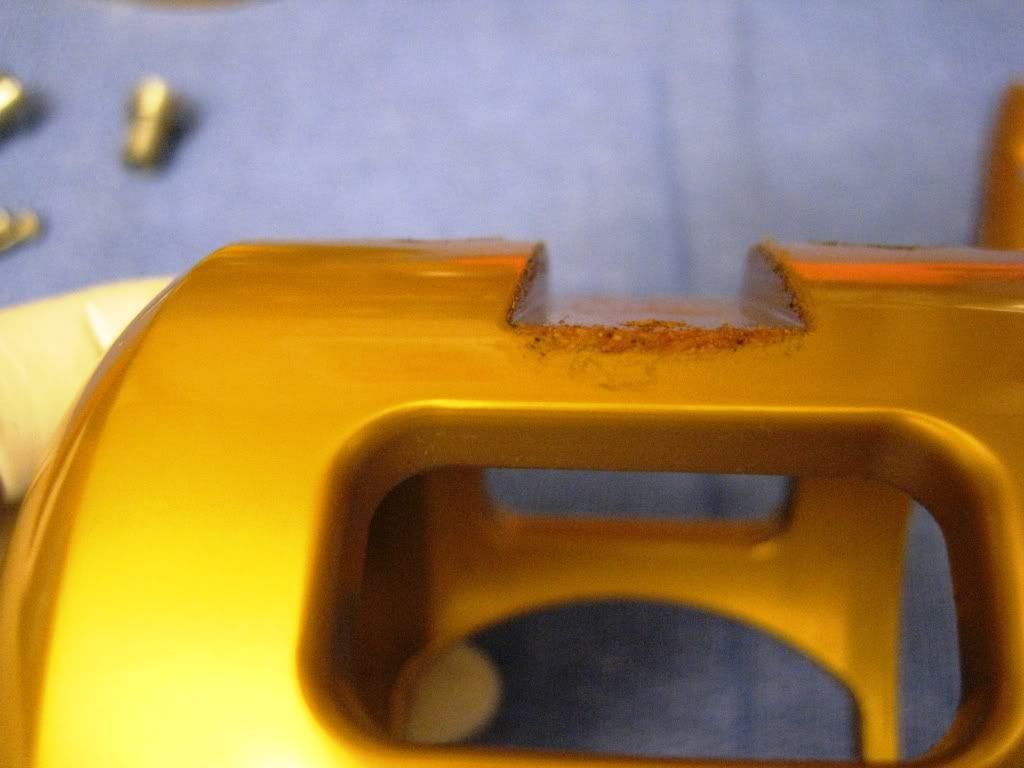
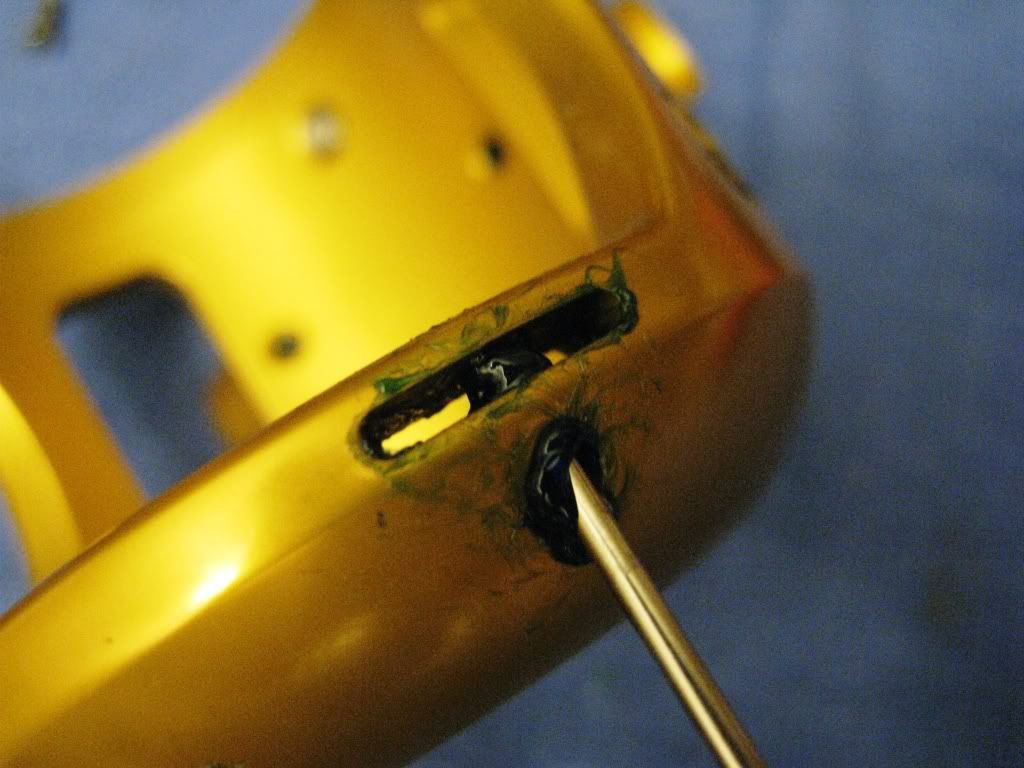
Now remove the reel foot.
Hmm, it just doesn't want to come off. What can you notice?
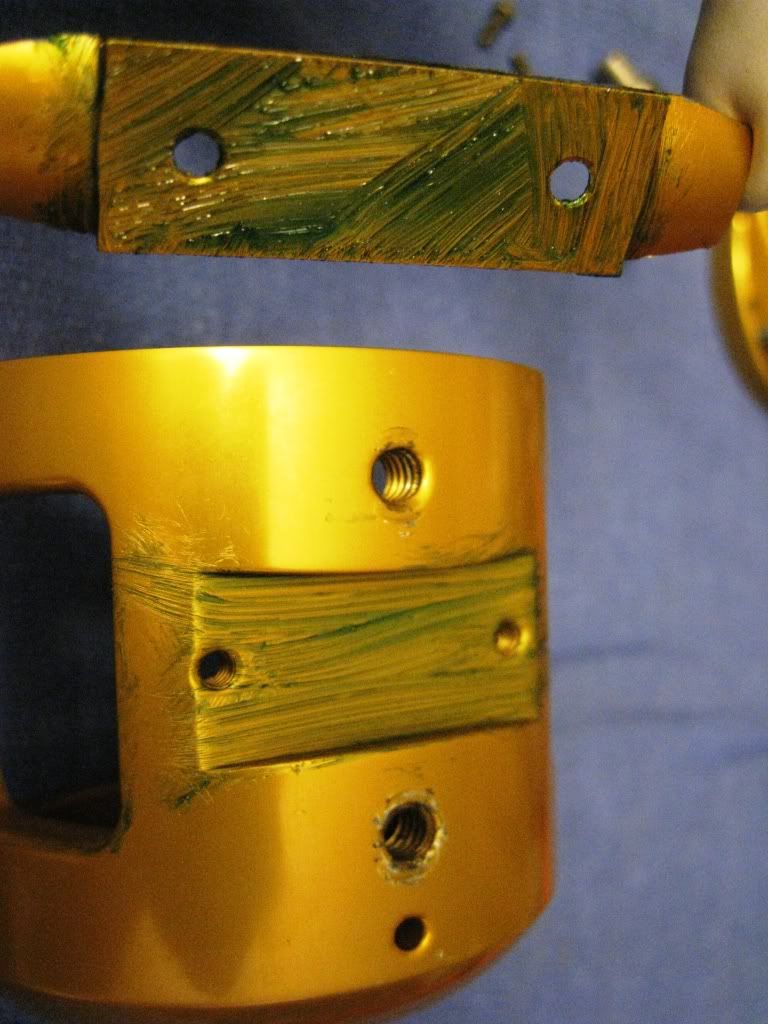
Maybe with the reel foot removed, what do you see?
Did you guys see the trapezoidal configuration? Even if the seat screws become loose, the reel seat sits tight.
The area is cleaned and greased.
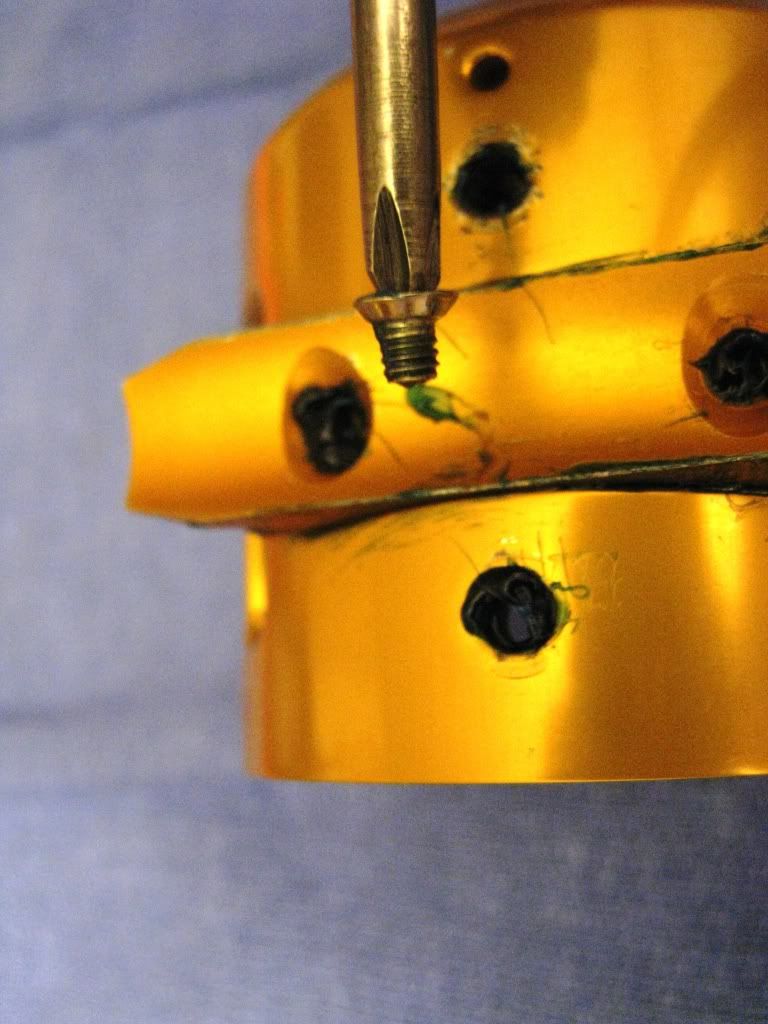
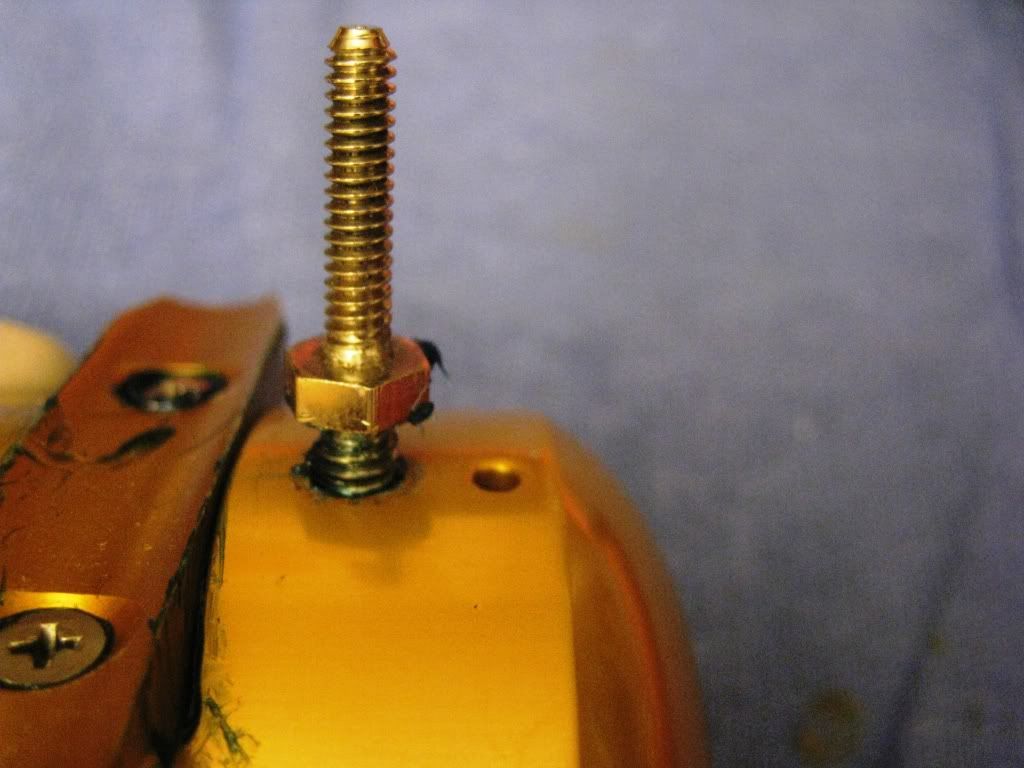
Slide the foot back in place and grease the screw openings and the screws.
Now the reel clamp posts.
Wipe the left side to remove old grease.
Apply marine grease
And whip off grease to leave a thin film.
Add CorrosionX to the dogs.
Remove the left side harness lug.
You will need a 1/16" allen wrench.
Remove lug, and clean.
Apply a light coat of grease in the lug slot.
Apply grease to the screw hole.
And reinstall lug.
Now you can put the frame aside for now.
Okay, the left side plate.
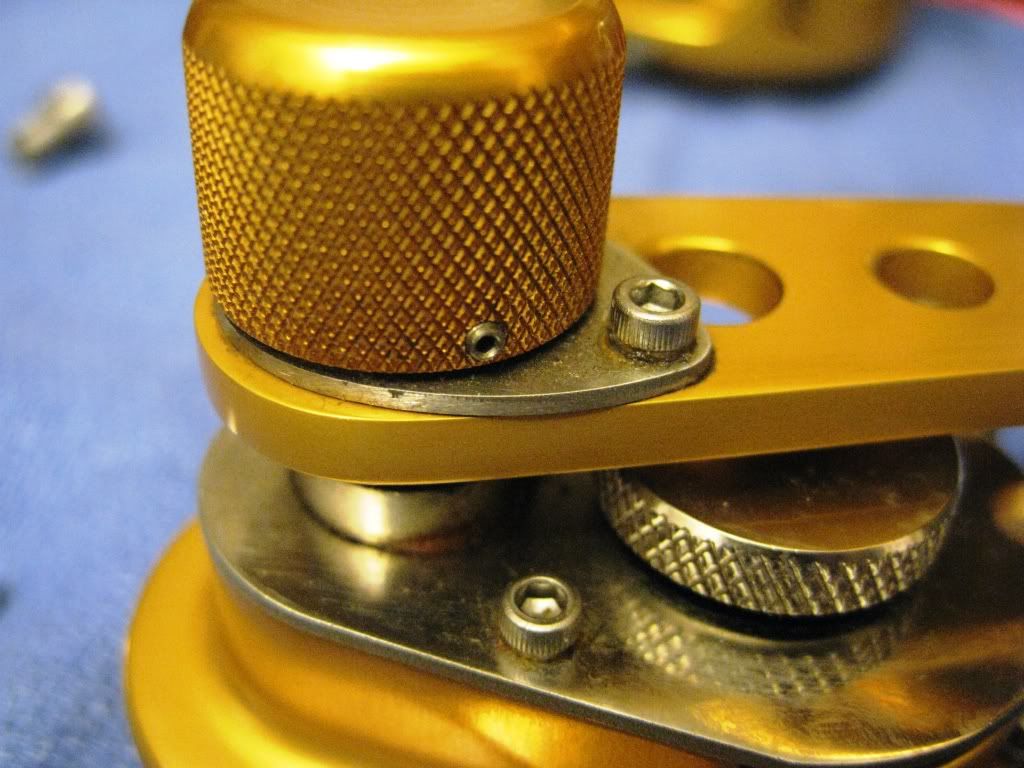
How do you get the shift knob off?
There are 2 fine screw that holds on the shift knob.
You will need a 0.9 mm allen wrench to remove the two screws.
Once the shift know is remove, you will see the shift mechanism.
Well, the gears just don't drop out like most lever drag reels. So I flipped the left side plate to study the reel a little more. Do you see what I didn't see?
Here, let me clean off some of the grease. Yes, an E-clip. It's tiny and tight. A little difficult to get out.
Finally...
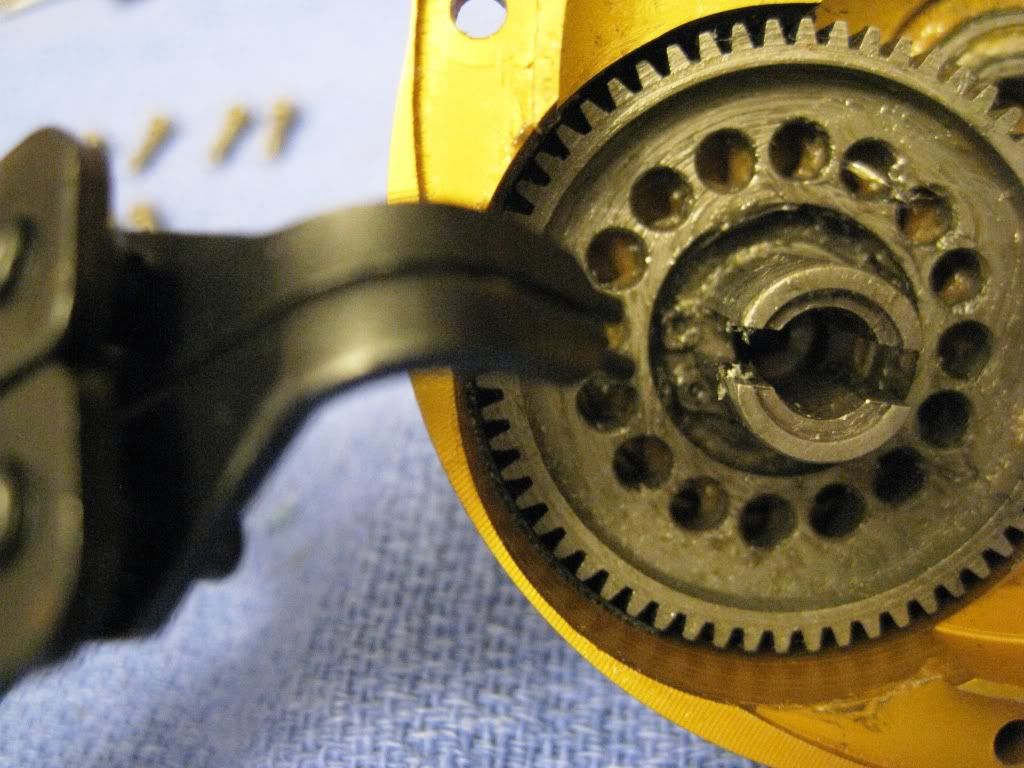
But the low speed gear just didn't drop out when the E-clip was removed. It has to be wiggled and waddled out.
Now, removed.
Whew, now can I get the shift mechanism out? Yes.
Now the handle can be removed.
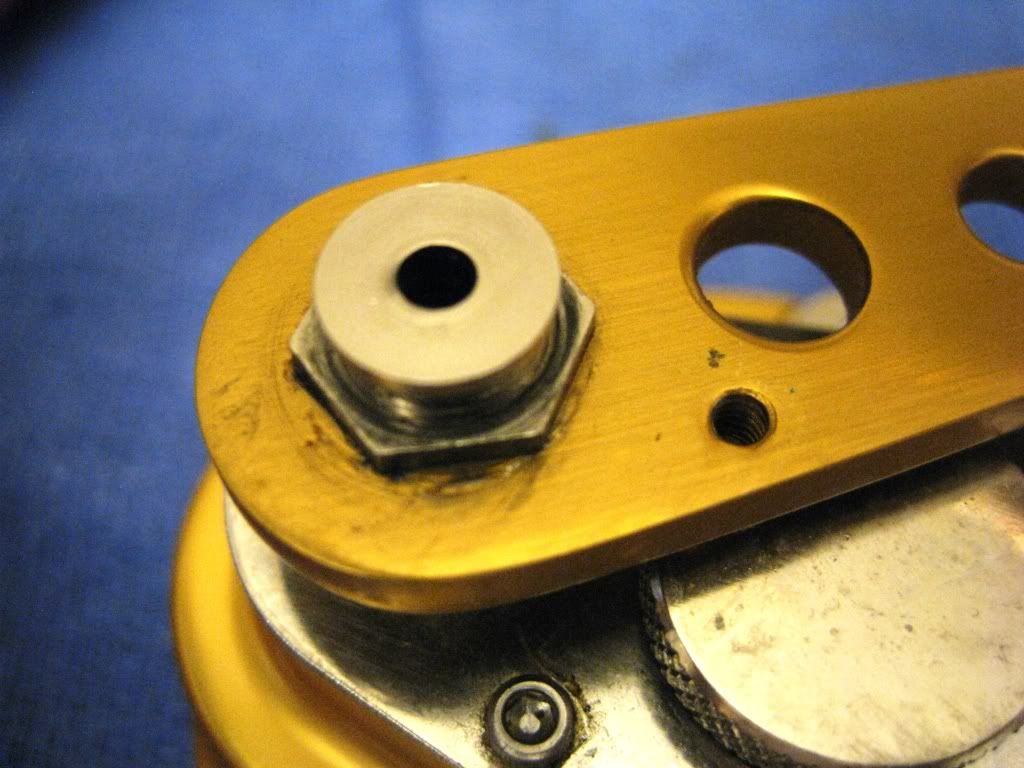
Remove the locking plate screw with a 3/32" allen wrench.
This exposes the handle nut.
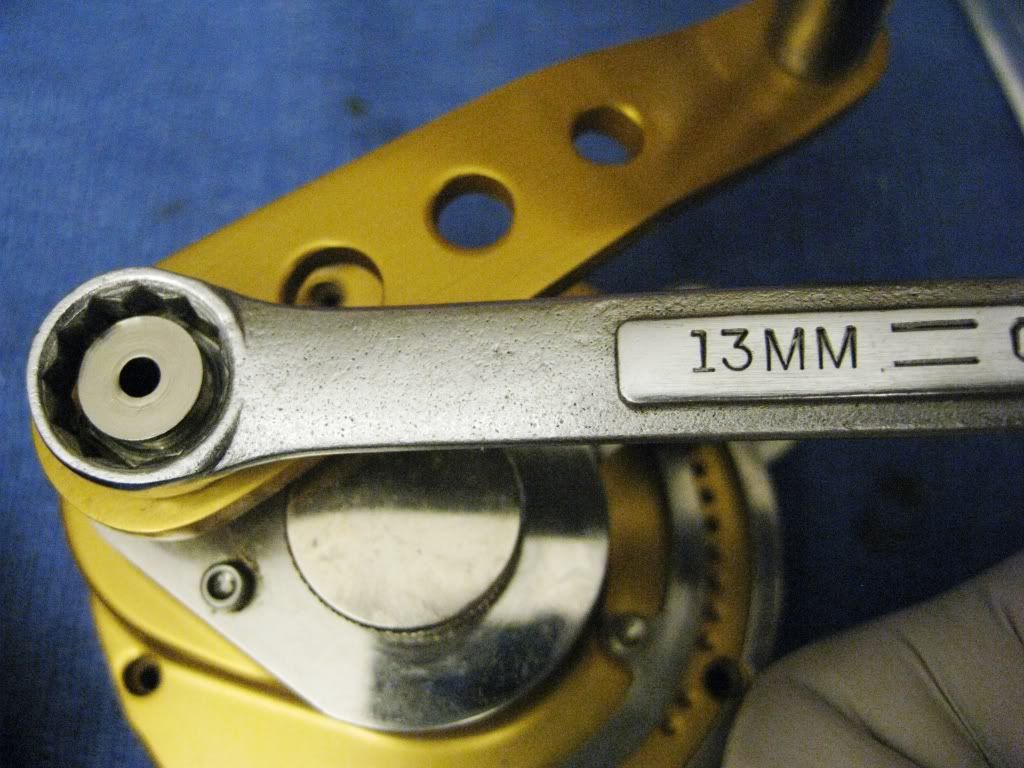
The handle can now be removed with a 13 mm wrench. I think it's a standard size, but I didn't have one available.
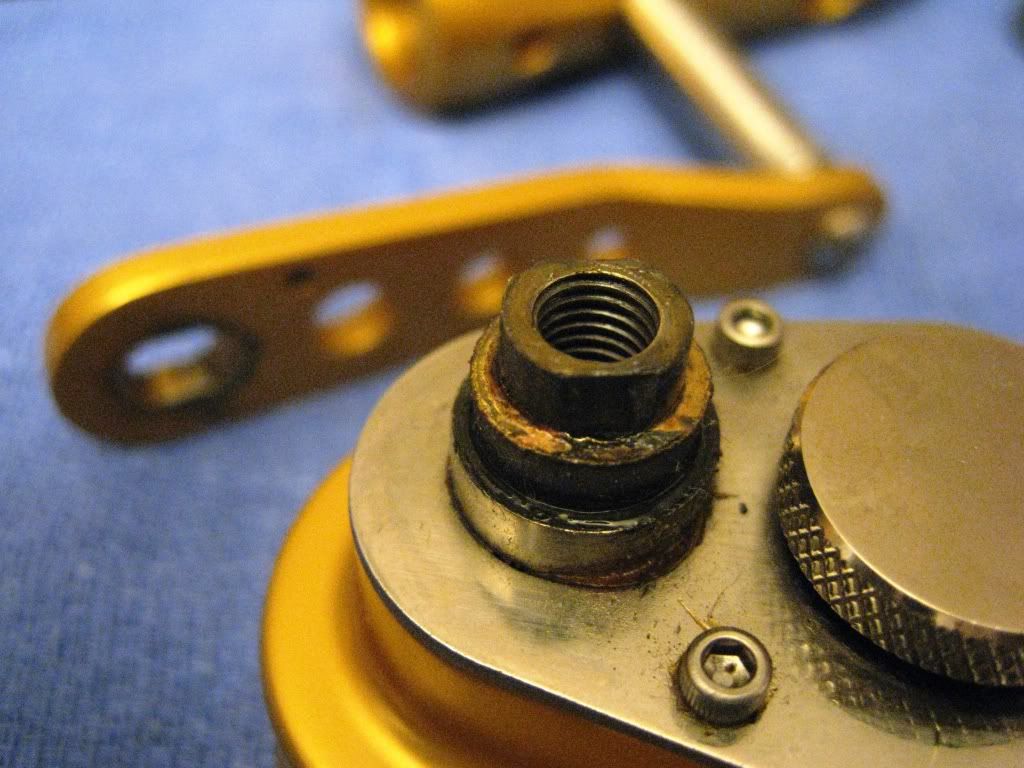
Handle removed.
Provided with a thrust washer, 0.39 X 0.52 X 0.03 in..
The handle is provided with a double D shaped opening.
The handle shaft is
Remove the two 3/32" allen wrench screws to remove the drag preset plate.
Remove the lever exposes the cam assembly.
Lube lever ratchet with CorrosionX. Don't loose the spring loaded ratchet pin. And place a side.
Now how to get the lower gear out to get to the left side plate bearing? Can you see the problem I am facing?
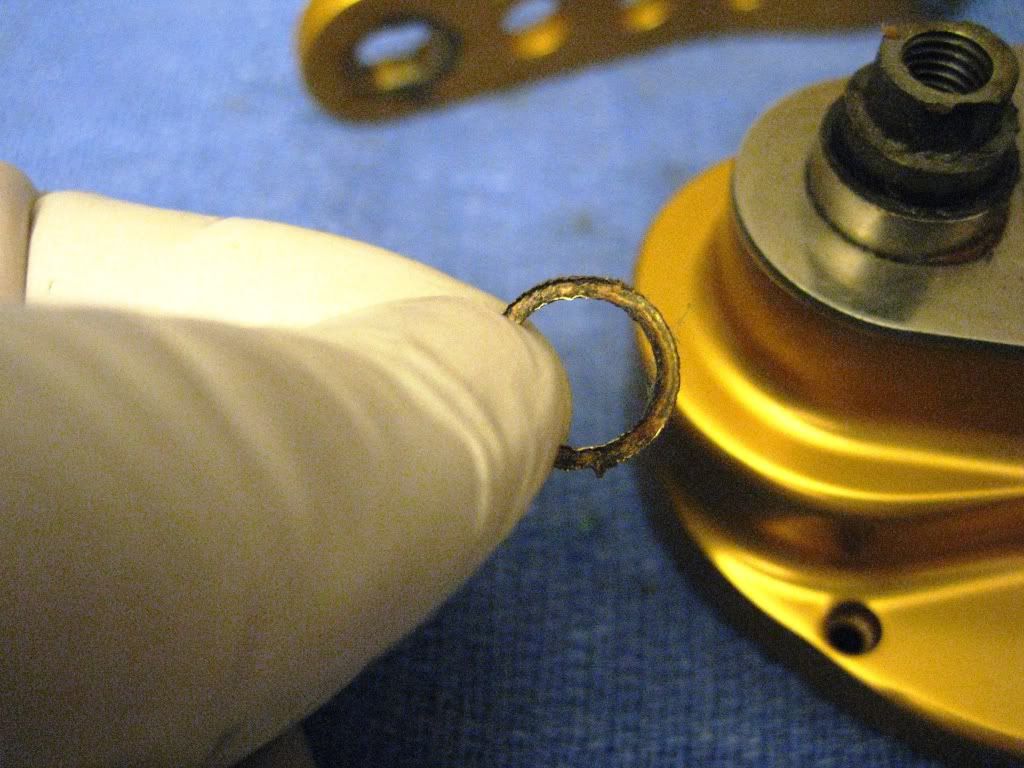
Try this angle. Arg, another spring clip.
Remove the spring clip, and this is no easy task with the limited space.
Whew, finaly got the spring clip off and here is the high speed gear, crank shaft and spring clip.
Remove the left side bearing and cam assembly.
Now clean the left side plate.
Apply marine grease, move and grease left side harness lug and apply CorrosionX to clicker assembly, and place aside.
Remove the bearing from the bearing cup of the cam assembly.
Disassembly the cam assembly and clean.
Grease with marine grease and reassemble.
Grease left side frame where cam that holds the cam assembly.
Install cam assembly.
This is where I grease both left and right side bearings. 10 X 17 X 5 mm and 7 X 17 X 5 mm, respectively. You will notice that the grease is not blue. It's because I'm using CorrosionX grease from Germany. When I spoke with representatives from CorrosionX, they had indicated that the mixing of these greases will not harden when mixed together.
And Install greased bearings
One last thing that needs to be disassembled is the lever guide, grease, wipe, and reassemble.
Lube preset knob with CorrosionX
Install Lever.
And install preset plate. Note that the preset know has a blade that is supposed to slot into the cam assembly. Please make sure that these are aligned.
Grease screw holes and install plate screws.
Now the handle arm shaft. Clean and grease with marine grease.
And install
Clean high speed gear
Lightly grease and install on shaft.
Reinstall spring clip over shaft and slide down.
I then lube with CorrosionX
Reinstall the thrust washer and handle.
Clean the shift shaft and shift cam and lube with CorrosionX.
Install shift assembly.
Install shift spring.
Hold the spring down the install the low gear. If you don't hold the spring down, you could damage the spring and the lower gear may bind with the spring.
Keep pressure on the lower gear and install the E-clip.
Now, you can install the shift know. But before you do, be sure you heavily grease the shift assembly. I tried lubing it with TSI301, and CorrosionX and it always bind. Grease was the solution for a smooth shift.
Now the handle. Disassemble with a 1/16" allen wrench, clean, grease, and reassemble.
The reel and frame are now done. Whew. Take a break, have a drink and something to eat. Are we done yet???
NO, we still have the spool to do.
Remove the shaft from the clicker plate side.
Remove the clicker plate, clean, apply a light grease, and reinstall the clicker plate.
Now the drag side.
Remove Drag retaining ring.
This will expose the pressure plate.
Remove the pressure plate and the second drag washer will appear.
Remove the drag washer. Be careful not to lose the pressure plate springs.
Remove the pressure plate springs and put in a safe place. Then remove thrust washers.
Tried pulling spool bearing and it would not come out, so I went in from the clicker plate side and use a 1/4" extension to push out the bearing.
Right and left side bearing measures 7 X 17 X 5 mm and 10 X 17 X 5 mm, respectively.
Bearings are opened, cleaned and lubed with TSI301, and placed aside.
Now the spool shaft. If you noticed, the bevels are rusty. Adjacent to the bevels is the right side spool bearing. I would recommend lubing this bearing on a regular basis because of the water intrusion on the right side.
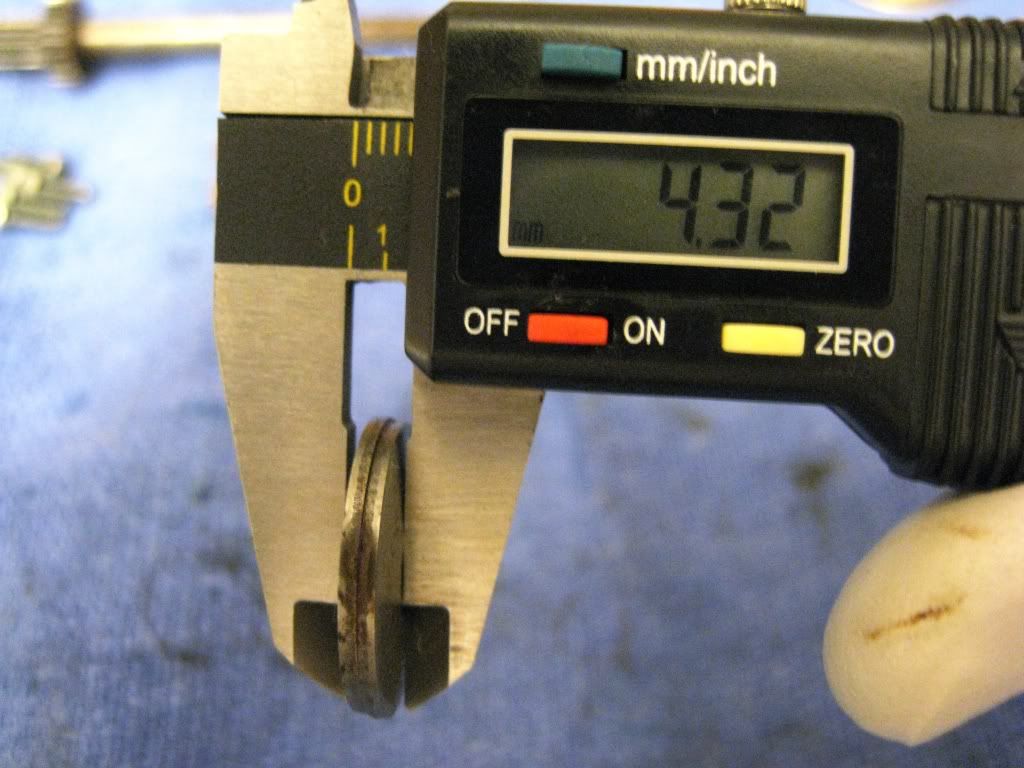
The bevel stack () was 4.32 mm in height, including the thrust washer. It was replaced with 4 Shimano bevels (((( was 4.31 mm. It was slightly lower but it did not make affect spool alignment. The bevels were changed from () to (((( since the reel was spooled with 80# JB hollow. The current drag set-up probably did not provide sufficient stopping power. The bevels also faced toward the gears.
The drags were cleaned, coated with Cal's Universal and Drag Grease, and whipped down.
Reassembly of the left side of the spool. Marine grease was brushed in, and wiped so that a thin layer of marine grease remained. Marnine grease was also inserted into the screw and spring holes, and springs reinstalled.
The thrust washers were also reinstalled.
Then the drag was installed. The back side of the drag is an aluminum plate and was greased with Cal's and wiped down. The drag looks strange in the picture because the drag was spinning while I took the picture.
The pressure plate and retaining ring were installed. Note that the retaining ring, screws and screw holes were grease prior to installation.
The gear sleeve was measured and cut, and then adjusted with shim washers. Completed was spool sleeve is as shown.
The sleeve and shims were dunked in TSI301 and installed.
The spool shaft assembly was installed in the spool.
The spring was installed. This is to ensure separation of the drag washers from the pressure plate. Note that the original spring used was discarded. If you see in the previous picture, you would understand why. I found it binding half the time. It was replaced with a spring with flat ends to eliminate the binding.
The drag was installed in the frame.
And the spool assembly was installed in the frame.
The frame holes and screws were greased.
The low gear was lightly coated with grease.
And the sideplate insert was greased, whipped and installed.
The side plate was reinstalled, greased holes
And the reel was wiped down of all excess grease and here it is.
In conclusion,
1. this reel is not the easiest to service, but it should be easier since you will now know where those pesky hidden spring clips are.
2. one of the biggest issues that I have with this shifting mechanism is that it's not that simple to turn when you are excitedly hooked up as you have to take your hands off the cranking handle to shift, and some of the intricacies in servicing these reels completely.
3. There is handle wobble that cannot be avoided. It is due to the connection between the crank arm and the gears. It's just not a super tight fit.
4. the shifting mechanism under the shift know must be greased.
5. the service time of these reels are 100% to 150% longer than most lever drag reels. So be prepared when servicing the reel yourself, or expect to pay a little more if the reel is being serviced by someone else.
Hoped you enjoyed the tutorial.
Title: Re: John Baker 12 Tutorial
Post by: alantani on May 30, 2011, 11:14:12 PM
Post by: alantani on May 30, 2011, 11:14:12 PM
bryan, thanks for taking this on. i know it was alot of work....... :-\
Title: Re: John Baker 12 Tutorial
Post by: Alto Mare on May 31, 2011, 01:58:17 AM
Post by: Alto Mare on May 31, 2011, 01:58:17 AM
Very nice tutorial Bryan, that's a lot of parts on that reel, I stopped counting after 100 ;D/. It had to take you a couple of hours, Thanks for sharing. You should get 2 wrenches fron Alan for that one, or maybe 3 ;D ;D
Title: Re: John Baker 12 Tutorial
Post by: wallacewt on May 31, 2011, 04:18:10 AM
Post by: wallacewt on May 31, 2011, 04:18:10 AM
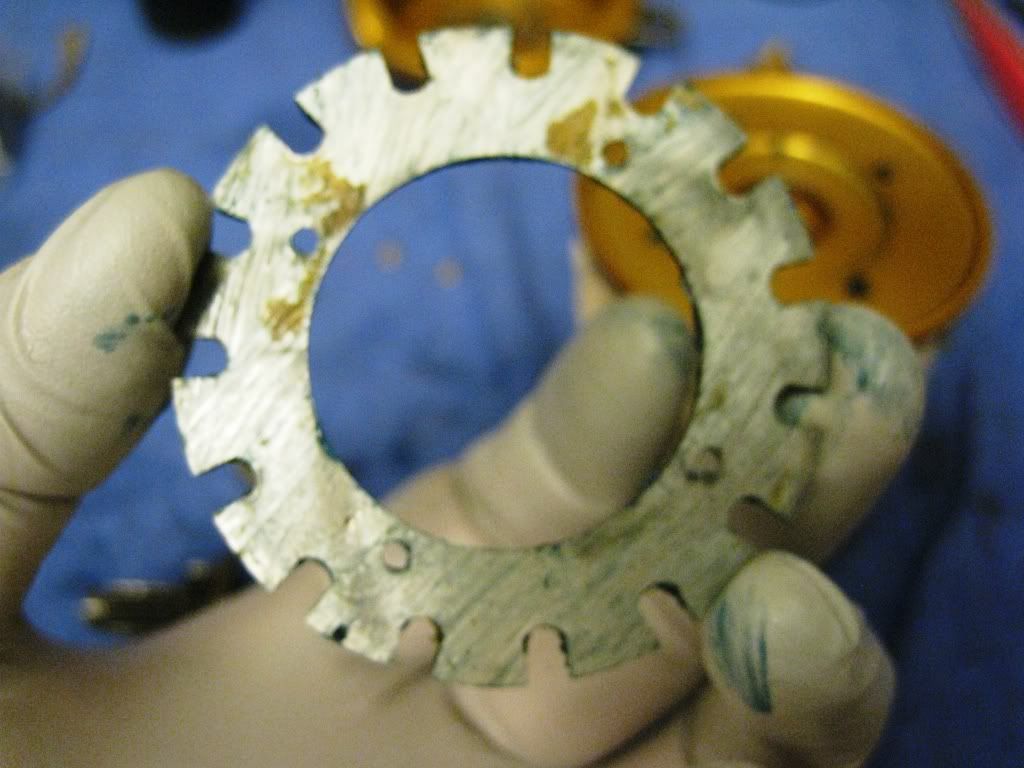
everytime you look a new tutorial there is something new.for instance,the 2 dogs!
they are rounded on the ends as are the ends where they fit in that plate.
is that a better system?
looks it.
great stuff.
they are rounded on the ends as are the ends where they fit in that plate.
is that a better system?
looks it.
great stuff.
Title: Re: John Baker 12 Tutorial
Post by: Bryan Young on May 31, 2011, 06:41:07 AM
Post by: Bryan Young on May 31, 2011, 06:41:07 AM
Quote from: alantani on May 30, 2011, 11:14:12 PMbryan, thanks for taking this on. i know it was alot of work....... :-\
No Probs Alan. Glad I could help.
Quote from: Alto Mare on May 31, 2011, 01:58:17 AMVery nice tutorial Bryan, that's a lot of parts on that reel, I stopped counting after 100 ;D/. It had to take you a couple of hours, Thanks for sharing. You should get 2 wrenches fron Alan for that one, or maybe 3 ;D ;DThanks. I think I took a total of 215 pictures and only used 158. :o I wanted to make sure I got everything, and had several because I didn't like the lighting or something. I think I have enough wrenches for now esp. since when I go over to work on reels, I just use his. ;D
Quote from: wallacewt on May 31, 2011, 04:18:10 AMeverytime you look a new tutorial there is something new.for instance,the 2 dogs! they are rounded on the ends as are the ends where they fit in that plate. is that a better system? looks it. great stuff.
I think if the dogs fit the, in this case, drag plate, the system will work great. I do like these rounded ones though. Doesn't seem to wear out as easily as the ones with the hard edges.
Title: Re: John Baker 12 Tutorial
Post by: Roger on May 31, 2011, 12:10:59 PM
Post by: Roger on May 31, 2011, 12:10:59 PM
Great job Brian, wow, 215 pic's that's a bunch.........
Title: Re: John Baker 12 Tutorial
Post by: zarandiado on September 16, 2011, 01:51:43 AM
Post by: zarandiado on September 16, 2011, 01:51:43 AM
Thanks Bryan, tutorial was excellent. I own a baker 6 and I decide to openned and serviced
myself, clips are hard to work on specially the tiny e-clip, but thanks to you everything was
easier.
myself, clips are hard to work on specially the tiny e-clip, but thanks to you everything was
easier.
Title: Re: John Baker 12 Tutorial
Post by: redsetta on September 16, 2011, 02:05:09 AM
Post by: redsetta on September 16, 2011, 02:05:09 AM
Wow, had missed that one till now.
That was epic - great job Bryan.
The 'War and Peace' of reel maintenance... ;D
Cheers, Justin
That was epic - great job Bryan.
The 'War and Peace' of reel maintenance... ;D
Cheers, Justin
Title: Re: John Baker 12 Tutorial
Post by: Bryan Young on September 16, 2011, 04:28:19 AM
Post by: Bryan Young on September 16, 2011, 04:28:19 AM
That is what we are all about. Sometimes having a proper tool makes all the difference to success, and these tutorials are useful tools. I've used these tutorials many times from others that had give me great success. I'm glad it helped.
Quote from: zarandiado on September 16, 2011, 01:51:43 AM
Thanks Bryan, tutorial was excellent. I own a baker 6 and I decide to openned and serviced
myself, clips are hard to work on specially the tiny e-clip, but thanks to you everything was
easier.
Title: Re: John Baker 12 Tutorial
Post by: SantaBarbarian on December 24, 2011, 03:46:00 PM
Post by: SantaBarbarian on December 24, 2011, 03:46:00 PM
Thanks Bryan for the tutorial. I have a Baker 8 that slips out of low gear under load into neutral ( tips of gear teeth just barely in contact causing grinding) when the handle is in the 3 O'clock position. The reel was purchased new and malfunctioned 1st time out...
Any suggestions out there for what is causing this??
Gary
Any suggestions out there for what is causing this??
Gary
Title: Re: John Baker 12 Tutorial
Post by: Bryan Young on December 24, 2011, 07:19:26 PM
Post by: Bryan Young on December 24, 2011, 07:19:26 PM
There is a spring under the gear that may be worn of needs to be spread out. The mechanism may also be a bit gunked with old grease causing sticking. It may be better to take apart the shifting and gear assembly, clean it out, relube/grease and reassemble. The spring may need to be stretched or replaced. See
Title: Re: John Baker 12 Tutorial
Post by: Snagged2 on December 25, 2011, 07:56:17 PM
Post by: Snagged2 on December 25, 2011, 07:56:17 PM
Awesome tutorial Bryan,
That reel looks like you could build a locomotive with some of those parts..
I've wondered WHY other manufacturers, don't use the "dovetailed" reel foot..
That reel looks like you could build a locomotive with some of those parts..
I've wondered WHY other manufacturers, don't use the "dovetailed" reel foot..
Title: Re: John Baker 12 Tutorial
Post by: Mr.Grinta on July 02, 2014, 06:20:50 PM
Post by: Mr.Grinta on July 02, 2014, 06:20:50 PM
Well done tutorial Bryan!
Very impressive.
leonard
Very impressive.
leonard
Title: Re: John Baker 12 Tutorial
Post by: Bryan Young on July 02, 2014, 09:59:31 PM
Post by: Bryan Young on July 02, 2014, 09:59:31 PM
Thank you. It's a very stout reel for sure and was fun to do. I wish I had more time to do tutorials like this.
Title: Re: John Baker 12 Tutorial
Post by: ksandin on April 01, 2015, 05:17:55 AM
Post by: ksandin on April 01, 2015, 05:17:55 AM
Thank you Bryan. I found this one for sale for a very reasonable price due to the fact that it's no longer made. As I started to do research on it I found your tutorial which gave me the confidence to purchase.
It's a great reel with the updated shift mechanism and the other updates made during production before they quit producing it.
Thanks again,
Keith
It's a great reel with the updated shift mechanism and the other updates made during production before they quit producing it.
Thanks again,
Keith
Title: Re: John Baker 12 Tutorial
Post by: Bryan Young on April 01, 2015, 05:59:14 AM
Post by: Bryan Young on April 01, 2015, 05:59:14 AM
Quote from: ksandin on April 01, 2015, 05:17:55 AM
Thank you Bryan. I found this one for sale for a very reasonable price due to the fact that it's no longer made. As I started to do research on it I found your tutorial which gave me the confidence to purchase.
It's a great reel with the updated shift mechanism and the other updates made during production before they quit producing it.
Thanks again,
Keith
Welcome Keith.
JB are unreal strong reels...I got more drag out of these little reels than the larger, beefier Avet EX series reels.
But I can honestly say, I truly hate working on these reels with the updated shift mechanism when the reel is not shifting right. As you notice in my pictures, all of the springs are cut and not finished. Finished meaning that the spring ends with a flat mating surface. These springs may get caught in the shifting mechanism and will deform. So, if your reel starts to have shifting problems, you may want to consider purchasing the following Penn Parts:
Penn Part 172A-15KG (I needed 2 of these)
Penn Part 18L-15KG (I used a one reel and wasted 3 in the trial and error cutting to find the proper length)
Penn Part 18H-15KG (I used one in the reel and wasted 2 in the trial and error cutting also to find the proper length)
Luckly, I purchased 4 of each part, and I think I will stock a few more just in case.
But the victory of success still looms over me and I'm quite satisfied that the reel that I just repaired, according to the owner, never quite shifted correctly, and now it does.
When you do take this reel apart, and run into problems, don't hesitate to ping me.
Title: Re: John Baker 12 Tutorial
Post by: ksandin on April 01, 2015, 04:54:56 PM
Post by: ksandin on April 01, 2015, 04:54:56 PM
Thanks for the part numbers and the heads-up on the new style shifter, that saves having to reinvent the wheel!
I will definitely message you when/if I run into problems!
It is filled with 65# JB spectra x 40# Momoi diamond topshot....do you think that's a good combo for this reel?
Keith
Title: Re: John Baker 12 Tutorial
Post by: Bryan Young on April 01, 2015, 06:39:45 PM
Post by: Bryan Young on April 01, 2015, 06:39:45 PM
The 3 or 4 JB 12 that I serviced appeared to have 80# or 100# spectra with 80#+ topshots. I think I was able to get 30# or 33# of drag.
Title: Re: John Baker 12 Tutorial
Post by: conniek on April 06, 2015, 05:44:58 PM
Post by: conniek on April 06, 2015, 05:44:58 PM
Very nice tutorial. Now I know why I stick to Shimano freshwater baitcasters only. LOL> Pictures are clear and you did a great job explaining each step. thanks.
Title: Re: John Baker 12 Tutorial
Post by: Mac53 on May 02, 2015, 09:36:00 PM
Post by: Mac53 on May 02, 2015, 09:36:00 PM
I have a new, unused Baker in the box sitting in my closet. I purchase it prior to them closing from Charkbait. It is black and I believe this color was only done on a few reels. Gold was always standard. Mac
Title: Re: John Baker 12 Tutorial
Post by: Kenstix on April 15, 2018, 10:55:53 PM
Post by: Kenstix on April 15, 2018, 10:55:53 PM
Hey Folks ~ Does Anyone know How i can get a-hold of John Baker or His frames ?
Thanks ~ Kenstix
Thanks ~ Kenstix
Title: Re: John Baker 12 Tutorial
Post by: gecsr1 on September 13, 2020, 03:19:54 PM
Post by: gecsr1 on September 13, 2020, 03:19:54 PM
are your bearing sizes correct, no one seems to have a 10x17x5 mm bearing ?
I checked Boca bearing and amazon .
Boca says no such bearing
Thanks
I checked Boca bearing and amazon .
Boca says no such bearing
Thanks
Title: Re: John Baker 12 Tutorial
Post by: Bryan Young on September 13, 2020, 10:15:19 PM
Post by: Bryan Young on September 13, 2020, 10:15:19 PM
I'm pretty sure. Without a reel to confirm, one will never know. Take apart your reel and measure yourself and please correct me if I'm wrong.
Title: Re: John Baker 12 Tutorial
Post by: gecsr1 on September 14, 2020, 12:06:08 PM
Post by: gecsr1 on September 14, 2020, 12:06:08 PM
okay will do...
just do a search for a 10x17x5 bearing on boca bearing.com they say no such bearing...
have a great day...
just do a search for a 10x17x5 bearing on boca bearing.com they say no such bearing...
have a great day...
Title: Re: John Baker 12 Tutorial
Post by: Robert Janssen on September 14, 2020, 05:06:20 PM
Post by: Robert Janssen on September 14, 2020, 05:06:20 PM
Just Google it. I did. Found them immediately.
Title: Re: John Baker 12 Tutorial
Post by: Rcscherz210 on June 23, 2022, 09:53:55 PM
Post by: Rcscherz210 on June 23, 2022, 09:53:55 PM
I recently purchased a set of 3 of these baker reels. One of them isn't working well. The reel will not shift to low gear and the reel doesn't go into freespool unless the preset knob is backed all the way off, but then it has no drag. Is this something you have fixed before?